Declaration of Conformity
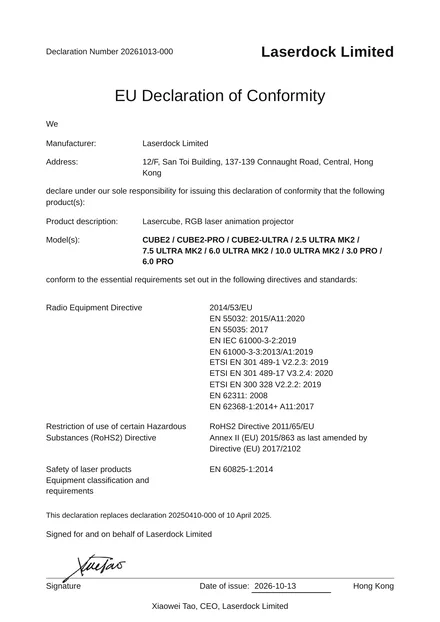
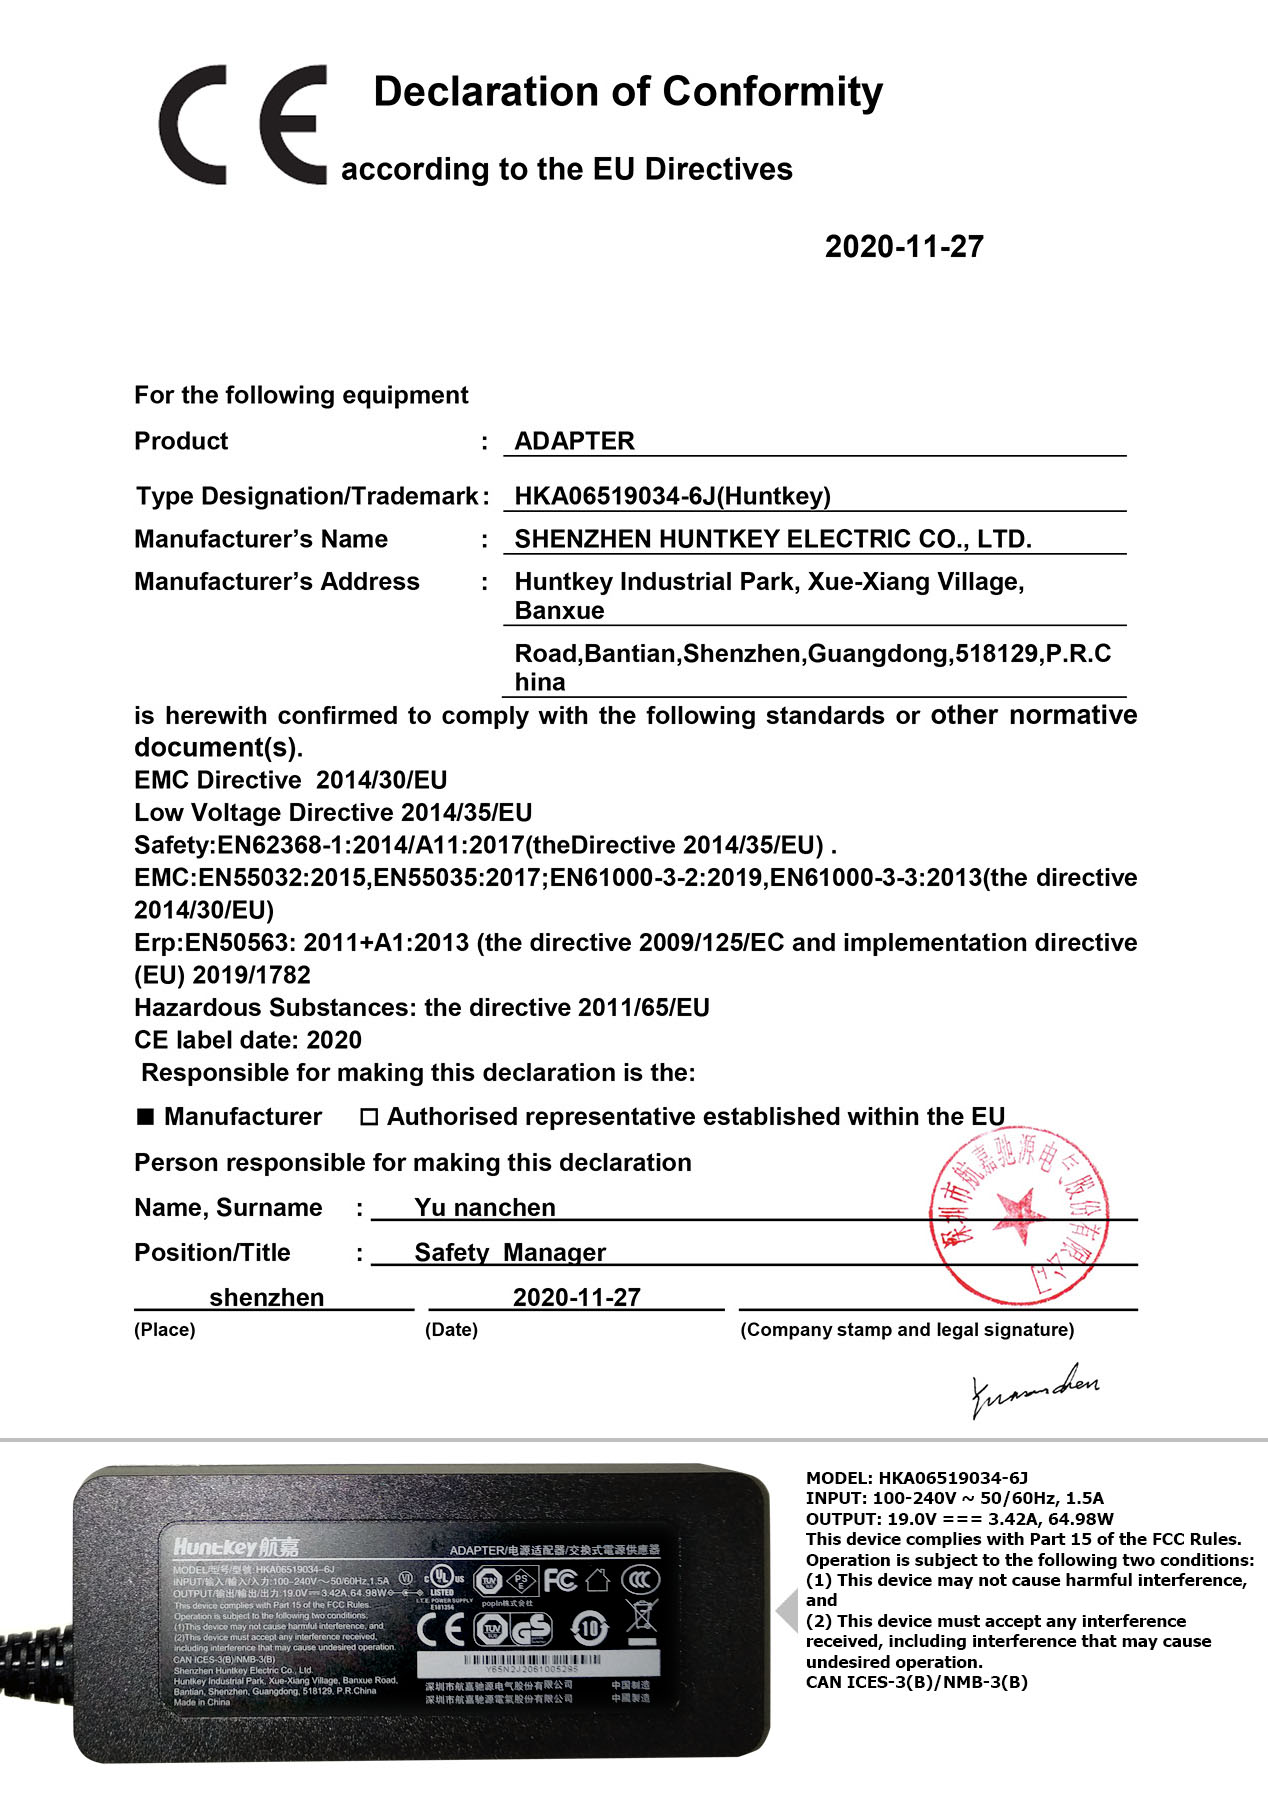
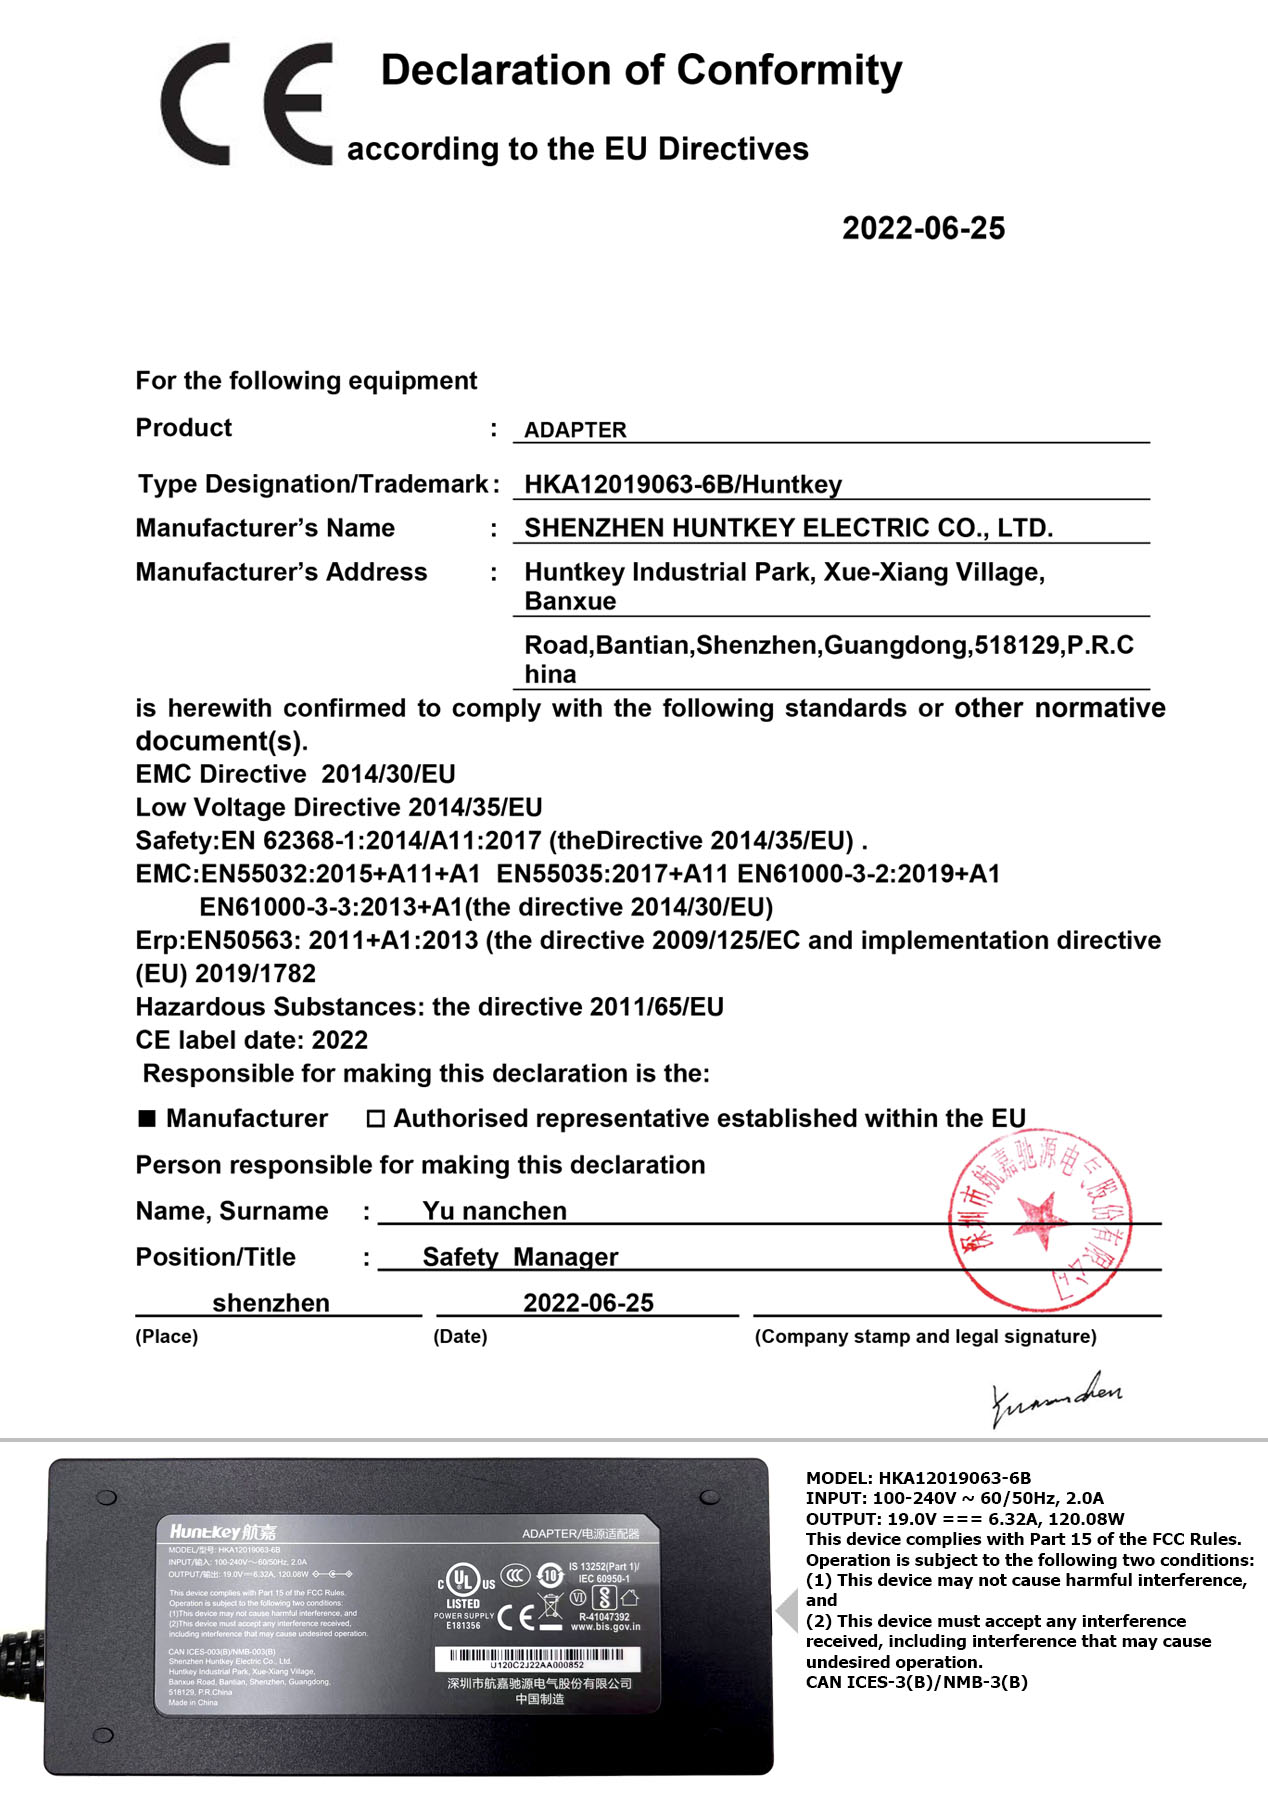
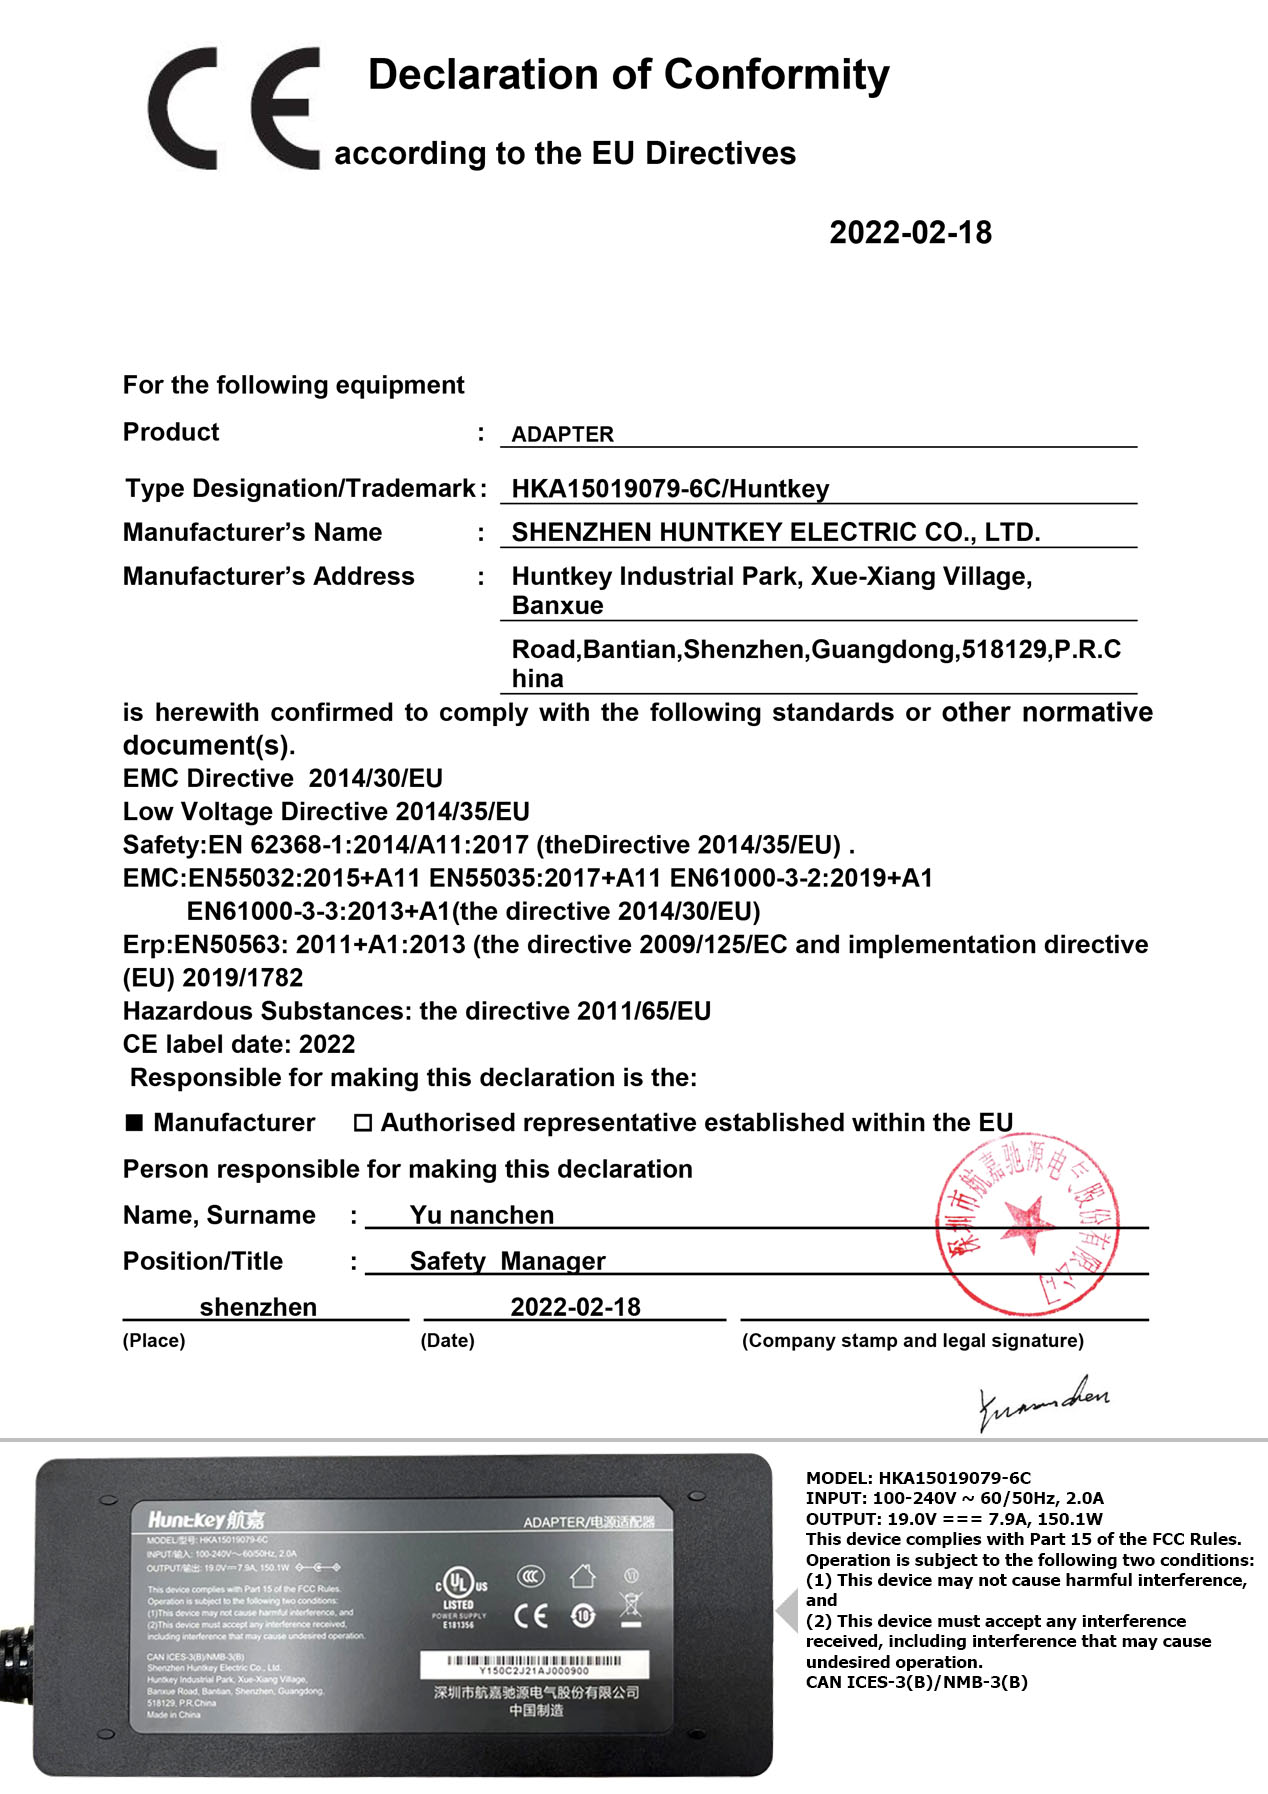
The LaserCube’s EU declaration (13 October 2026) covers the LaserCube WiFi (1.2W and 2.5W), the Ultra MK2 (2.5W, 7.5W, 6W and 10W), the Pro (3W and 6W), the first-generation Ultra and the old 2.5W Pro (2021): download it as a PDF. After it come the power adapters’ CE declarations. Select one to open it full size.
Safety Warning

WARNING!
LASER RADIATION
AVOID EYE OR SKIN EXPOSURE TO
DIRECT OR SCATTERED RADIATION
CLASS 4 LASER PRODUCT
BEFORE USING THIS PRODUCT, READ AND FOLLOW ALL NOTICES AND SAFETY INFORMATION THROUGHOUT THIS GUIDE.
Some US states require additional licensing and/or registration. Many locations require operation only under the supervision of a trained Laser Safety Officer (LSO).
FOR PROFESSIONAL USE ONLY.

12/F, San Toi Building, 137-139
Connaught Road Central, Hong Kong
Email: support@laseros.com
If you have any questions about any of the content of this manual
or the safe operation of your new laser projector, please do not hesitate
to contact LaserDock Ltd. directly.
What’s in the Box
Every Ultra MK2 and Pro comes in its protective case, with:
- its 19V charger, with a plug or cable for your country (see Charger)
- an Ethernet cable, and a USB-C to Ethernet adapter for a cable to a phone or laptop
- spare safety keys (lost them all? See Lost the Key)
- interlock jumpers: small plugs for the RJ45 interlock connectors on the back (see Enabling the Laser E-Stop / Interlock). US units come with an E-Stop instead.
- WiFi antennas (the Ultra MK2 box in our unboxing video has a short one, and a longer one for when something blocks the signal or when the cube hangs upside down)
- a clamp adapter, for fitting your own clamp
- a steel safety loop with a carabiner, for the safety cable through the eye bolt when the cube is mounted at height
- a pre-loaded micro SD card (see SD Card Information)
Outside the USA, the DJX and STAGE bundles add accessories (see Accessories) and an E-Stop, with a second Ethernet cable for it. The US shop has its own bundles. The product page lists what each bundle has.
Video: unboxing an Ultra MK2 (filmed with an earlier bundle; the product page lists today’s)
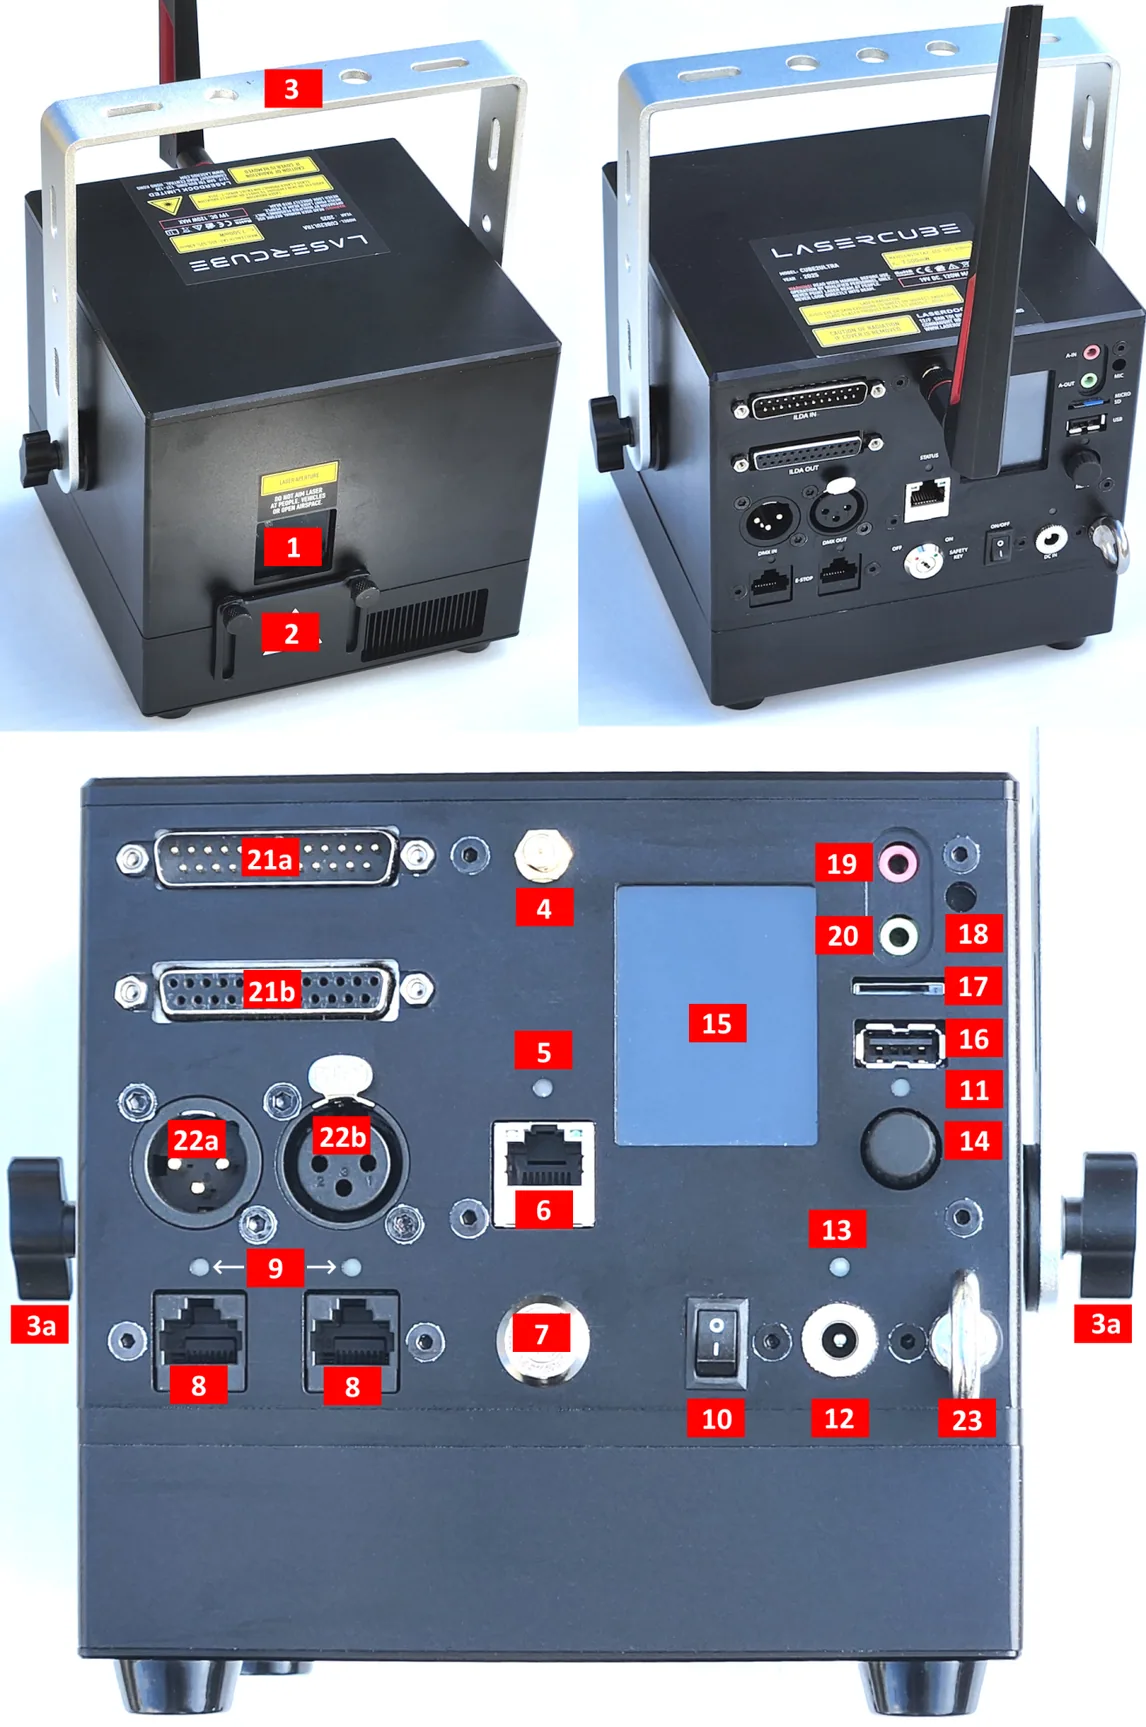
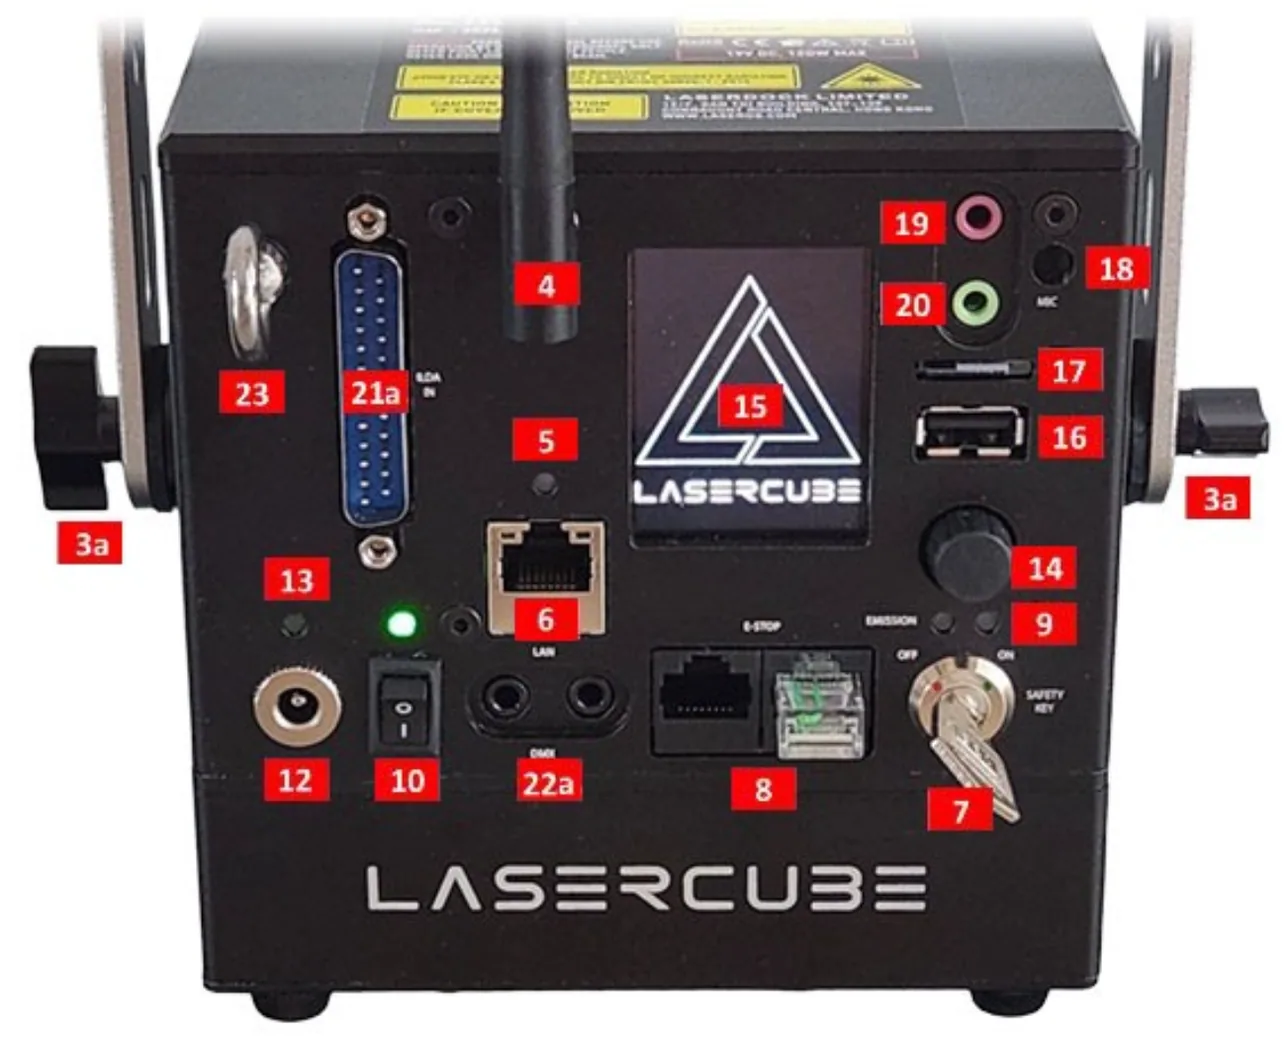
LaserCube Parts Diagram
- Laser Aperture: Laser light is emitted from this opening.
- Beam Block: Prevents laser emission and also restricts the laser scan from going into an audience. Can be locked using the screws either side.
- Mounting Bracket: For secure installation. Tilt may be locked using Screws 3a
- WiFi Antenna Connector: to facilitate wireless connection.
- Status LED: For showing Connection Mode.
- RJ-45 Ethernet Port: For cable connection to network.
- Safety Key Control: Prevents accidental operation. Resetting of the key control will be required if there is a power loss or remote interlock cycling.
- RJ45 Remote Interlock Connectors: In/Through. Provides a safety shut-off for terminating the laser emission via a jumper connection. A jumper is included with the product.* Do not attach Ethernet devices to these connectors. One E-Stop can stop several Ultra MK2s: chain them through these In/Through ports with standard LAN (RJ45) cables, and one press of the red button stops them all (our E-Stop video, from 2:11).
**For the US LaserCube model, the jumper is not included. It is required to be operated with an E-Stop for FDA compliance and will not work with only the safety jumper installed. *
- Emission LEDs: Indicate when the Laser is emitting or ready to emit.
- Power Switch: Toggles the power ON or OFF.
- Power LED: Indicates when the Power Switch is ON.
- Power (19V DC) Input: Power connection/charging port via wall outlet.
- Charging Status LED indicator: Red = Charging, Green = Fully Charged
- Rotary / Push Menu Knob: Navigate CubeOS and adjust settings.
- LCD Display for CubeOS.
- USB Port: Connect a USB MIDI device (APC40 MK2 / APC mini MK2)
- MicroSD Card slot: Stores content for MIDI, ArtNet, DMX and Stand Alone mode.
- Internal Microphone: Audio input source for built-in visualisers.
- 3.5mm Audio Line Input: Audio input source for built-in visualisers
- 3.5mm Audio Line Output: Audio Laser show output to powered speakers.
- ILDA Ports (In/Out):
21a. ILDA Input Connector: DB25 Male: The LaserCube will automatically change from the internal LaserOS DAC to an external ILDA compatible DAC if connected to this port.
In the settings for the software that accompanies the external DAC, we suggest configuring the scan rate to 30000 points per second.
21b. ILDA Output Connector: DB25 Female: Duplicate of the internal LaserOS DAC signals, of those of an external DAC when connected to the ILDA input. *The LaserCube Pro has no ILDA output.
- DMX connectors (In/Out): Connect to a lighting desk / controller. Only connect real DMX equipment. A true DMX fog machine is fine, but most fog machines are not true DMX: their XLR socket is a remote socket, and many put mains power on it, which damages the LaserCube. Never connect a fog machine unless you are sure it is true DMX, even if a DMX cable fits.
22a. DMX Input. On the LaserCube Pro, DMX In and Out are the two 3.5mm TRS jacks (In on the left, Out on the right), which need adapter cables: see Connecting DMX cables to the LaserCube Pro.
22b. DMX Output
- Safety Eye Bolt: When mounted at height, attach safety cable through the eye.
Technical Specifications
Current models first, then discontinued models. The Pro is the compact version of the Ultra MK2: same scanners and onboard hardware, with a smaller 70Wh battery, 3.5mm TRS DMX jacks instead of full-size XLR, and no ILDA output.
LaserCube Ultra MK2 10W
| Name: | LaserCube |
| Model: | Ultra MK2 10W |
| Laser Class: | Class 4 |
| Power: | 10000mW |
| Blue 455nm: | 5000mW |
| Green 525nm: | 2800mW |
| Red 638nm: | 2800mW |
| Battery: | 92.16Wh (3–4 hours runtime, 4 hours charging) |
| Modulation: | Analog 70kHz |
| Scan speed: | >35,000pps @ 7 deg |
| Max Scan Angle: | >37 degrees |
| Connectivity: | WiFi RP-SMA Female, 2.4GHz ILDA Ports (In/Out) DMX Ports (In/Out) USB-A Port (for APC USB MIDI device) 3.5mm Stereo Line Audio Ports (In/Out) MicroSD card socket Interlock RJ45 connectors (In/Through) |
| Size: | 15.5 x 15 x 15.5 cm |
| Weight: | 3.7 kg |
| IP rating: | IP51 (IP63 with the rain cover fitted) |
| Voltage: | 19V DC, 120W adapter |
| Warranty: | 1 year |
| Software: | Internal CubeOS + LaserOS Included |
| Safety: | Features key, interlock, beam block, indicator LED. Complies with latest safety standard IEC 60825-1 |
LaserCube Ultra MK2 6W
| Name: | LaserCube |
| Model: | Ultra MK2 6W |
| Laser Class: | Class 4 |
| Power: | 6000mW |
| Blue 455nm: | 2800mW |
| Green 525nm: | 1500mW |
| Red 638nm: | 1800mW |
| Battery: | 92.16Wh (3–4 hours runtime, 4 hours charging) |
| Modulation: | Analog 70kHz |
| Scan speed: | >35,000pps @ 7 deg |
| Max Scan Angle: | >37 degrees |
| Connectivity: | WiFi RP-SMA Female, 2.4GHz ILDA Ports (In/Out) DMX Ports (In/Out) USB-A Port (for APC USB MIDI device) 3.5mm Stereo Line Audio Ports (In/Out) MicroSD card socket Interlock RJ45 connectors (In/Through) |
| Size: | 15.5 x 15 x 15.5 cm |
| Weight: | 3.7 kg |
| IP rating: | IP51 (IP63 with the rain cover fitted) |
| Voltage: | 19V DC, 120W adapter |
| Warranty: | 1 year |
| Software: | Internal CubeOS + LaserOS Included |
| Safety: | Features key, interlock, beam block, indicator LED. Complies with latest safety standard IEC 60825-1 |
LaserCube Pro 6W
| Name: | LaserCube |
| Model: | Pro 6W |
| Laser Class: | Class 4 |
| Power: | 6000mW |
| Blue 455nm: | 2800mW |
| Green 525nm: | 1500mW |
| Red 638nm: | 1800mW |
| Battery: | 70Wh (2–3 hours runtime, 3 hours charging) |
| Modulation: | Analog 70kHz |
| Scan speed: | >35,000pps @ 7 deg |
| Max Scan Angle: | >37 degrees |
| Connectivity: | WiFi RP-SMA Female, 2.4GHz ILDA Port (In) DMX Ports (In/Out), 3.5mm TRS jacks USB-A Port (for APC USB MIDI device) 3.5mm Stereo Line Audio Ports (In/Out) MicroSD card socket Interlock RJ45 connectors (In/Through) |
| Size: | 13 x 13 x 13.5 cm |
| Weight: | 2.5 kg |
| IP rating: | IP51 (IP63 with the rain cover fitted: see Rain Cover) |
| Voltage: | 19V DC, 120W adapter |
| Warranty: | 1 year |
| Software: | Internal CubeOS + LaserOS Included |
| Safety: | Features key, interlock, beam block, indicator LED. Complies with latest safety standard IEC 60825-1 |
LaserCube Pro 3W
| Name: | LaserCube |
| Model: | Pro 3W |
| Laser Class: | Class 4 |
| Power: | 3000mW |
| Blue 455nm: | 1350mW |
| Green 525nm: | 850mW |
| Red 638nm: | 950mW |
| Battery: | 70Wh (2–3 hours runtime, 3 hours charging) |
| Modulation: | Analog 70kHz |
| Scan speed: | >35,000pps @ 7 deg |
| Max Scan Angle: | >37 degrees |
| Connectivity: | WiFi RP-SMA Female, 2.4GHz ILDA Port (In) DMX Ports (In/Out), 3.5mm TRS jacks USB-A Port (for APC USB MIDI device) 3.5mm Stereo Line Audio Ports (In/Out) MicroSD card socket Interlock RJ45 connectors (In/Through) |
| Size: | 13 x 13 x 13.5 cm |
| Weight: | 2.5 kg |
| IP rating: | IP51 (IP63 with the rain cover fitted: see Rain Cover) |
| Voltage: | 19V DC, 65W adapter |
| Warranty: | 1 year |
| Software: | Internal CubeOS + LaserOS Included |
| Safety: | Features key, interlock, beam block, indicator LED. Complies with latest safety standard IEC 60825-1 |
LaserCube Ultra MK2 7.5W Discontinued
| Name: | LaserCube |
| Model: | Ultra MK2 7.5W |
| Laser Class: | Class 4 |
| Power: | 7500mW |
| Blue 455nm: | 4000mW |
| Green 525nm: | 2000mW |
| Red 638nm: | 1500mW |
| Battery: | 92.16Wh |
| Modulation: | Analog 70kHz |
| Scan speed: | >35,000pps @ 7 deg |
| Max Scan Angle: | >37 degrees |
| Connectivity: | WiFi RP-SMA Female, 2.4GHz ILDA Ports (In/Out) DMX Ports (In/Out) USB-A Port (for APC USB MIDI device) 3.5mm Stereo Line Audio Ports (In/Out) MicroSD card socket Interlock RJ45 connectors (In/Through) |
| Size: | 15.5 x 15 x 15.5 cm |
| Weight: | 3.7 kg |
| Voltage: | 19V DC, 120W adapter |
| Warranty: | 1 year |
| Software: | Internal CubeOS + LaserOS Included |
| Safety: | Features key, interlock, beam block, indicator LED. Complies with latest safety standard IEC 60825-1 |
LaserCube Ultra MK2 2.5W Discontinued
| Name: | LaserCube |
| Model: | Ultra MK2 2.5W |
| Laser Class: | Class 4 |
| Power: | 2500mW |
| Blue 455nm: | 1300mW |
| Green 525nm: | 800mW |
| Red 638nm: | 400mW |
| Battery: | 92.16Wh |
| Modulation: | Analog 70kHz |
| Scan speed: | >35,000pps @ 7 deg |
| Max Scan Angle: | >37 degrees |
| Connectivity: | WiFi RP-SMA Female, 2.4GHz ILDA Ports (In/Out) DMX Ports (In/Out) USB-A Port (for APC USB MIDI device) 3.5mm Stereo Line Audio Ports (In/Out) MicroSD card socket Interlock RJ45 connectors (In/Through) |
| Size: | 15.5 x 15 x 15.5 cm |
| Weight: | 3.7 kg |
| Voltage: | 19V DC, 120W adapter |
| Warranty: | 1 year |
| Software: | Internal CubeOS + LaserOS Included |
| Safety: | Features key, interlock, beam block, indicator LED. Complies with latest safety standard IEC 60825-1 |
Product Labelling and Placement
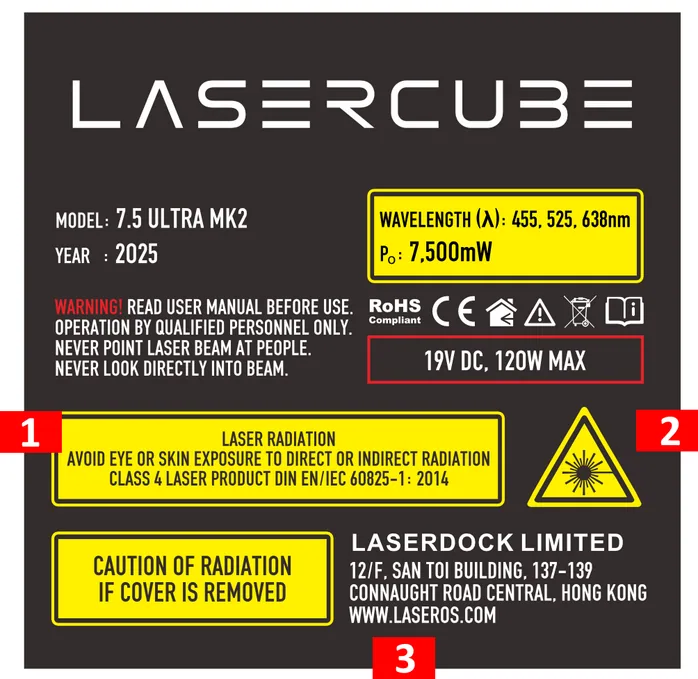 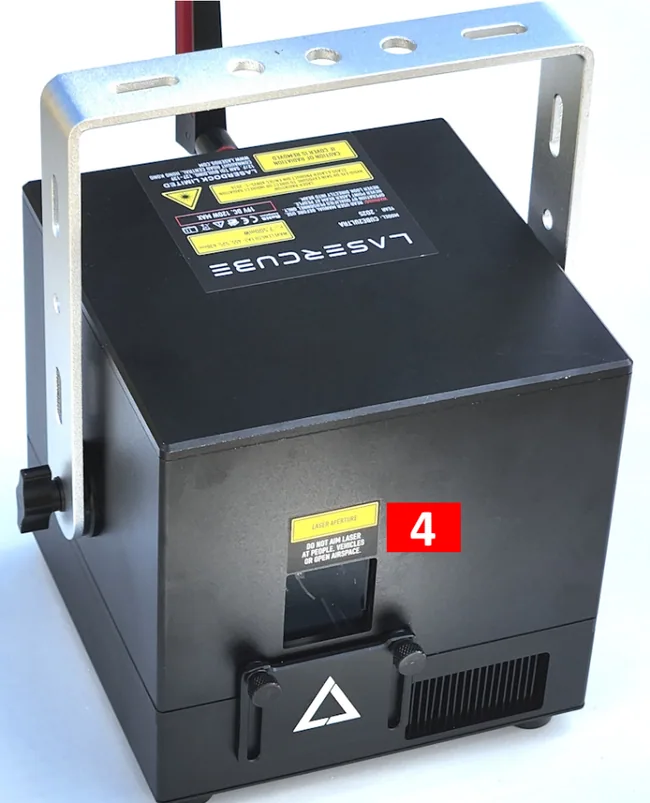 | 1. Explanatory 2. Hazard Warning Symbol 3. Manufacturer’s Identification 4. Laser Aperture Protective Housing Label (Appears on underside of housing) 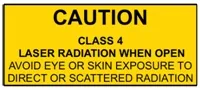 Aperture Label (Appears in front above aperture) 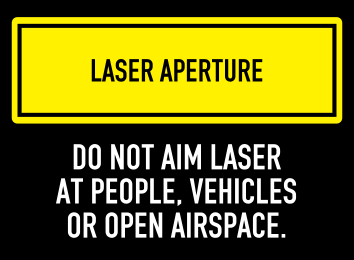 |
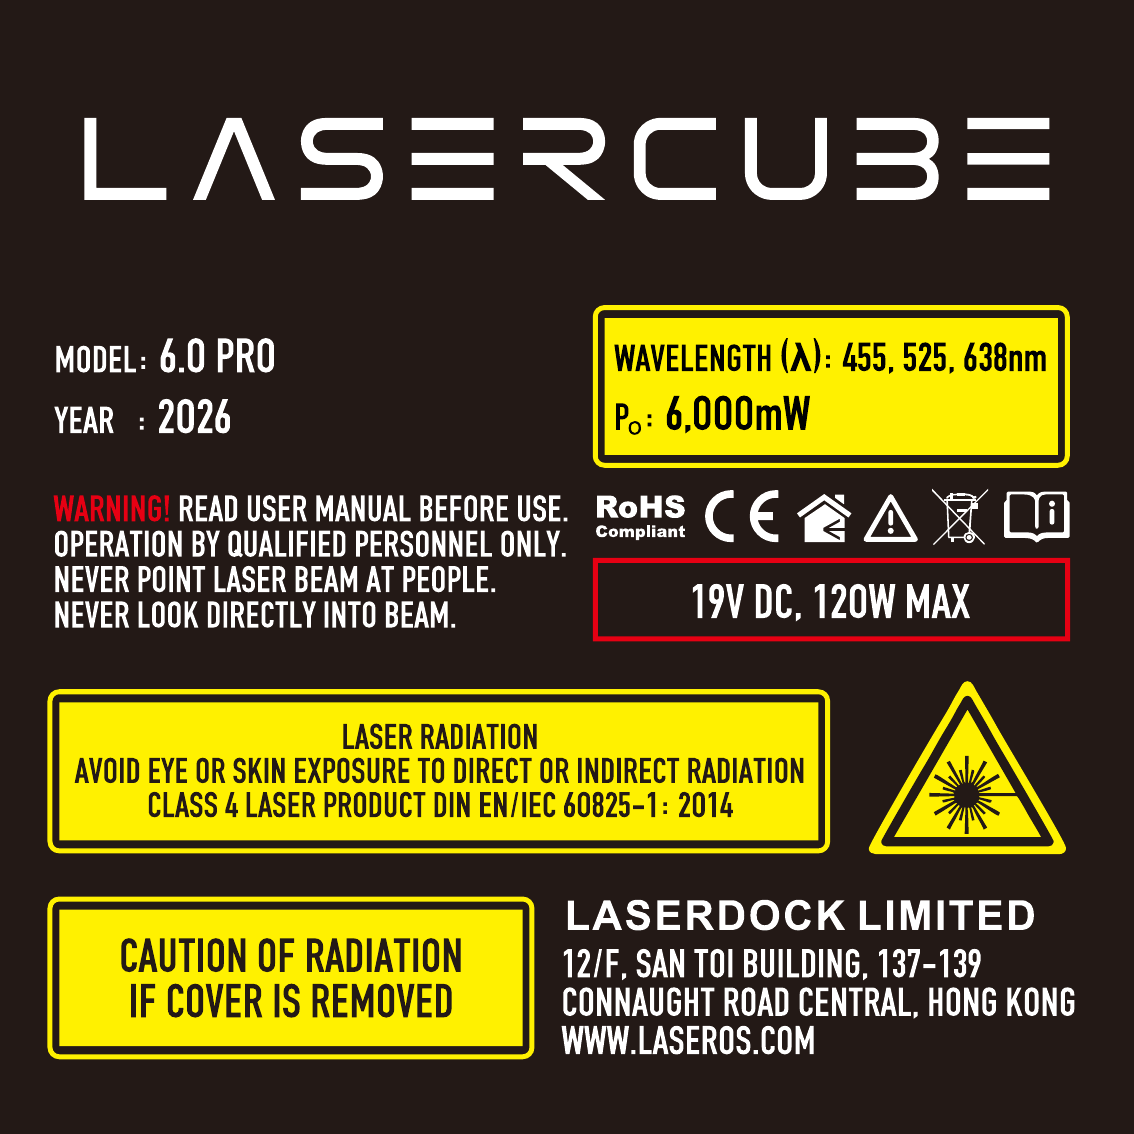
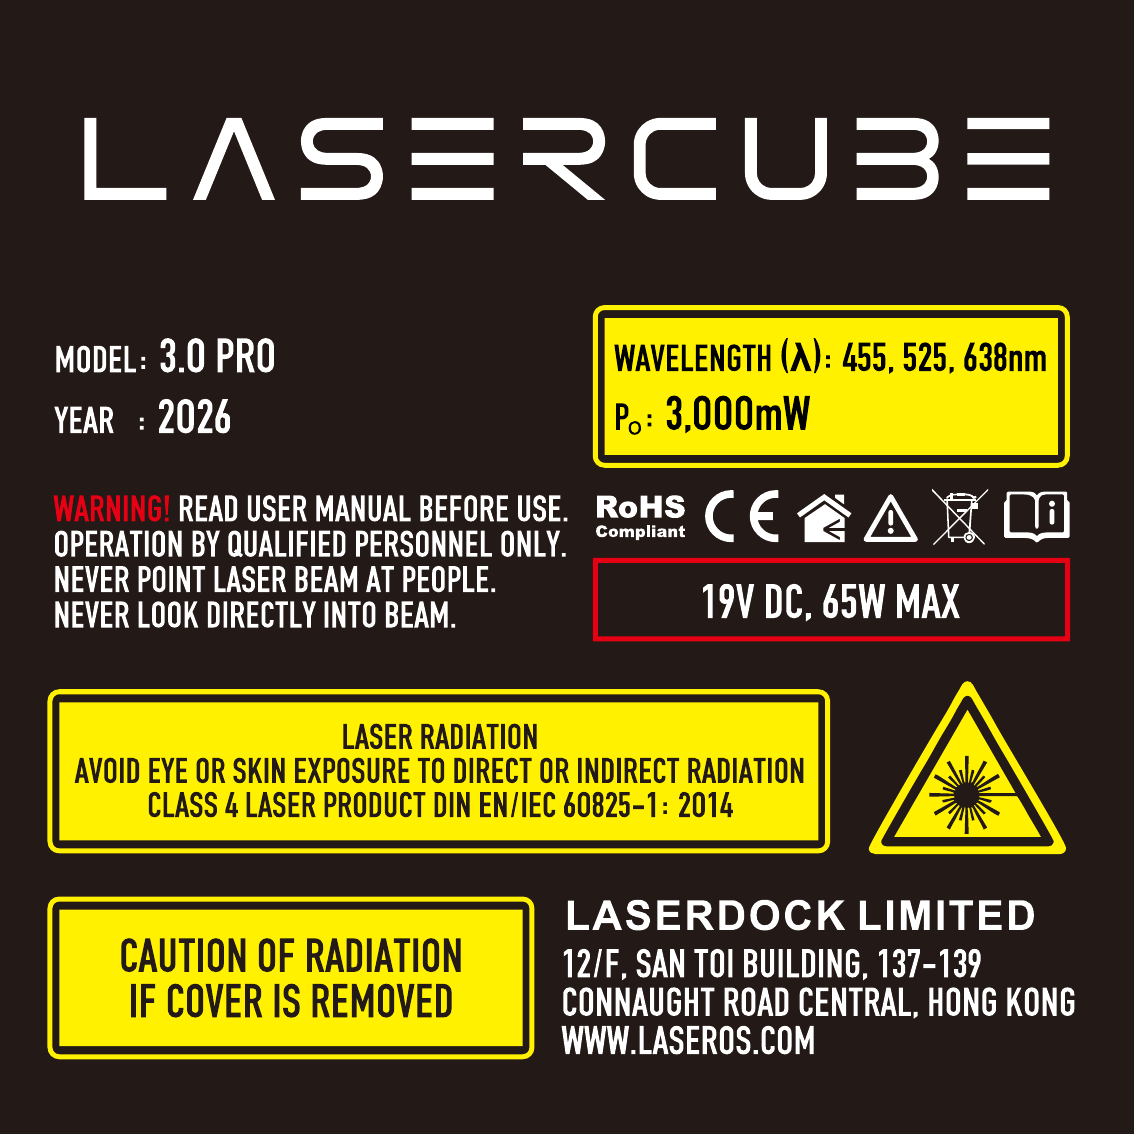
The label shown is from an Ultra MK2 7.5W. The label on your LaserCube shows its own model and laser power.
On the LaserCube Pro, as on the Ultra MK2 in the photo above, the main label is on top, and the aperture label sits on the front, above the aperture. The Pro’s main label:
Safety Guidelines and Proper Usage
1. No scheduled maintenance necessary to keep the product in compliance. Simply keep the laser free from dust or other contaminates that could cloud or dirty the laser aperture. Cleaning the aperture window and vents are the ONLY maintenance allowed and must be performed with the unit powered down and locked off. Servicing by the user is not allowed. Any attempt to open or modify the unit is prohibited. Instant permanent blindness may result in case of an accidental eye exposure to the beam.
2. Do not expose the human eye directly or indirectly to focused or scattered laser radiation as loss of vision, complete blindness, and/or other serious injuries may result. Lasers are capable of starting fires at great distances. Do not use around flammable materials.*
3. Do not take apart, modify or dismantle the laser or operate it under abnormal current load (doing so will void the warranty). Strictly no service is allowed. Servicing should only be handled by authorized factory trained technicians.
4. Always treat your laser with great care as some components are very fragile and must not be subjected to shock.
5. Avoid turning the laser on and off frequently as it will reduce the diode life. This device does not have a set duty cycle; with the improved cooling of the Ultra MK2 and Pro, continuous operation should be fine.
6. From time to time, clean the laser aperture with a dry tissue that does not pill. You may also use an alcohol prep wipe and compressed air to blow dust from the vents. BE SURE the alcohol has dried fully before activating the laser. Cleaning the aperture and vents are the only user maintenance allowed and can ONLY be performed with the unit powered down and locked off.
7. Always keep all factory supplied labels on the unit and visible. These are required for legal compliance.
8. During use, be sure to leave an open space around all sides of the laser to facilitate airflow through the heat sink beneath the device.
9. Operate your laser only within the specified temperature range of 10°C (50°F) to 40°C (104°F). Failure to do so may result in weak output, overly strong output which will diminish the life of the unit and/or large output power swings. The LaserCube is thermostatically monitored so we can determine if a failure was temperature related. Such failures are NOT covered under our manufacturer’s warranty. Extreme cold and hot temperatures WILL cause a diode failure. Keep this unit climate controlled at ALL times.
10. Always ensure that the main power supply is properly grounded before use. Do not use a 2 prong IEC cord with this projector. You should always hook up a laser system in such a way that you have both a primary and backup means of instantly terminating laser emissions.
11. DO NOT USE the laser device if you suspect that it contains a defect of any kind either from manufacturing, damage, general wear or has a broken manufacturer’s seal. Contact us to return the unit to the factory for service and/or maintenance immediately.
12. Should you have difficulty operating the laser properly and troubleshooting does not work, go to www.laseros.com for support and RMA assistance if necessary. Do not attempt to service, modify or fix the laser yourself. You will be provided with instructions on how to send the laser projector back for repair.
13. Before using this product in any capacity, ensure that the unit is properly secured to prevent accidental beam shifts and that a safety cable is used for any aerial rigging.
14. This product is not a toy and should be kept inaccessible to unauthorized persons before, during, and after use. Keep away from minors.
15. The LaserCube includes all required safety features per international regulations. For US residents, authorized persons should only be employees of an FDA variance holder.
16. This level of laser light can interfere with Aircraft operation at many miles. DO NOT allow lasers to hit aircraft or enter airspace. Shining a laser at an aircraft in the US is considered a federal crime punishable by fines or jail time.**
17. Before using this product, it is the responsibility of the user to be familiar with all Federal and State reporting and usage requirements. Laws vary by state, some US states require additional licensing and/or registration. Many locations require operation only under the supervision of a trained Laser Safety Officer (LSO). An FDA variance is required to operate this product in the United States; a LaserCube bought in the USA comes with this variance, issued by X-Laser.
18. For all venues you must designate safe and restricted areas of the venue where persons are or are not allowed to be respectively. The “safe areas” should not be subject to any laser radiation either directly or indirectly. By protocol, there must be at least a 3 meter buffer between safe and restricted areas on all sides. In other words, all laser beams must terminate (i.e. not be reflected away) in the restricted areas to avoid human contact. The laser must never be aimed at or allowed to be directed or reflected toward other people or reflective objects.
19. Do not stand in front of the laser while active. All persons should wear protective eyewear while rigging, maintaining, or otherwise working with the laser.
*Failure to follow the above precautions and other precautions contained in this user manual, particularly with regard to human exposure to laser radiation and electrical safety, may result in serious injury, loss of vision, electric shock or skin damage. Class 4 lasers must be handled and operated with care and extreme caution.
**This product shall NOT be operated by persons who are not trained in proper laser safety procedures and/or do not know how to use all components of a laser system properly. The safety procedures outlined in this manual must be observed at all times to provide you with safe and fun laser displays. Please contact us if you have any questions about how to safely and effectively use our products!
For more safety information & guidance please refer to:
IEC/TR 60825-3:2022 Laser Show Guidance
IEC TR 60825-3 Abstract
IEC/TR 60825-3:2022
Safety of laser products - Part 3: Guidance for laser displays and shows
IEC TR 60825-3:2022 gives guidance on the planning and design, set-up and conduct of laser displays and shows that make use of high power lasers emitting output between 380 nm and 780 nm.
This document is a code of practice for the design, installation, operation and evaluation of the safety of laser light shows and displays, and the equipment employed in their production. This document is also intended for persons who modify laser display installations or equipment.
The laser power needed to produce visually effective theatrical or artistic displays in large spaces such as theatres, arenas, or architectural sites is great enough to pose a severe accidental exposure hazard, even when personal exposure is very brief. For this reason, IEC TR 60825-14 states that only laser products that are Class 1, Class 2 or visible-beam Class 3R should be used for demonstration, display or entertainment purposes in unsupervised areas. Only under carefully controlled conditions and under the control of a trained experienced operator can laser products of higher classes be used for visual entertainment.
This document expands upon the principles considered in IEC TR 60825-14, providing specific technical guidance appropriate for the safe use of laser products used for the purposes of visual entertainment.
Enabling the Laser E-Stop / Interlock
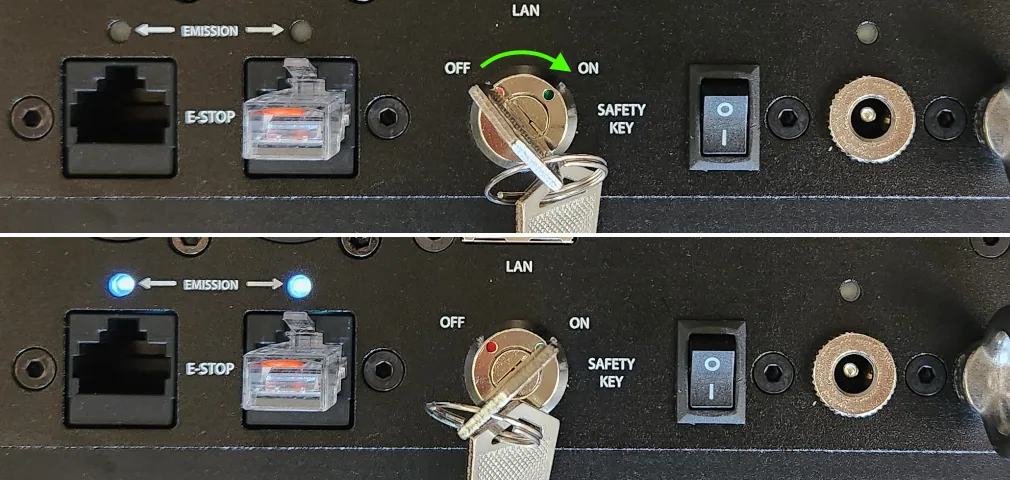
Follow these steps:
1) Connect the safety jumper to one of the E-Stop RJ45 ports*.
For the US version of the LaserCube, you will need to connect the E-Stop included with the unit. Please check the E-Stop Setup Guide section for instructions. This is required for FDA compliance and the laser will not work without it. Outside the US the E-Stop is optional: if you connect one instead of the jumper, follow the same E-Stop Setup Guide.
2) Insert the safety key and rotate from the OFF to ON position. The EMISSION LEDs will illuminate to show that the LaserCube is capable of Laser Emission.
3) To disable laser emission, turn the safety key from ON to OFF and remove the key.
E-Stop Setup Guide
This part of the guide applies to every LaserCube with an E-Stop connected: all US units, and units outside the US that use the optional E-Stop. If your E-Stop has no key, skip step 4. Steps 5 and 6, the slow flashing and the 10-second countdown, are how US units start. Outside the US there is no countdown: after step 4, press the green START button and let go, and the EMISSION LEDs light up and the laser can emit.
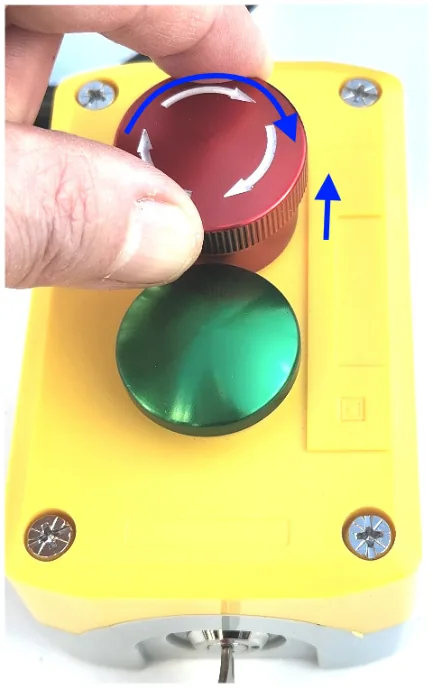
1) Connect the E-Stop pendant to the LaserCube.
2) On the laser, turn key to the “ON” position.
3) On the E-Stop pendant, if the red STOP switch is pushed in, rotate clockwise until it can be raised.
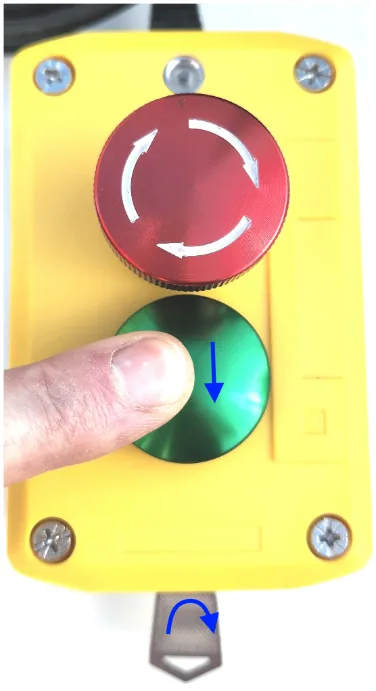
4) On the E-Stop pendant, turn the key clockwise to the “ON” position.
5) With the red STOP switch raised plus keys on both the laser and pendant set to the “ON” position the Interlock / Emission LEDs will flash slowly, once every 3 seconds.
6) After the second flash, the laser may be enabled by briefly pressing the green START button (for about half a second). The Interlock / Emission LEDs will begin flashing more quickly, once every second. After 10 seconds the LEDS will remain solidly on and the laser will be capable of emission.
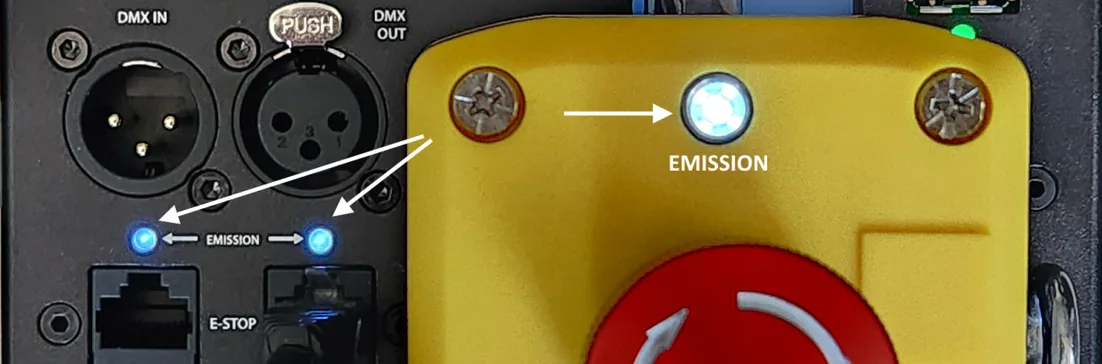
NOTE: In case of an emergency and you need to stop the laser, press the big red button. It switches the laser, the scanners’ power and the fan off; the cube itself stays on, and its screen and network keep working.
Hardware Installation
1. Adjust the beam block with the unit powered off, make sure the key is not connected, secure projector aiming, then make adjustments to the beam block.
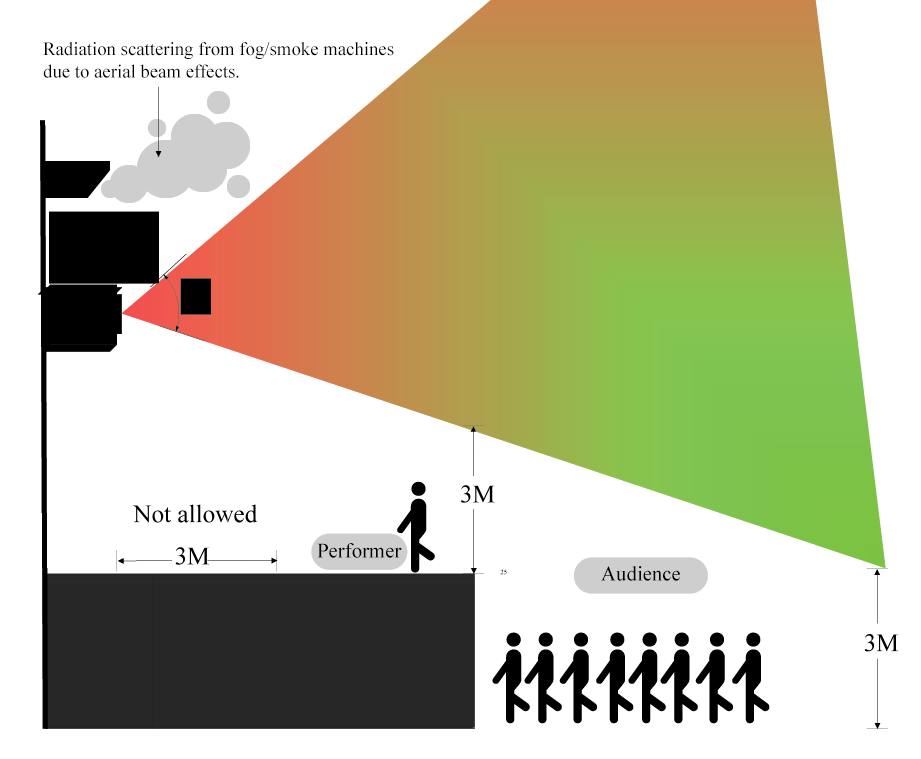
Note: You may need to repeatedly power the laser back on to check for the proper beam block setting until it prevents any scanning into audience areas. All beams must be maintained at least 3 Meters (10 feet) above the floor level where people may be present. Eye exposure to laser light can cause instant injury and permanent blindness.
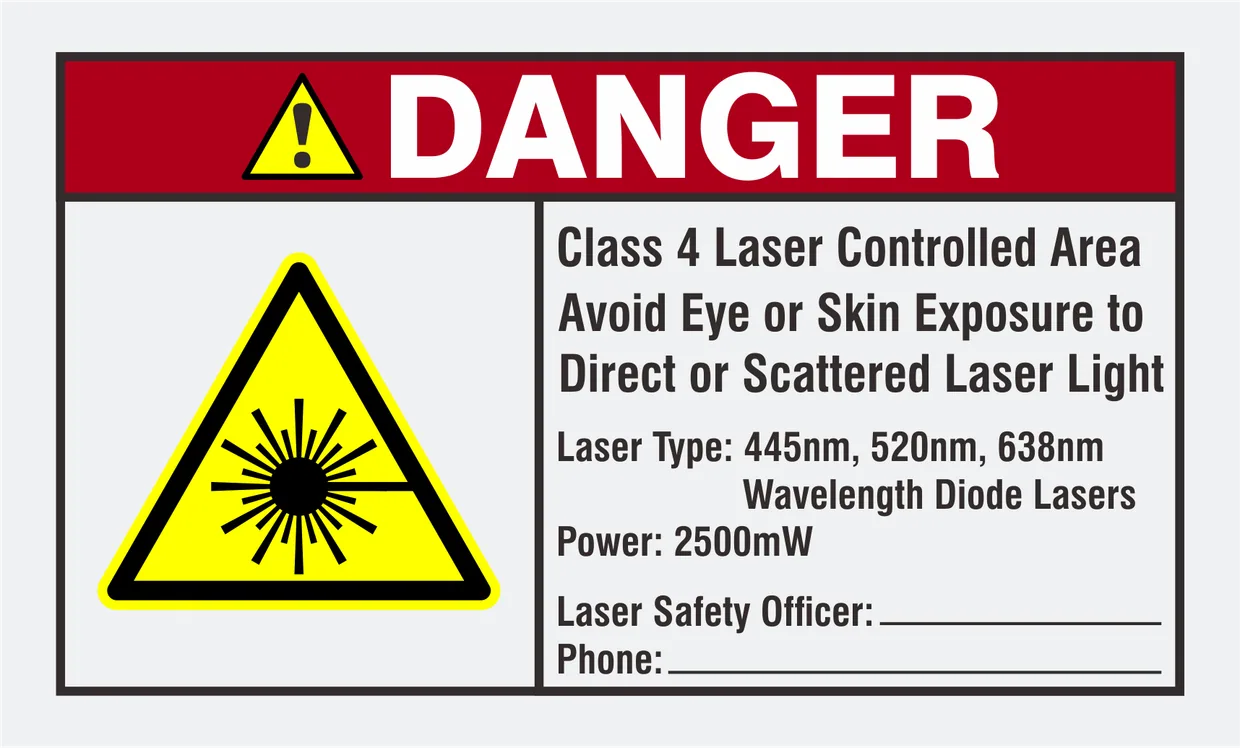
2. Place appropriate compliant ANSI area warning sign(s) in and around the laser show venue especially areas accessible to the audience.
3D Models for Mounts and Cases
To design a mount, case or rig, download the outside shape of your cube as a STEP file (millimetres; it opens in any CAD program). It shows the outside only. Each download is a ZIP with the STEP file and a short read-me with the main sizes and the axes.
- LaserCube Pro (ZIP, 3.6 MB)
- LaserCube Ultra MK2 (ZIP, 6.0 MB), approximate: the lid, base, bracket and knobs are modelled on the earlier Ultra, so the bracket and the tripod thread position may differ from your cube.
- LaserCube WiFi (ZIP, 5.5 MB), approximate: made from the 3D model on our website, with flat facets on round parts and no feet.
Check anything critical against your own cube before you build.
CubeOS LCD Settings and Status
The rear panel LCD displays certain status information, and allows configuration of the control mode and connection settings as well as a live preview of points entering the DAC*.
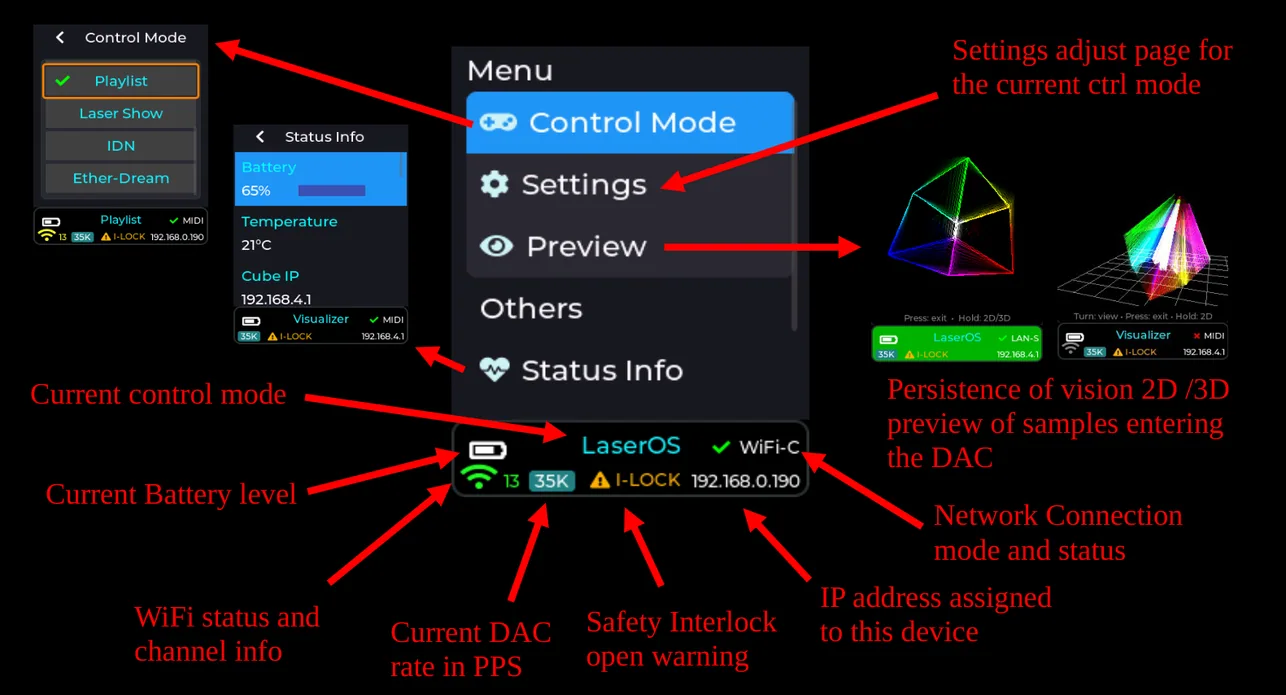
The status bar area at the bottom of the display gives the user a quick overview of the device, and displays any important messages or warnings. The background colour will also change to indicate certain connection states. e.g. a green background indicates active samples being received over the network, and a cyan background indicates the ILDA analog input is being used (overriding the current DAC data for the currently selected control mode).
The status bar shows the battery level, the control mode, the connection mode, the cube’s IP address and, while the laser is not armed, an I-LOCK warning. In WiFi connection modes, a WiFi symbol at the bottom left is green when the connection is good and turns yellow or red with interference. At the bottom left, “35K” is the scan rate in thousands of points per second (35K = 35,000, the default), and a red SD card symbol means no micro SD card is in.
*Note: The live preview only works for DAC samples received over the network, or internally generated projections, NOT data from the analog ILDA port on the back of the device.
Main Menu and Preview
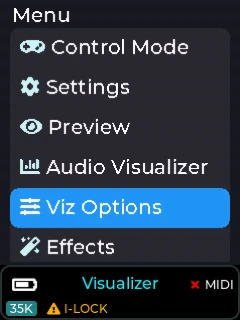
Turn the knob to move through a menu and push it to open an item. To go back, turn the knob to the back arrow at the top left of the page and push it. The main menu changes with the control mode: in Visualizer mode, for example, it starts with Control Mode, Settings, Preview, Audio Visualizer and Viz Options.
Preview (firmware 2.0 and later) shows on the screen what the cube is playing, even while the laser is not armed (not the ILDA input: see the note above). A line under the preview says what the knob does: in Visualizer mode, turn it to skip to the next visual, press it to leave the preview and hold it to switch between the 2D and 3D view. In the 3D view, turning the knob changes the point of view. General Settings sets which view opens first. On firmware 2.2 and later, while a phone or computer shows the web app’s live Preview, the cube’s own Preview closes and is greyed out (see Picture Settings).
Control Modes
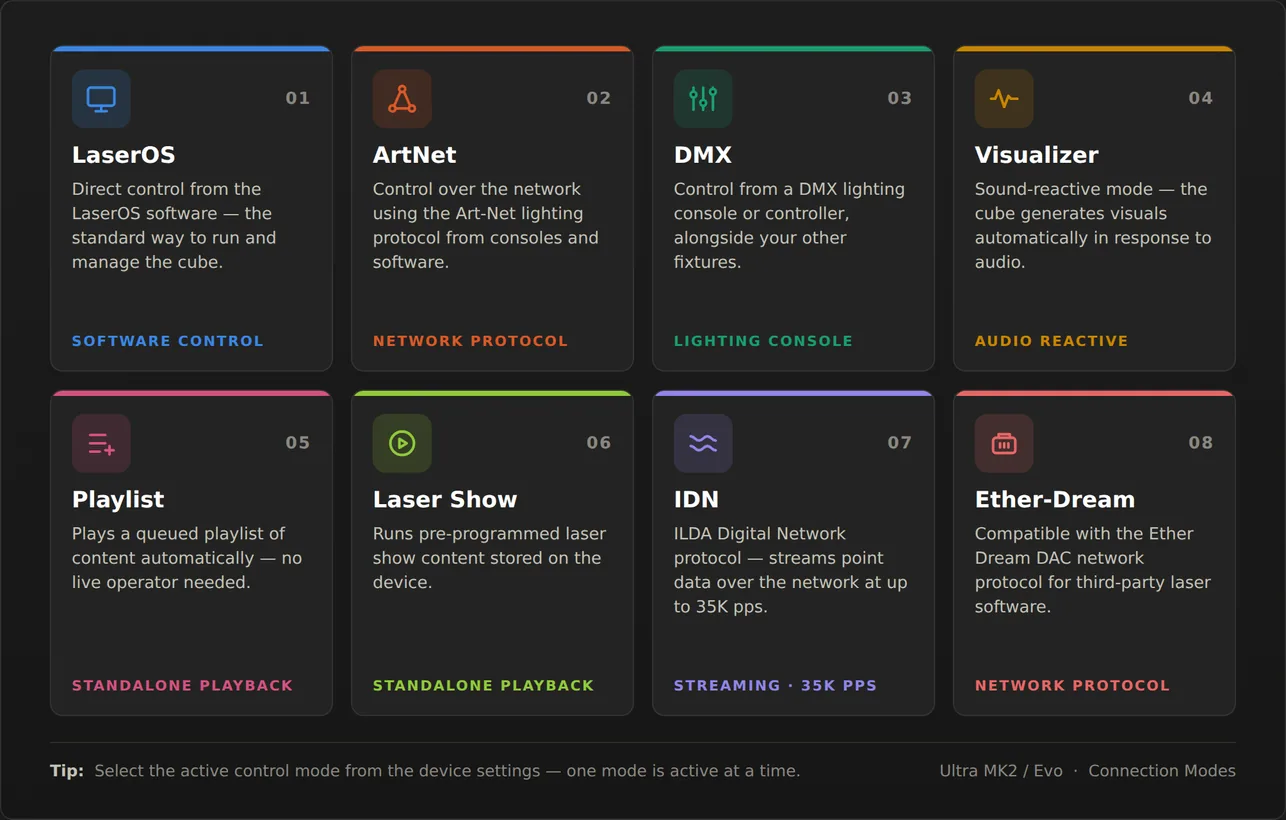
The Ultra MK2 / Pro currently has 8 selectable control modes:
- LaserOS control mode
- ArtNet control mode
- DMX control mode
- Visualizer control mode
- Playlist control mode
- Laser show control mode
- IDN (ILDA digital network protocol, streaming up to 35K pps)
- Ether Dream (DAC network protocol)
LaserOS Control Mode
This mode is used when you want our LaserOS application to be in complete control of the LaserCube, or you wish to use any of the supported third party applications like Liberation, LaserShowGen, Madmapper etc. For TouchDesigner, use Ether Dream Control Mode.
In this mode all projections are streamed over LAN/WiFi directly to the LaserCube, so the Settings→Projection menu items will not be available since these are now adjusted via the LaserOS settings menu, or other third party software projection settings.
- Select Control Mode, LaserOS
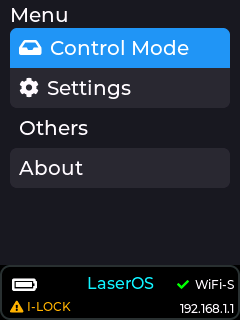
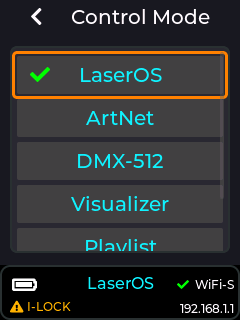
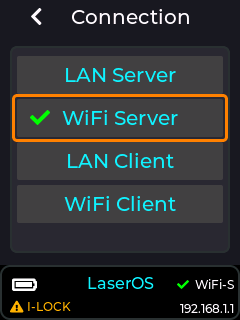
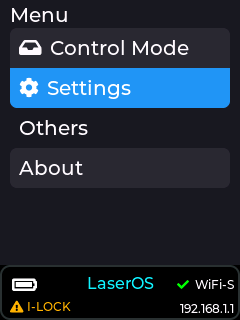
- Select Settings -> Connection -> WiFi server
- when using WiFi server, connect to the LaserCube’s Access Point with your mobile or desktop / Laptop device. By default, the SSID is LaserCube. The default WiFi password is Laser2020. These settings may be changed under Settings -> Network -> WiFi Server.
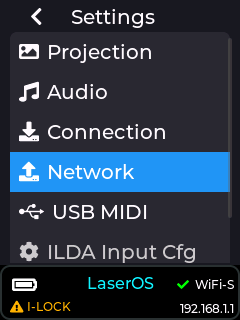
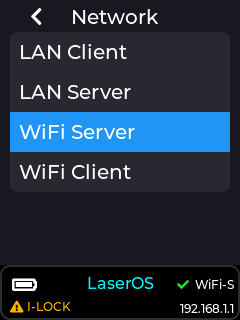
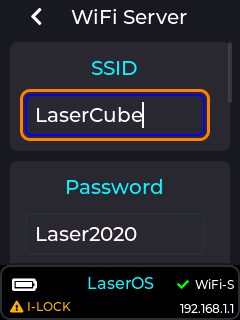
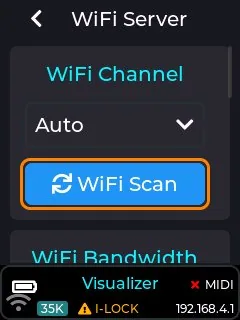
In order to get the best projection quality with minimal projection interruptions we recommend using the WiFi Scan button in the WiFi Server settings page (Settings→Network→WiFi Server) to show the current congestion status of the available 2.4GHz WiFi channels. If the channel scan is heavily congested then we recommend using a wired connection method. Using WiFi outdoors should be absolutely fine, but in some apartment buildings it could likely result in projection break-up unless the supplied LAN adapter is used with your mobile/desktop device.
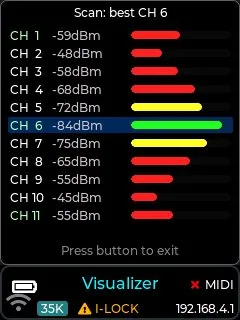
- If using LAN, we recommend using LAN client if you are planning to connect to your home router or switch. If no DHCP server is present on the network to assign an IP address (e.g. direct LAN cable connection between mac and LaserCube), the LaserCube will self-assign an APIPA address, or you can instead select LAN server and the cube will auto assign an IP address to your MacBook or Windows Laptop etc.
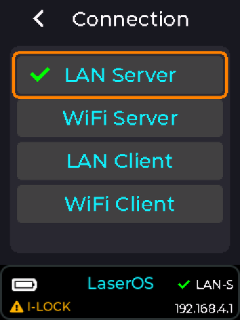
The images below show how to set the connection mode:
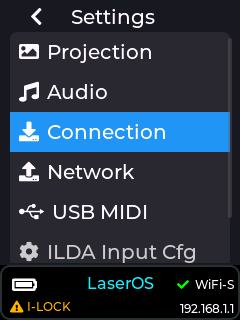
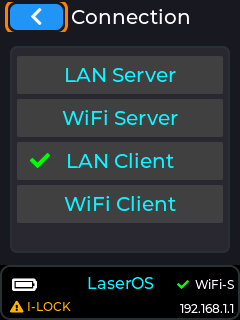
Select the new connection method and push the encoder knob: on firmware 2.1 and later the cube switches to it straight away, without a restart. While it switches, the status bar shows a yellow “...” beside the new mode (below, left); once it is connected, a green tick and the cube’s IP address take its place (below, right). A red cross means the connection could not be made, for example LAN Client with no cable connected. Changing the Control Mode still restarts the cube.
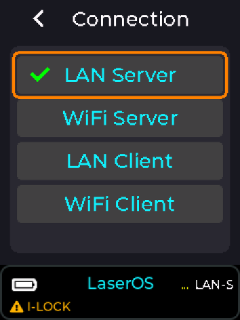
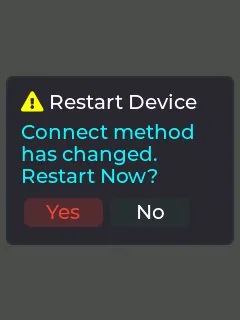
On firmware before 2.1, the LaserCube asks you to reboot the device after a change of connection method instead. Highlight “YES” using the red cursor box then push the encoder knob to confirm.
Installing LaserOS 0.18.1 or later
Before you can add content to your Ultra MK2 / Pro, or directly stream to it, our LaserOS desktop software must firstly be installed onto your PC/Mac. Go to http://www.laseros.com/ and scroll down until you see the download links as shown in the image below:
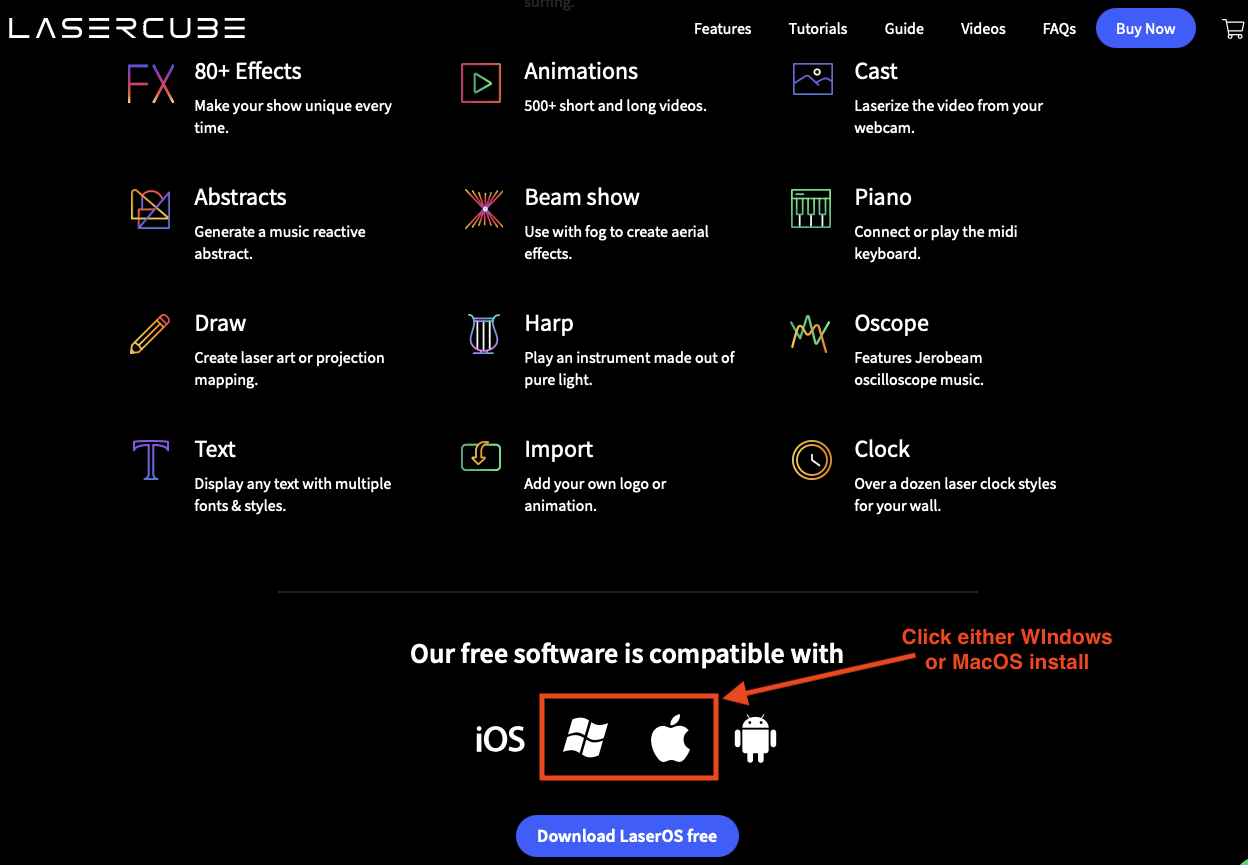
Alternatively, you can use the direct web links provided below for PC/Mac operating systems.
Note: You cannot use the iOS or Android version of LaserOS to export to the LaserCube's SD card. Mobile platforms are for direct streaming to cubes only. Adding content must be done via PC/Mac version.
Windows Platform
- Follow this link to download for PCs running Windows.
- Double click on the downloaded .exe file to install LaserOS.
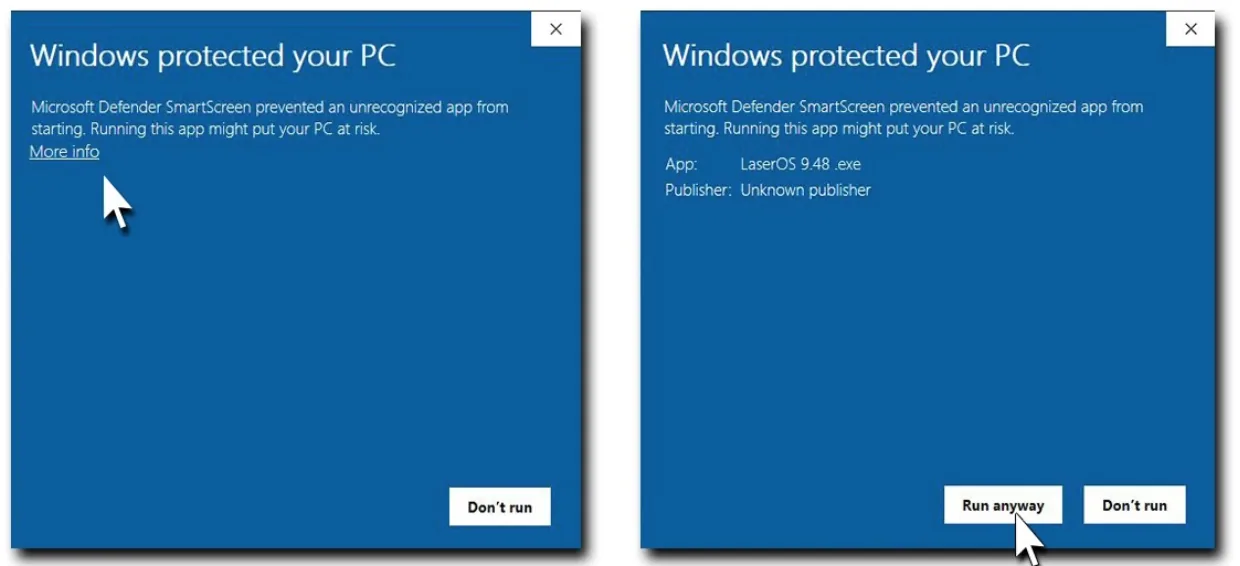
- Occasionally, Windows will display the following warning. Click on “more info” to enable the “run anyway option”. Click on “run anyway”.
macOS Platform
LaserOS 0.18.1 needs macOS 11 (Big Sur) or later: the installer doesn’t install on an older macOS.
- Follow this link to download and install for macOS.
- Double-click on the .pkg file and run the installer app.
Follow the instructions for installing LaserOS on your chosen platform, then run the software by opening Launchpad on macOS, or click the icon for LaserOS on your desktop if using a Windows platform.
Using LaserOS
After connecting your LaserCube(s) over LAN or WiFi to your network, the LaserOS app will detect if any are connected. The LaserCube can then be turned on or off from the power menu in the top left corner of the app. Pressing the ESC key will also turn it off.
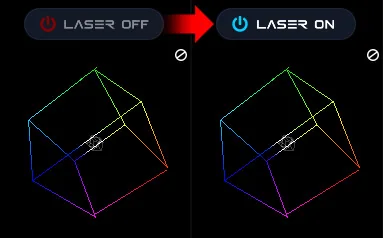
Note: While securing projector aiming, turn off the unit and remove the key. Check for the proper beam block setting. Repeat until beam block prevents any scanning into audience areas.
From the main menu, you can easily select from the different apps, modes and laser show effects available. Audio, power level, colour/hue and other settings can also be adjusted from here.
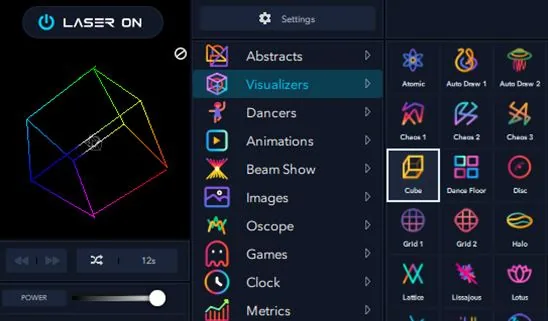
To make your own content in LaserOS, see Making Content in LaserOS.
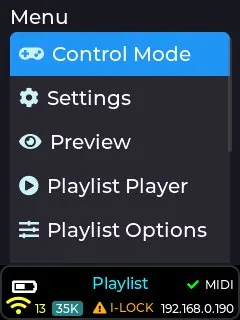
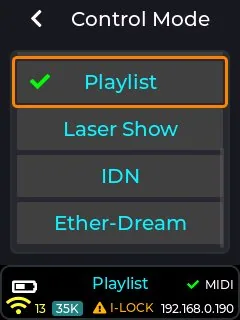
Playlist Control Mode
This control mode is used to play custom playlists exported from our LaserOS app to the SD card.
It can be selected by going to the Control Mode menu and selecting “Playlist” from the options.
Creating a custom playlist
Before being able to project content on the LaserCube in playlist mode you must first create a playlist or export an existing playlist to the LaserCube's SD card using the desktop version of our LaserOS software.
The method of adding new content to the LaserCube is via a LaserOS playlist, by either selecting an existing one you already created, or by creating a new one from scratch.
You can create a new playlist by selecting the playlists app from the centre pane, then click the small ‘+’ icon as shown in the image below:
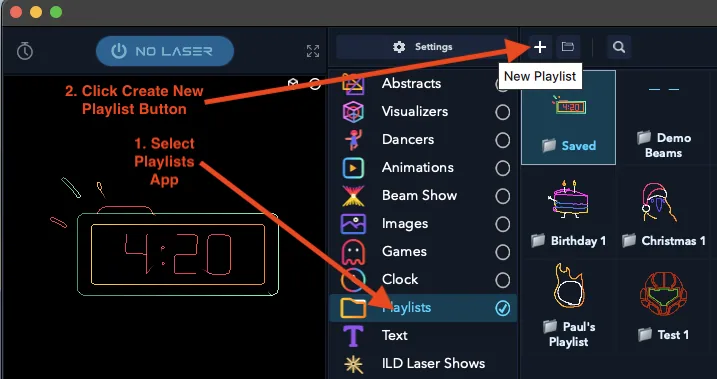
Once you create a playlist, you will now be able to drag content from the various categories into the playlist pane on the right hand side. You can also add content to a playlist by right clicking on any CUE within LaserOS, and then use the “add to playlist” button.
This is the method we will show in this document, so for now you can simply save the empty playlist with the name of your choice as shown below:
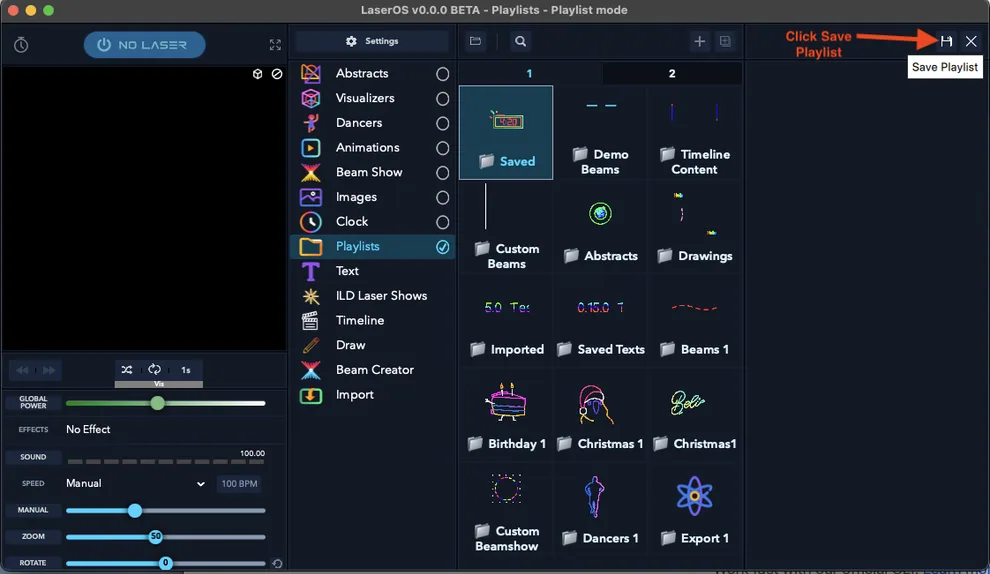
When you click the “save playlist” button you will need to give the playlist a name. Keep this name as short as possible, as the LaserCube can only display a limited number of characters on the LCD when selecting a playlist from the drop down menu on the LaserCube's LCD.
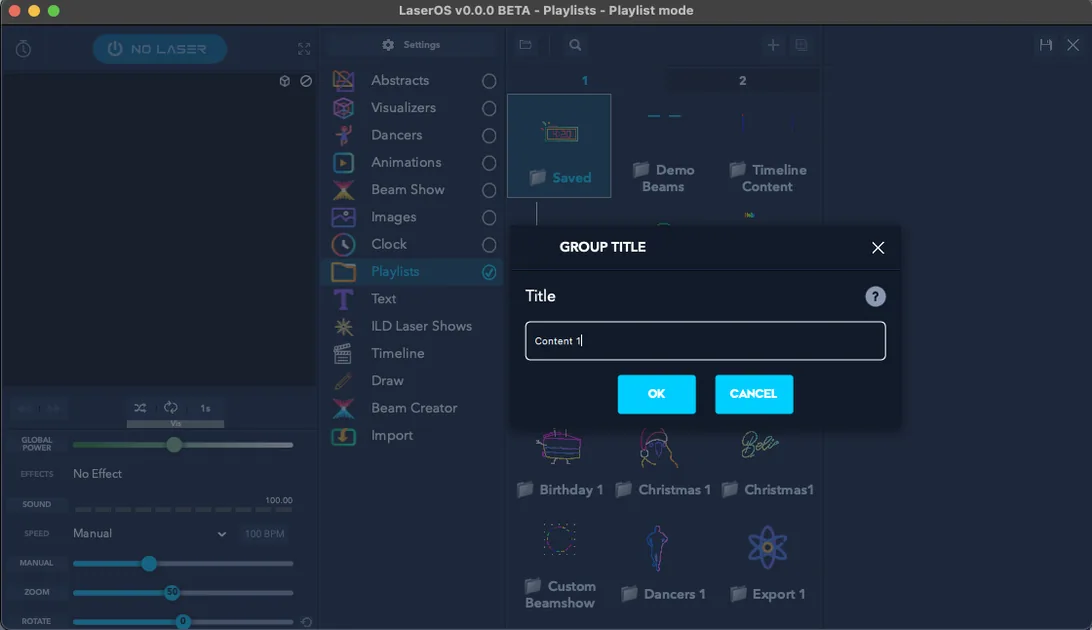
In this example guide we name the new playlist “Content 1”.
Now you have a custom playlist added, it is now possible to add content to the playlist by selecting items from the various LaserOS categories and right clicking on the CUE you wish to add to the playlist.
When you right click on a CUE (Animations→Vectors→Axe Chop in our example), a pop-up menu will appear which will then allow you to select the newly created playlist from the “Add To Playlist” drop-down, then click the “Add” button to add the item to the chosen playlist as shown below:
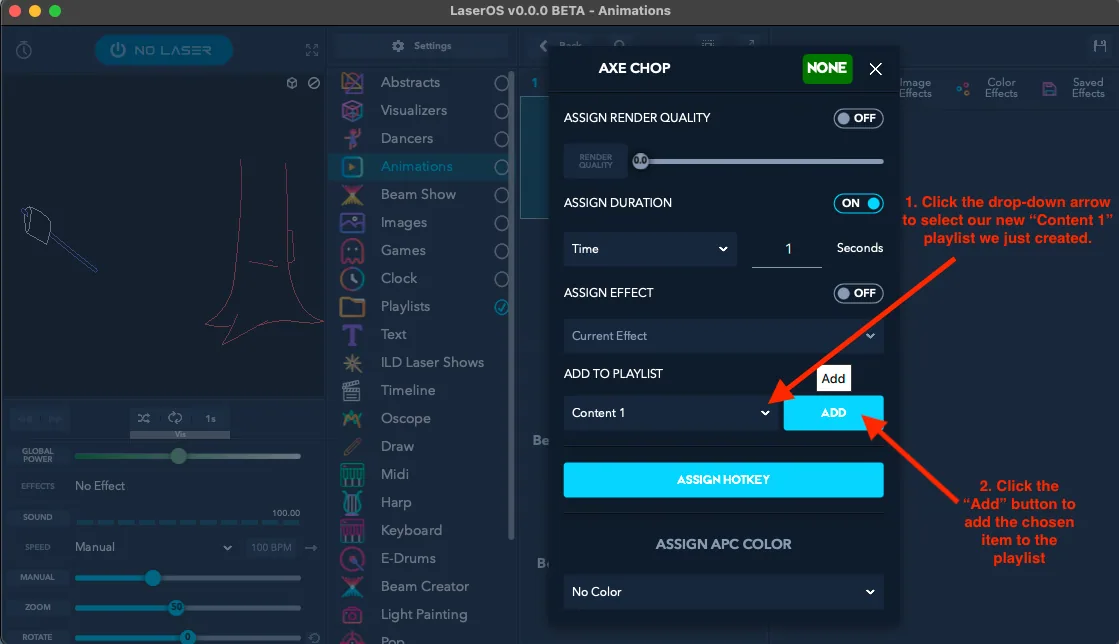
Note: The above image also shows a manual “Assign Duration” option which can be set to disabled for now, and its purpose is described further down in this document.
Adding a custom SVG to the Playlist
If you have any custom content you wish to display with the LaserCube such as a company logo in SVG file format, you can add this to the playlist by using the import app within LaserOS.
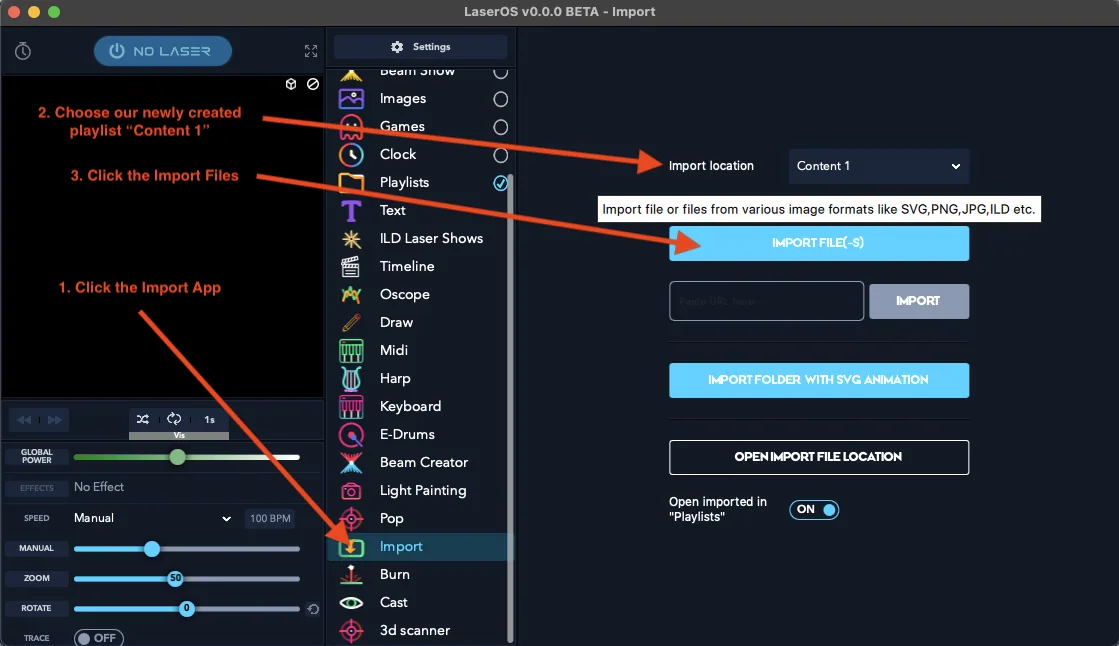
Select the import app, then select the playlist you wish to import content into, then click the import files button.
Note: If you have an animated SVG then you would click the “import folder with SVG animation instead”. See SVG Animations for how to name and import the frames.
Select the SVG file you wish to add using the file browser window which appears after clicking the “import File button”
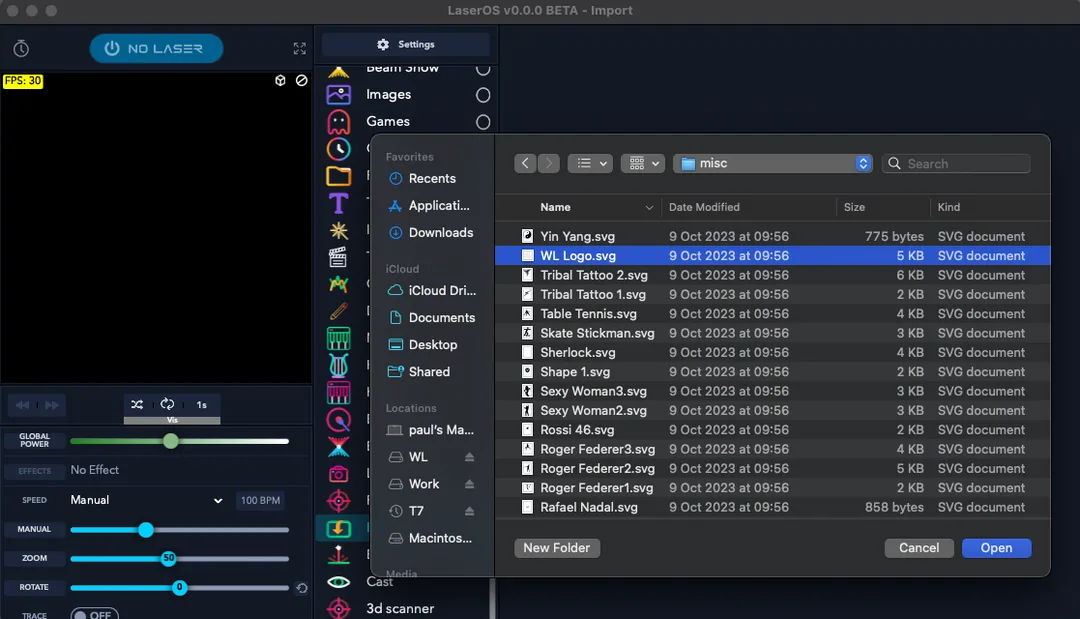
In our example we are importing the Wicked Lasers Logo as an SVG file.
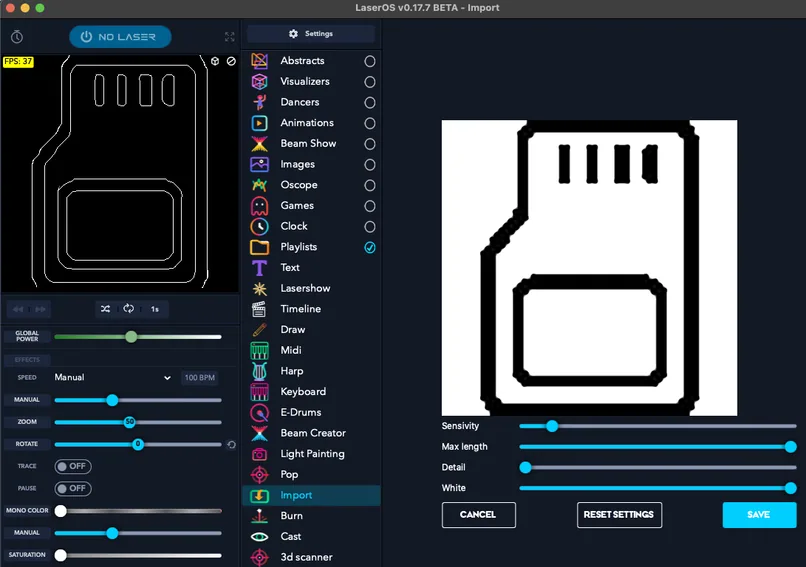
The import app will also allow other image file formats (.png, .jpg, .bmp, .ild), but for the best results we recommend using SVG or ILD formats. GIF files don’t import.
If you select a non vector image format like .jpg, .png or .bmp then this type of image will need to be converted to vector format. A separate popup window will be displayed to allow user adjustments of sensitivity, line length and other parameters with a live preview of the result, as shown below:
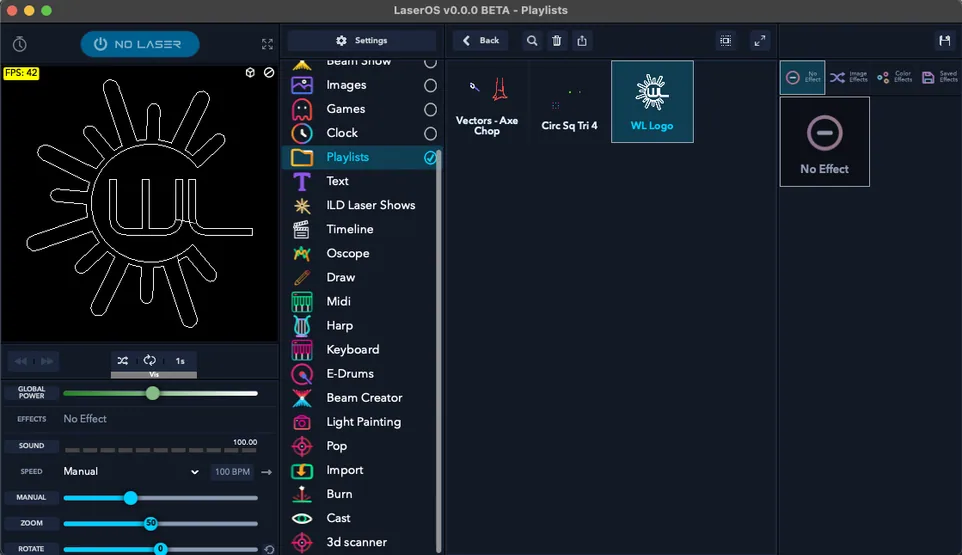
After importing your custom image you can return to the playlists app and select the “Content 1” playlist by double clicking which will then show all the items added to this playlist.
The playlist should contain all the items you have selected and added via the right click popup menu. The image below shows the newly added custom SVG called “WL Logo”
Some content imported from SVG may need its render quality changing depending on how complex the image is. Since the Galvo Scanners can only render a certain number of points per second you may see the projection start to flicker if the imported SVG is too complex, or the quality slider is adjusted to maximum quality, as the laser will need to render more points in order to display the image with sharper corners and more detail. You can turn on “Show FPS” in Settings→General in order to get an idea of the frame rate the item will render at. (>=45 FPS will not appear to flicker).
You can adjust the render quality by right clicking on an item in the playlist and turning on the “assign render quality” toggle followed by adjusting the render quality slider as shown below.
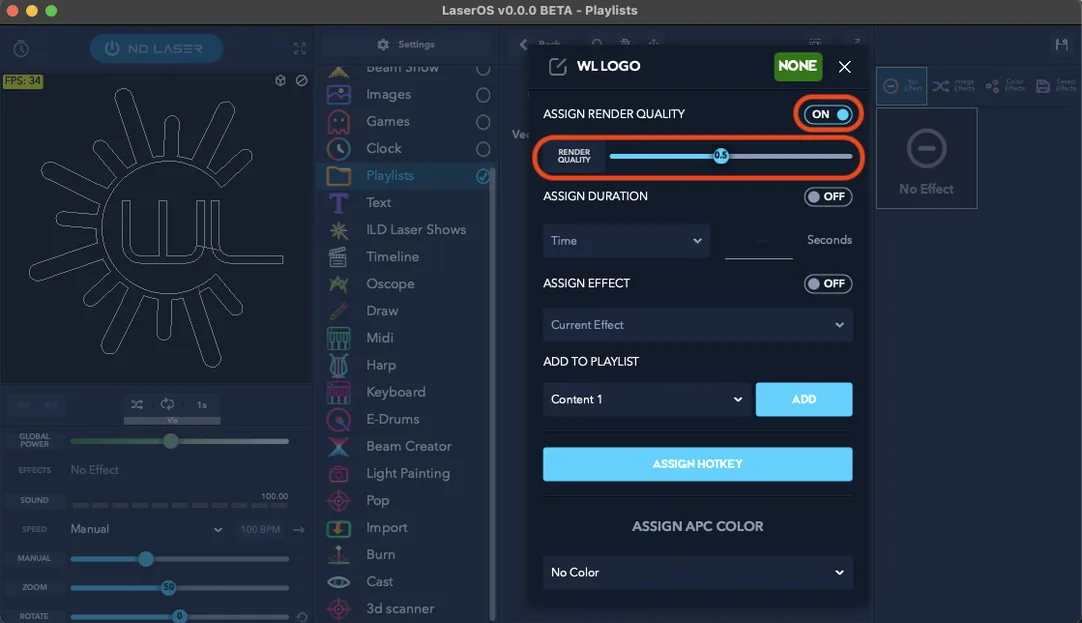
It is also possible to assign a manual duration override to the playlist item, or set the number of times an animated item will play before the playlist player on the LaserCube moves to the next item in the playlist.
This can be seen in the previous image below the render quality slider options.
To perform a manual playlist duration override on an item, enable “Assign Duration” option and select either “time” or “cycles” from the drop down.
Note: The “Beats” option is not currently supported on the LaserCube.
If time is selected then the number of seconds between 1 and 999 can be entered, and if animation cycles is selected then the number of times an animation plays can be set between 1 and 999.
The animation cycles option is especially useful when assigned to a scrolling text item created with the LaserOS text app, as it can be set to animation cycle of 1 so the scrolling text only displays once before moving on to the next playlist item. If this was no set then the text may have only partially scrolled before moving on, depending on the playlist player CUE delay time.
Note: The “Assign Effect” option in right-click CUE popup is not currently supported on the LaserCube.
Exporting a Playlist to the micro SD card
Once you have finished adding CUEs to your new playlist, you can then export the entire playlist to the micro SD card.
Only playlists go on the card: LaserOS leaves Timeline shows out of an SD card export, so a Timeline show plays only while LaserOS (on a computer, phone or tablet) is connected. For a show without LaserOS running, build it as a playlist.
Switch the LaserCube off before you take the micro SD card out. You will need to insert the micro SD card provided with the LaserCube into a USB 3.x reader and then connect the reader to your PC/Mac.
The SD card should appear in File Explorer / Finder as a removable device with the volume name “WL”. The card should also contain a folder in the root called “Lasercube”.In LaserOS, select the playlists app, then select the playlist you wish to export, then finally click the SD card export button as shown in the image below:
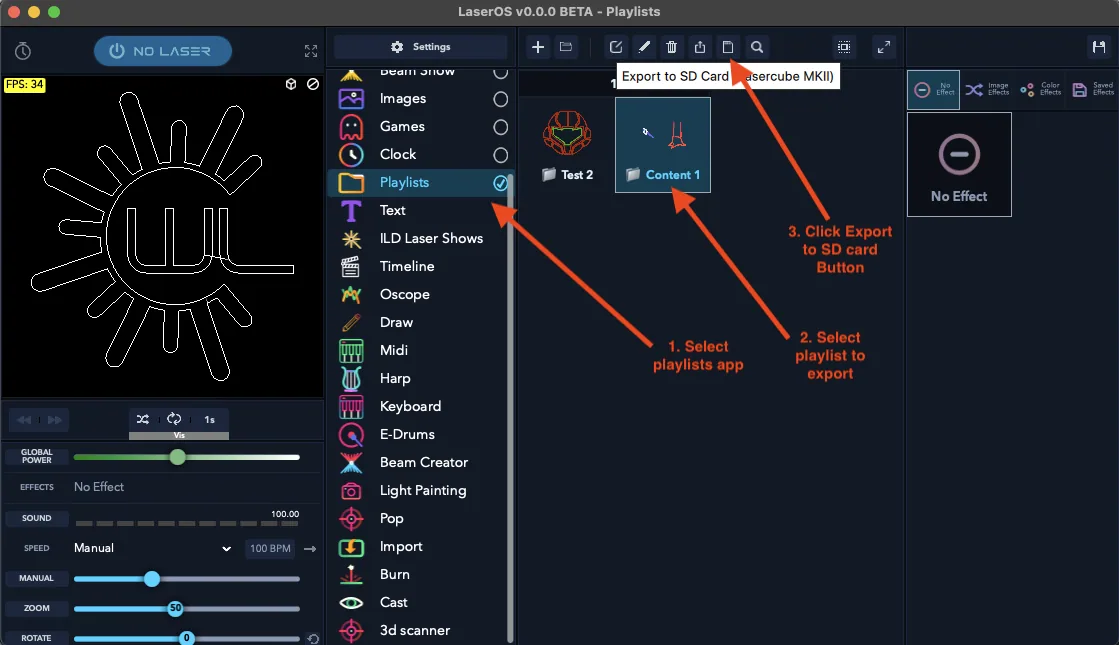
Your OS may ask for permission to access files on a removable volume, if so then click “Allow”.
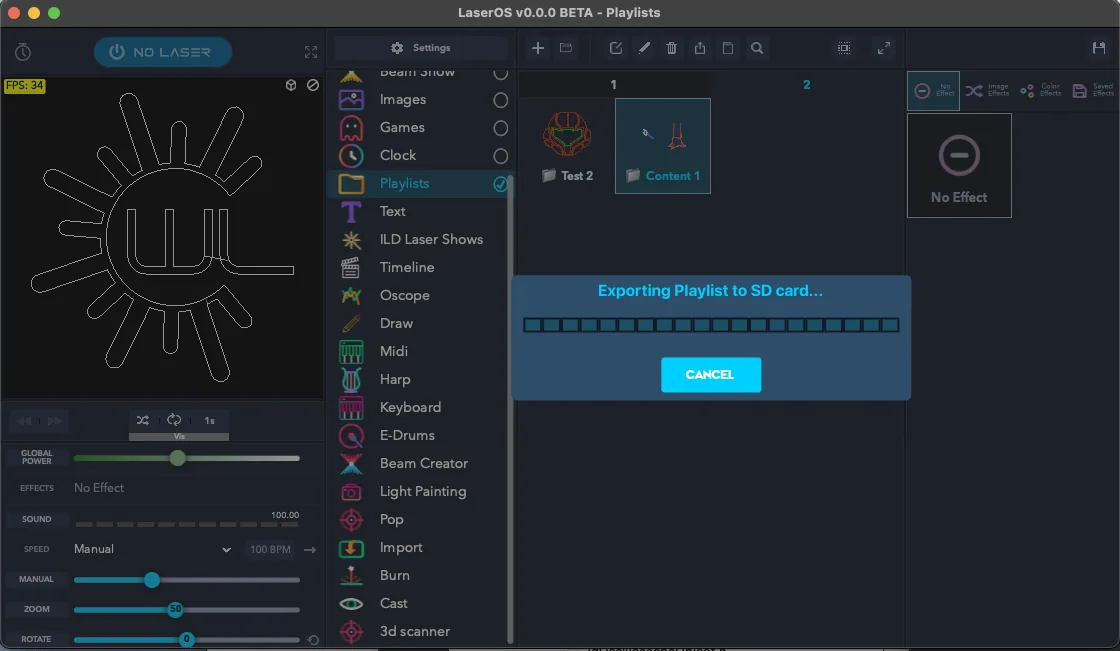
If the SD card is detected on your machine then LaserOS will show an export progress bar depending on how many items need exporting to the SD card.
If the playlist already exists on the SD card (as you may have already added it once before) you may be prompted as to whether you wish to overwrite the playlist on the SD card or not, as shown below.
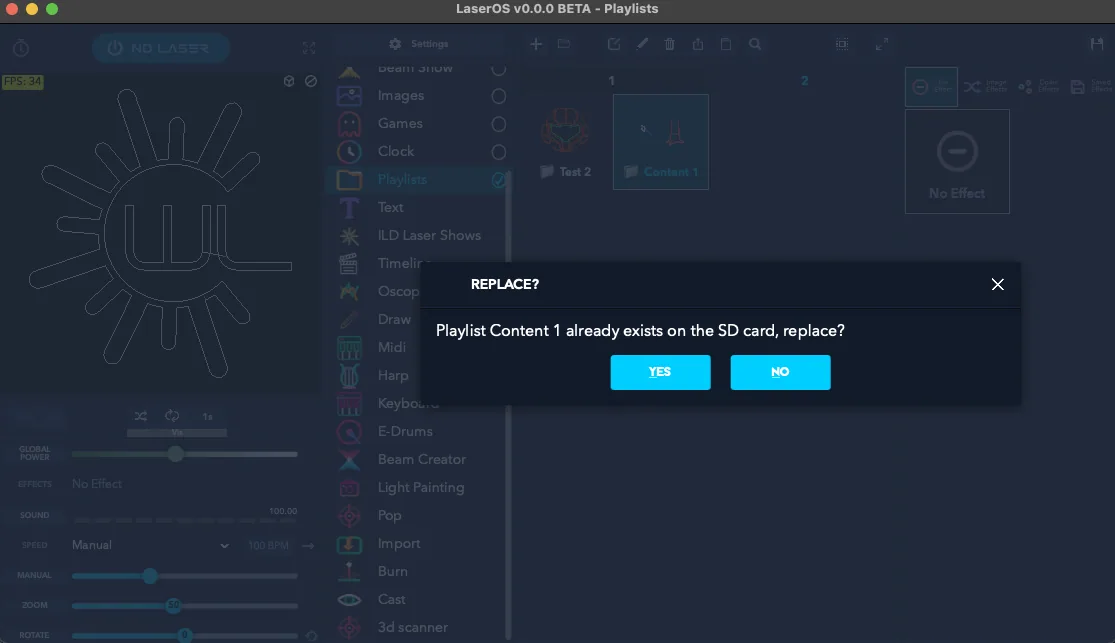
If you accept to replace the playlist then the previous playlist on the SD card will be deleted and replaced by the current one.
If when you click the export to SD card you see an “SD card not Found” message box, then please ensure you have inserted the provided SD card into your reader and into your PC properly, and also check that the volume name of the SD card is shown as “WL”. If the SD card volume name is not “WL” without the quotes then you can right click on the removable device and rename the card to “WL” using Windows file manager. This should only be necessary if you have used your own SD card and forgot to rename the volume. The SD card should also contain a folder called “Lasercube”. If it does not then you need to download the factory SD card image again from our GitHub here: https://github.com/Wickedlasers/mk2SDContent
The image below shows the contents of the SD card with the new “Content 1” playlist folder and files added.
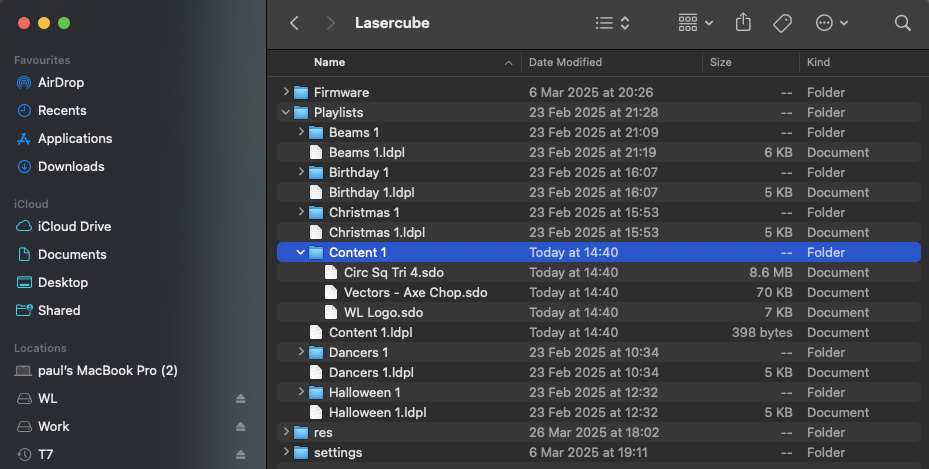
Each playlist exported from LaserOS to the SD card also has a playlist file which is a human readable JSON file with the extension “.ldpl”, and each playlist also has an associated folder of the same name containing the actual CUE files for each item in the playlist. The order in which CUEs will be played on the device (with shuffle mode disabled) is based on the order of the entries in the “.ldpl” file.
Note: Both the folder and playlist “.ldpl” file must be present for the playlist to be available on the device. e.g. if either “Content 1.ldpl” or “Content 1” folder are not present then “Content 1” will not be listed in the playlists drop down on the device.
Manual Customization of the Playlist File
The image below shows a small preview of the contents of another playlist already provided on the factory supplied SD card for the Ultra MK2 / Pro. This is an extract of the Beams 1 playlist “.ldpl” JSON file viewed in a text editor:
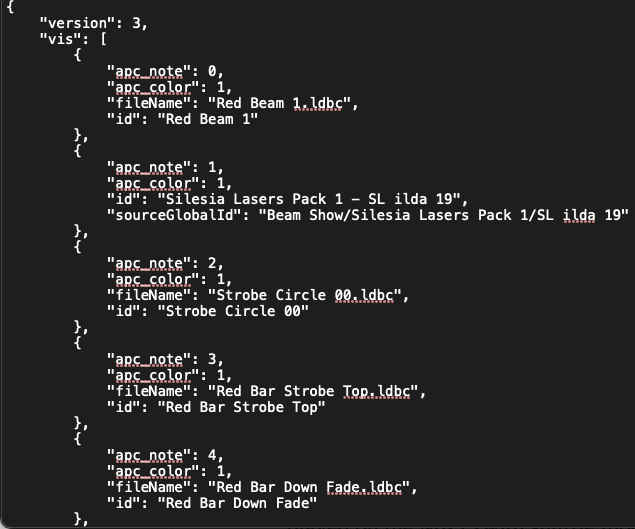
This file has been edited after export in order to add custom MIDI mapping for an APC40 MK2 controller. “apc_note” field within the JSON array allows the user to choose which button on the APC will activate this playlist item.
You will need to consult the data sheet for the relevant APC MIDI device to determine which MIDI note value corresponds to which button on the APC.
Similarly, “apc_color” field allows the user to choose which colour the button will be (if RGB is available on the chosen APC button).
The available values for “apc_color” field are:
| 1 | Red |
| 2 | Green |
| 3 | Blue |
| 4 | Yellow |
| 5 | Cyan |
| 6 | Magenta |
| 7 | White |
| 8 | Orange |
| 9 | Purple |
| 10 | Salmon |
| 11 | Pink |
| 12 | Lime |
| 13 | Cornflower |
| 14 | Mocha |
| 15 | Ice Blue |
If playlist items do not have these fields present in the JSON file when an APC40 MK2 or APC mini MK2 is used in the playlist control mode then the playlist items will be automatically allocated to the available APC grid buttons.
Note: The Ultra MK2 / Pro has this playlist and others as part of the demo SD card provided with the device.
Using the new playlist on the Ultra MK2 / Pro
To project the CUEs from the example “Content 1” playlist we just exported from LaserOS, you need to firstly safely eject the SD card from your PC/Mac. This can be done by right clicking the SD card in file manager and selecting “Eject”.
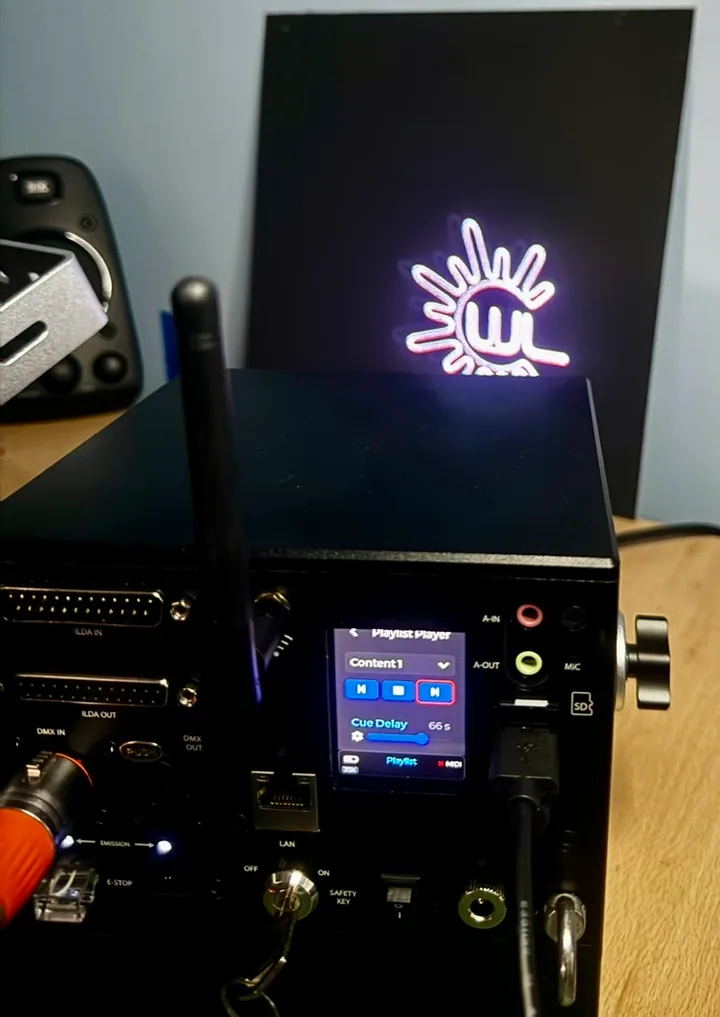
With the cube still switched off, place the SD card back into the device, then power on the cube. Select playlist control mode, then select the “Content 1” playlist which should now be available in the playlist drop-down within the playlist player menu.
The photo below shows the custom SVG that was imported to LaserOS, then exported to the LaserCube as “Content 1” playlist.
Playlist Player UI
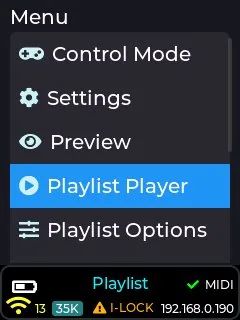
The playlist that the device will use is selected from the Playlist selection menu drop down.
The factory supplied SD card comes with ready-made playlists, such as Beams 1, Birthday 1, Christmas 1, Dancers 1 and Halloween 1 (the list depends on the card’s version). A playlist you export yourself is listed last.
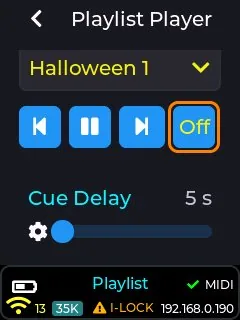
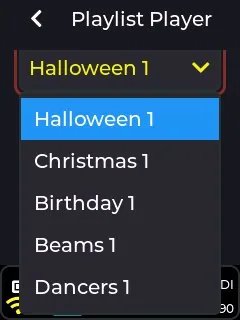
The chosen playlist selection will be saved and used again even through a power cycle of the device.
Note: The last chosen playlist will project immediately after a power cycle if the device is in playlist control mode and “Power-On play” is enabled in the playlist options menu, but projection will only occur once the interlock is enabled. This is to allow for fixed installations to quickly start up and project the users chosen content with minimal setup time. If you do not want the playlist to automatically start projecting at power-on, set “Power-On Play” to Disabled in the playlist options menu.
The main media controls for the playlist player are shown below.
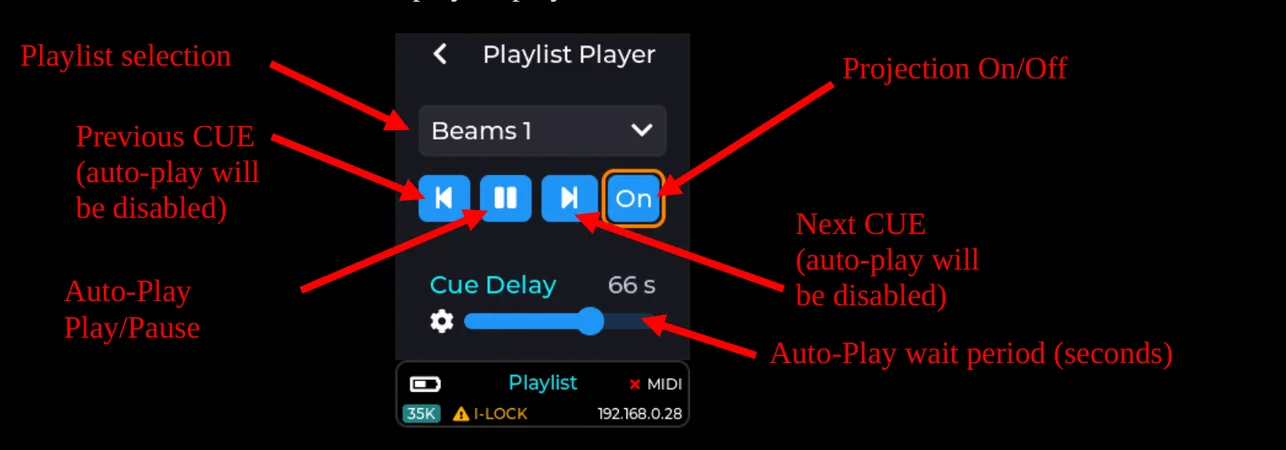
Auto-Play (when enabled) will automatically cycle through another CUE in the currently selected playlist every <cue delay> seconds. Auto play is enabled when the pause button is visible, and pressing the pause button will move to auto-play disabled, and UI will show the play button.
Press the play button to re-enable the CUE Auto-Play. While Auto-Play is off, the playlist will remain at the last selected CUE.
Note: If an APC MIDI device is connected and a CUE is manually selected using an APC button, or a CUE is manually selected via the playlist web app, then the device will no longer cycle through items in the playlist until the Auto-play button is selected again.
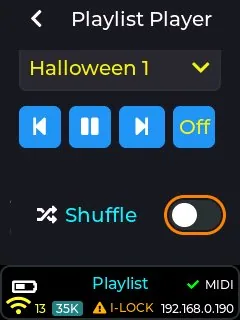
The playlist can also be shuffled in order to randomize the order of CUEs in the playlist.
CUE Playback Speed
The user can adjust the playback speed of any CUE being projected while in the playlist control mode.
This can be done using the Settings→Playback Speed menu
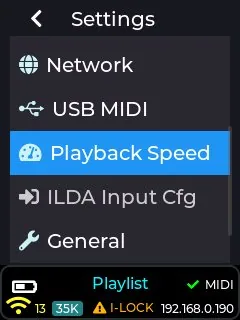
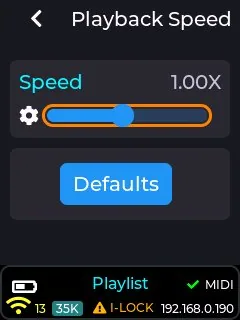
The playback speed slider can also be assigned to a MIDI knob or fader if using an APC40 MK2 or APC mini MK2 (see MIDI Mapping or the online wiki).
Playlist Player Web App
In playlist control mode the cube serves a web app: a control page for any phone, tablet or computer on its network, opened in the device’s web browser (Safari, Chrome or Firefox). The page is laid out for a phone, and works on a tablet or computer too.
First connect your device to the cube, using the cube’s connection method. If it is WiFi Server (see Connection Settings), look for the network “LaserCube” in your device’s WiFi list and connect with the default password “Laser2020”.
Then enter the cube’s IP address in the browser. This is 192.168.4.1 by default. The cube shows its address in the bottom right corner of the LCD status bar, and in Settings→Network.
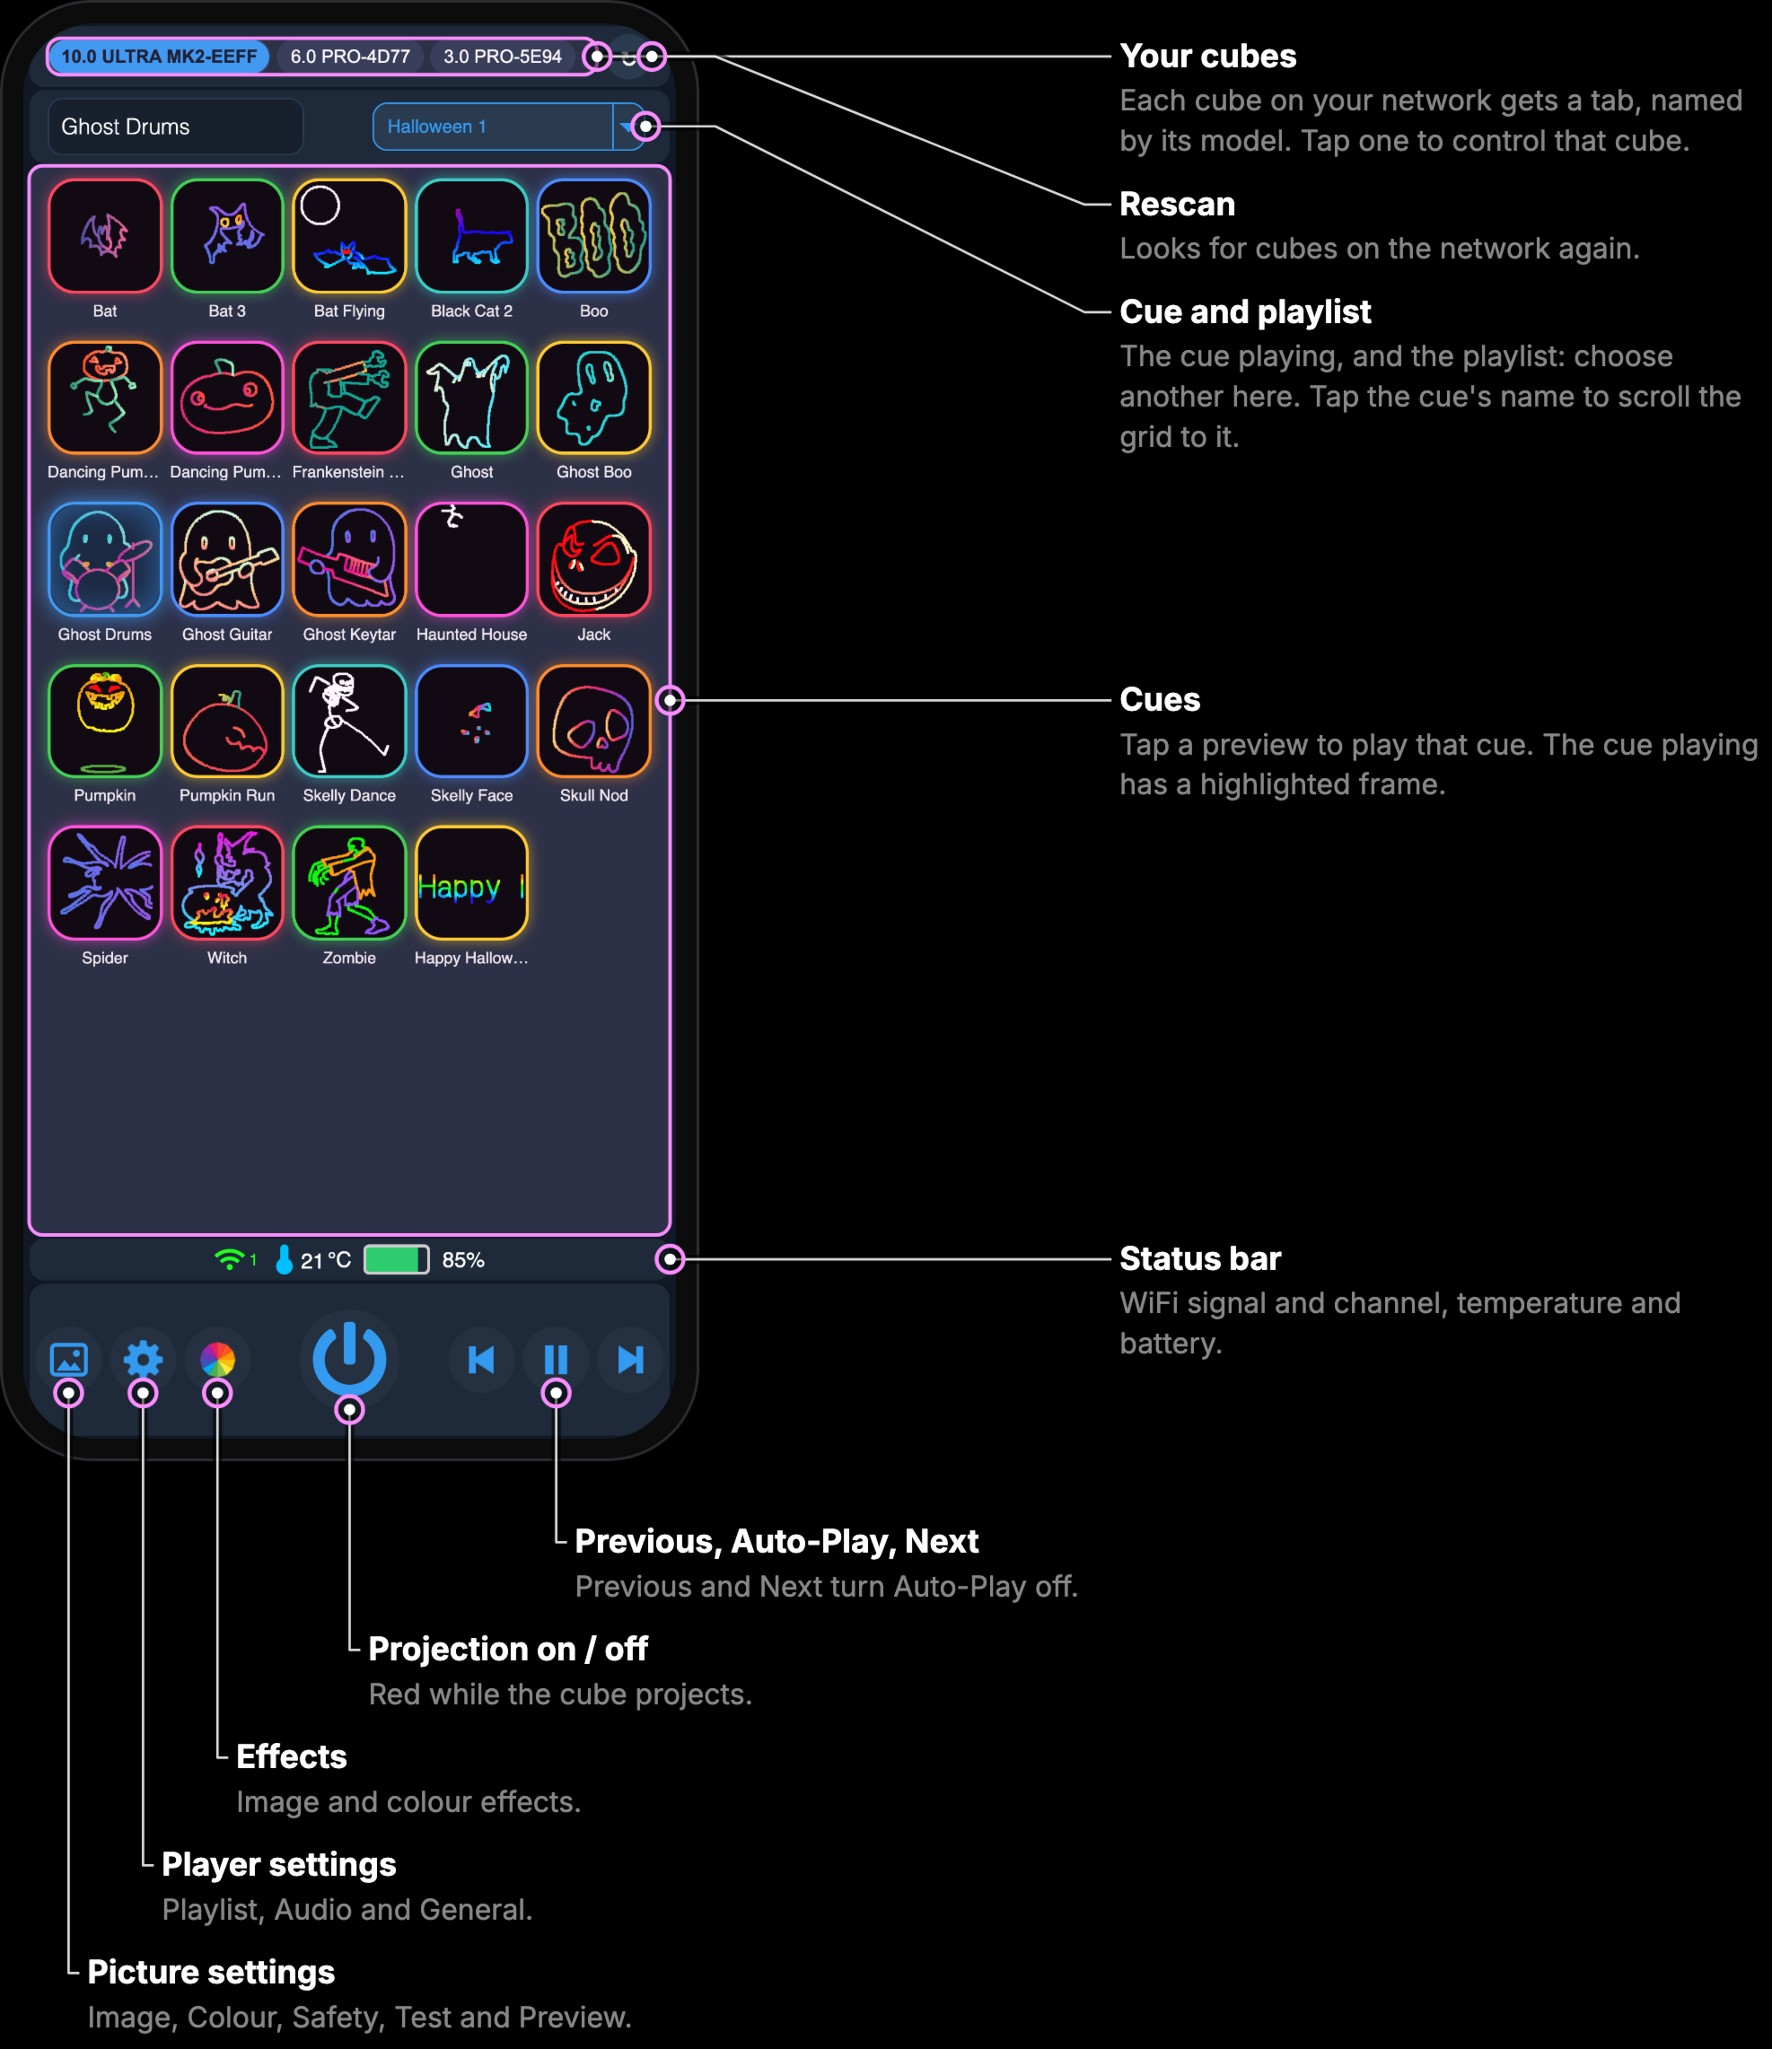
- Your cubes: every cube on your network in playlist or visualizer control mode gets a tab, named by its model and the last 4 digits of its MAC address, so one page controls them all. The cube serving the page is always the first tab. See Multi-Cube Control to set your cubes up for this.
- Cues: tap a preview to play that cue. If the SD card is missing, or has no previews on it, the page says so.
- Status bar: the WiFi signal and channel (in the WiFi modes), the cube’s temperature and its battery level.
- Projection on / off: starts and stops the projection. The button is red while the cube projects.
- Previous, Auto-Play and Next: with Auto-Play on, the next cue plays after the Cue Delay. Previous and Next turn Auto-Play off.
The three buttons on the left open the popups below. A popup closes with a tap outside it. The popups are those of firmware 2.2; a cube on older firmware has fewer settings in the web app until it is updated (see Firmware Update).
Picture Settings
The picture button opens the cube’s projection settings in five tabs: Image, Colour, Safety, Test and Preview, the settings of the LCD’s Projection menu. A change shows on the laser straight away, and the LCD follows it.
Press Save to keep the changes on every tab. An orange dot marks a tab with changes not saved yet; a change that is not saved is undone when the cube restarts. The button beside a slider sets it back to its default. Each pad has a reset button in its top left corner, or double tap the pad.
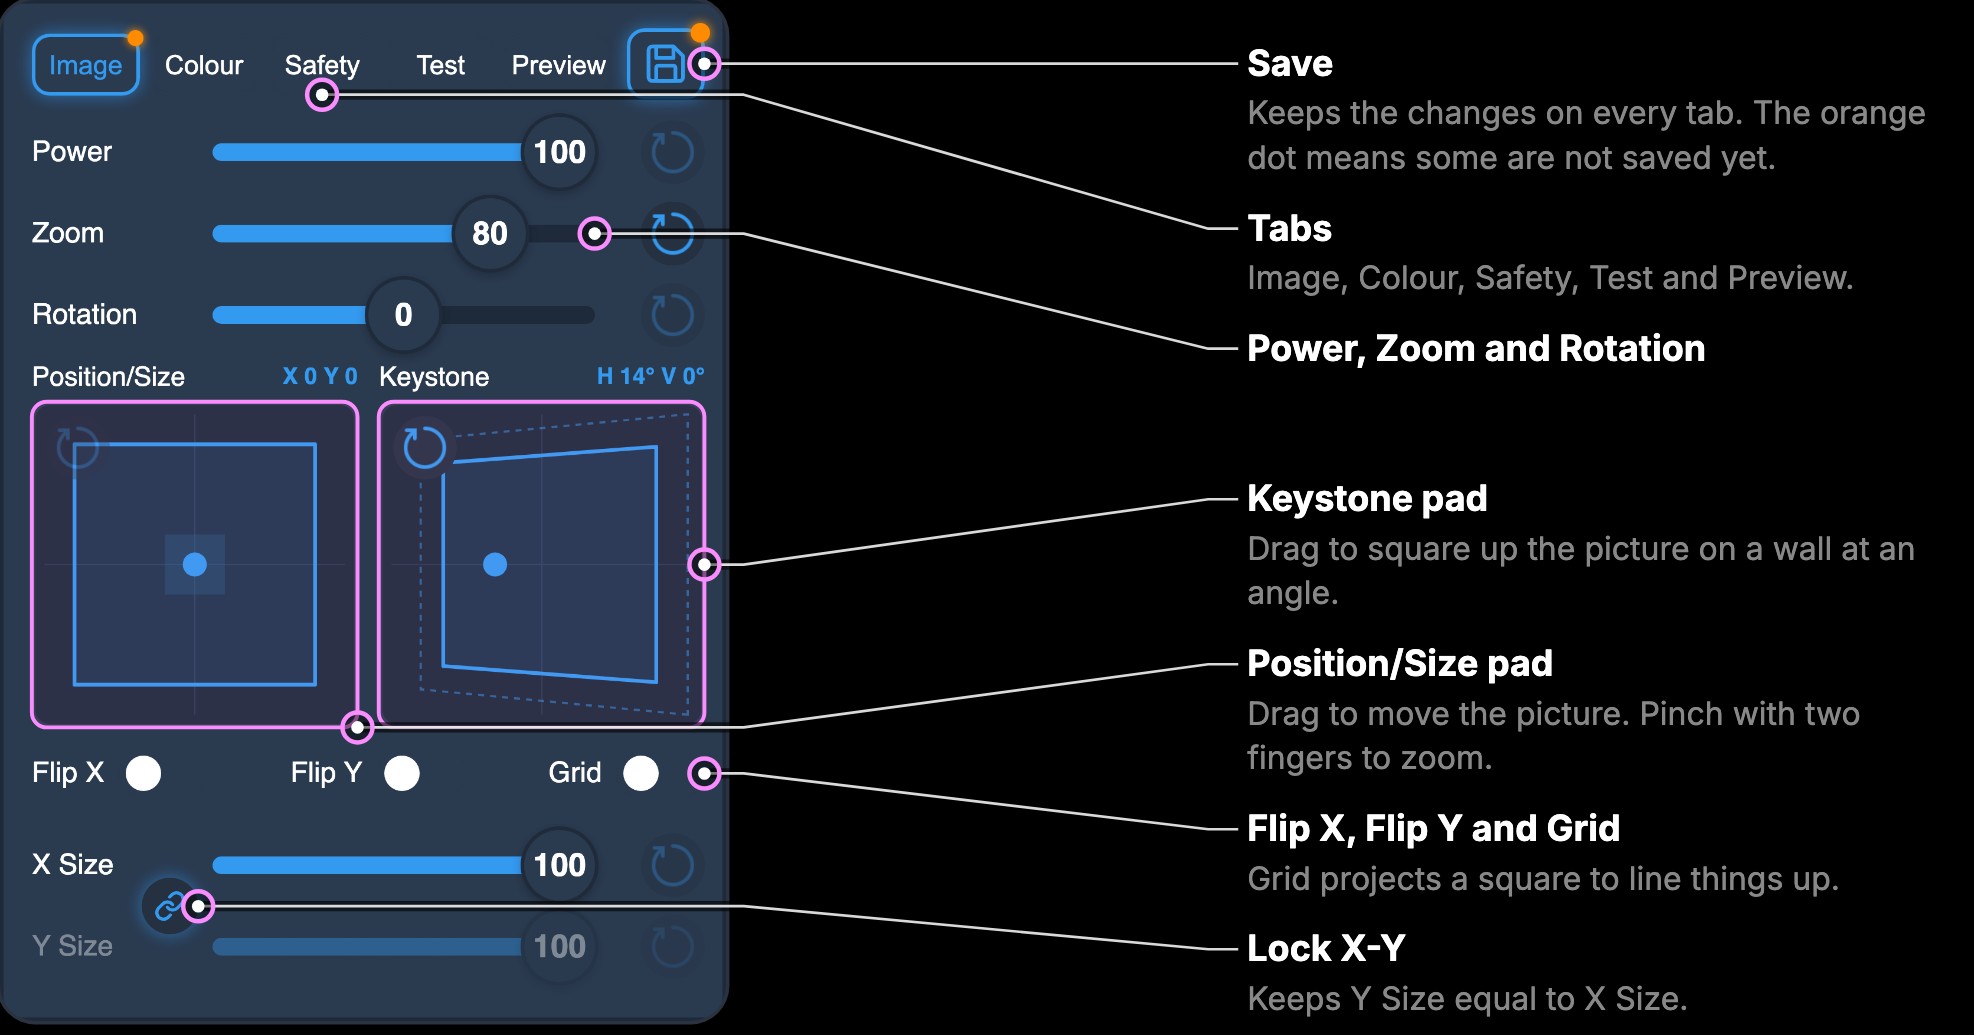
Image
- Power: the projection power, 0 to 100%.
- Zoom: the picture size, 10 to 100%.
- Rotation: up to 90° either way.
- Position/Size pad: drag to move the picture, and pinch with two fingers to zoom. With Lock X-Y off, a pinch side to side sets X Size and a pinch up and down sets Y Size. The shaded area shows how far the picture can still move.
- Keystone pad: squares up the picture on a wall the cube does not face straight on, horizontally, vertically or both. Drag towards the side of the picture that is too big on the wall (see Keystone Correction).
- Flip X, Flip Y and Grid: mirror the picture, or project a square to line it up (like Show Grid on the cube).
- X Size, Y Size and Lock X-Y: with Lock X-Y on, Y Size follows X Size.
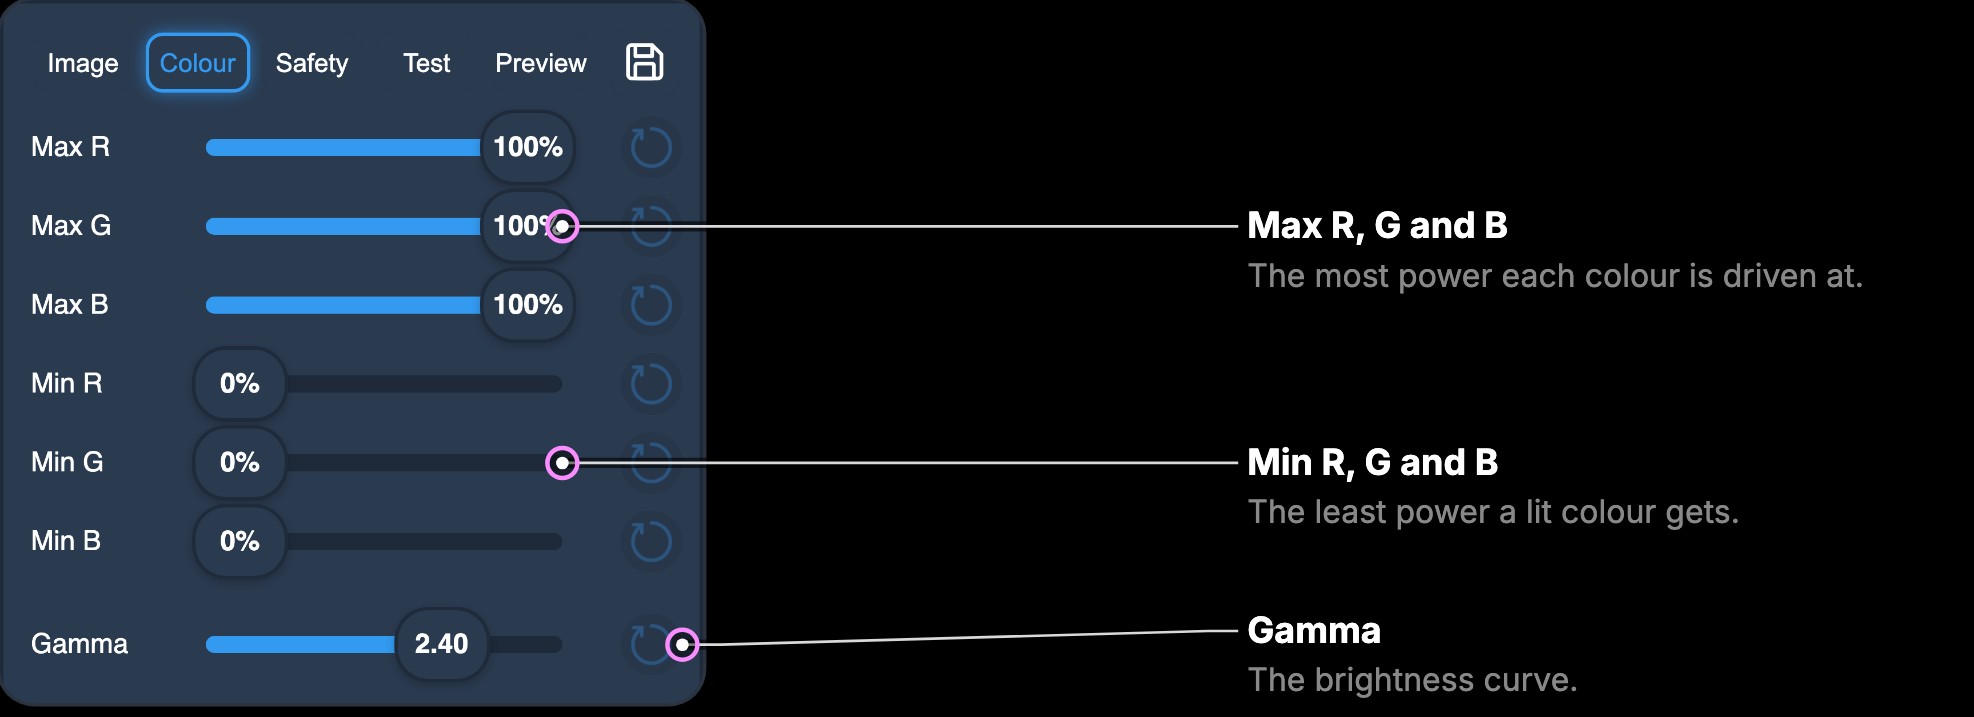
Colour is the cube’s Colour Balance: the most and the least power each colour is driven at, and the gamma, the brightness curve.
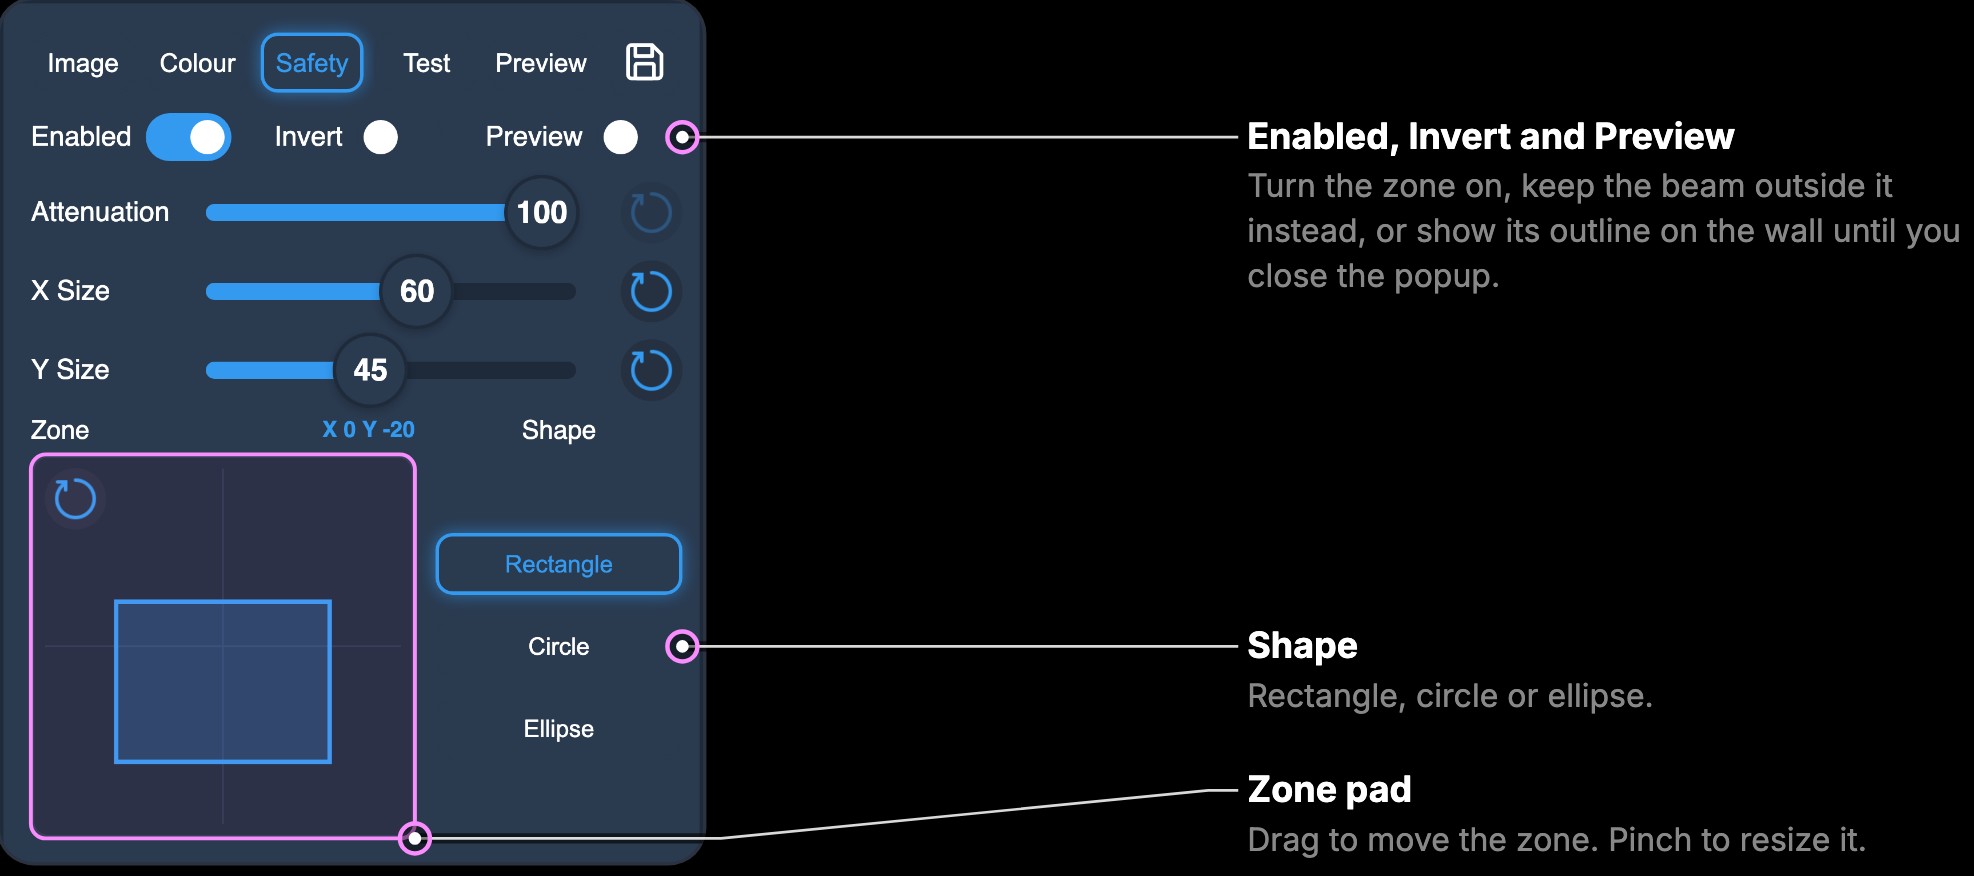
Safety is the safety zone, the area the beam may draw in. Enabled turns it on, and Invert makes it a keep-out zone instead. Drag the zone on the pad to move it, pinch it to resize it, and choose its Shape: rectangle, circle or ellipse. Attenuation sets how much the beam is dimmed outside the zone: 100% blanks it. Preview projects the zone’s outline until you leave the Safety tab, close the popup or switch away from the page, or about 5 seconds after the cube stops hearing from the page (for example when the phone locks). See Safety Zone for more.
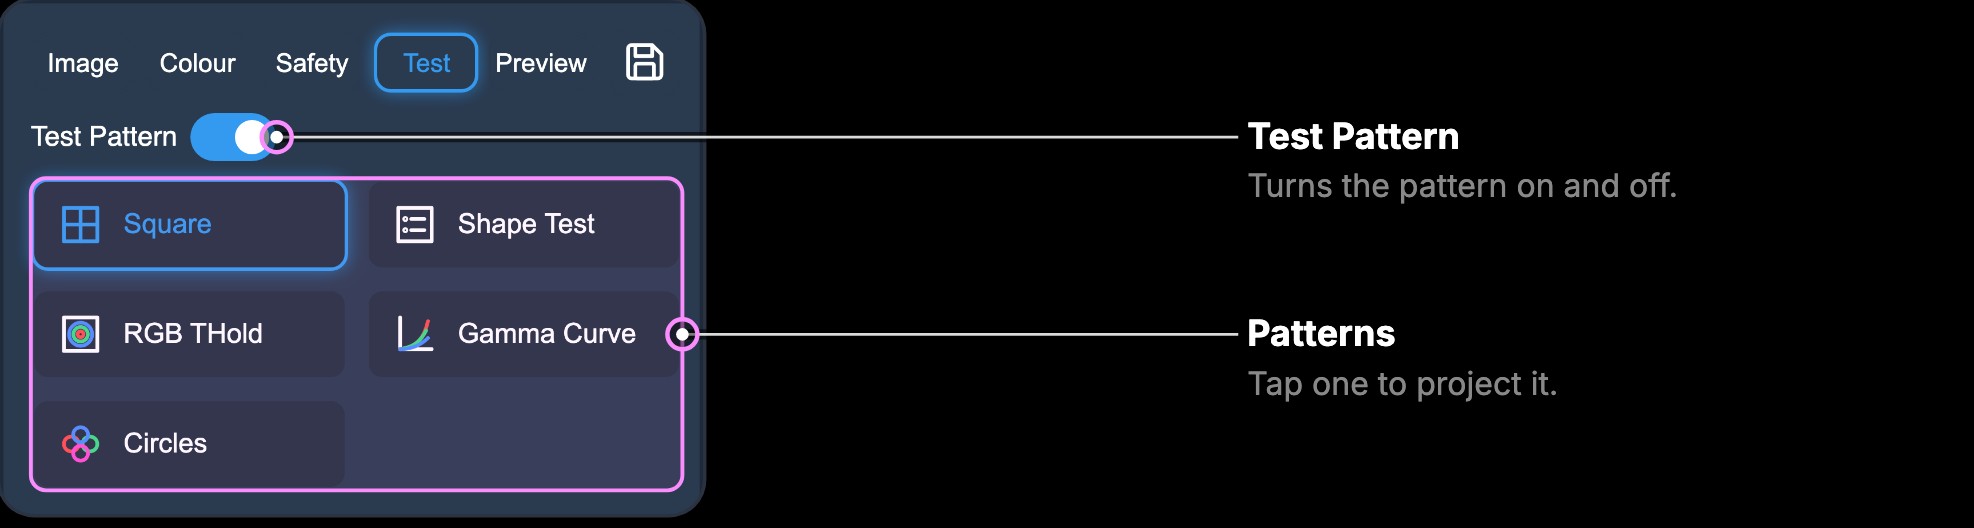
Test projects the cube’s test patterns: turn on Test Pattern, and tap a pattern.
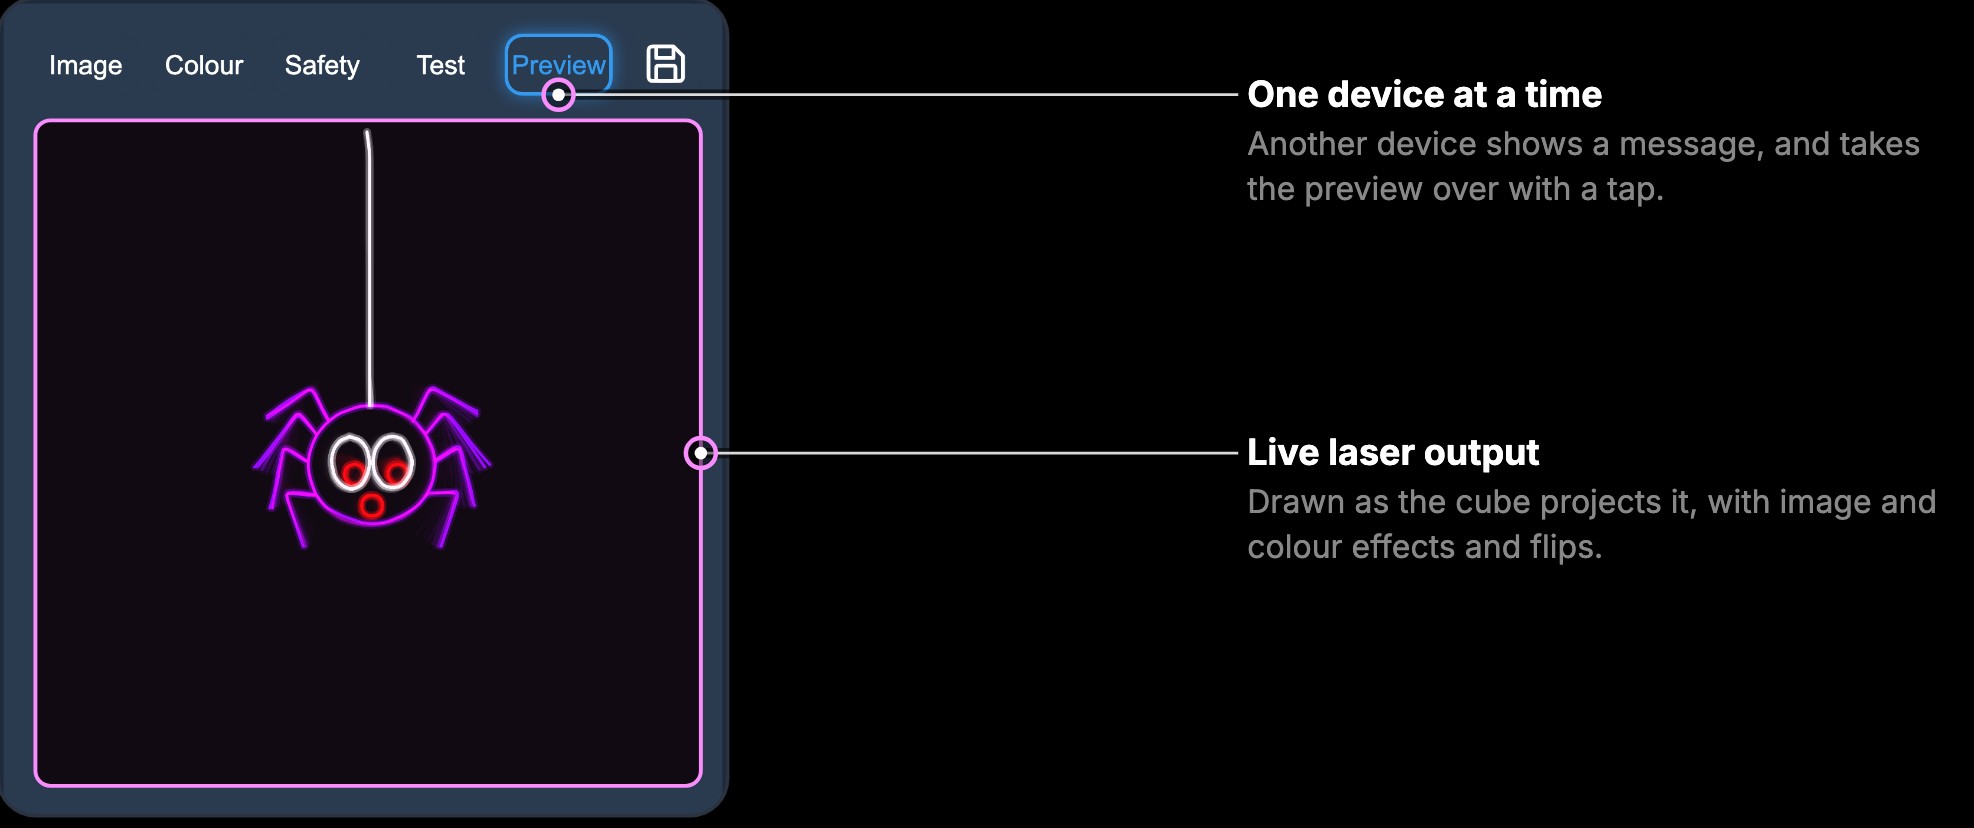
Preview shows the laser output live, as the audience sees it: after every picture setting, with any image and colour effects. One device shows it at a time: another shows a message instead, and takes the preview over with a tap. The LCD’s Preview closes while a device shows it.
Player Settings
The settings button opens three tabs: Playlist, Audio and General. Press Save to keep the changes on the Playlist and Audio tabs; an orange dot marks changes not saved yet. In visualizer control mode the first tab is called Visualizer and a BPM tab is added: see Visualizer Settings.
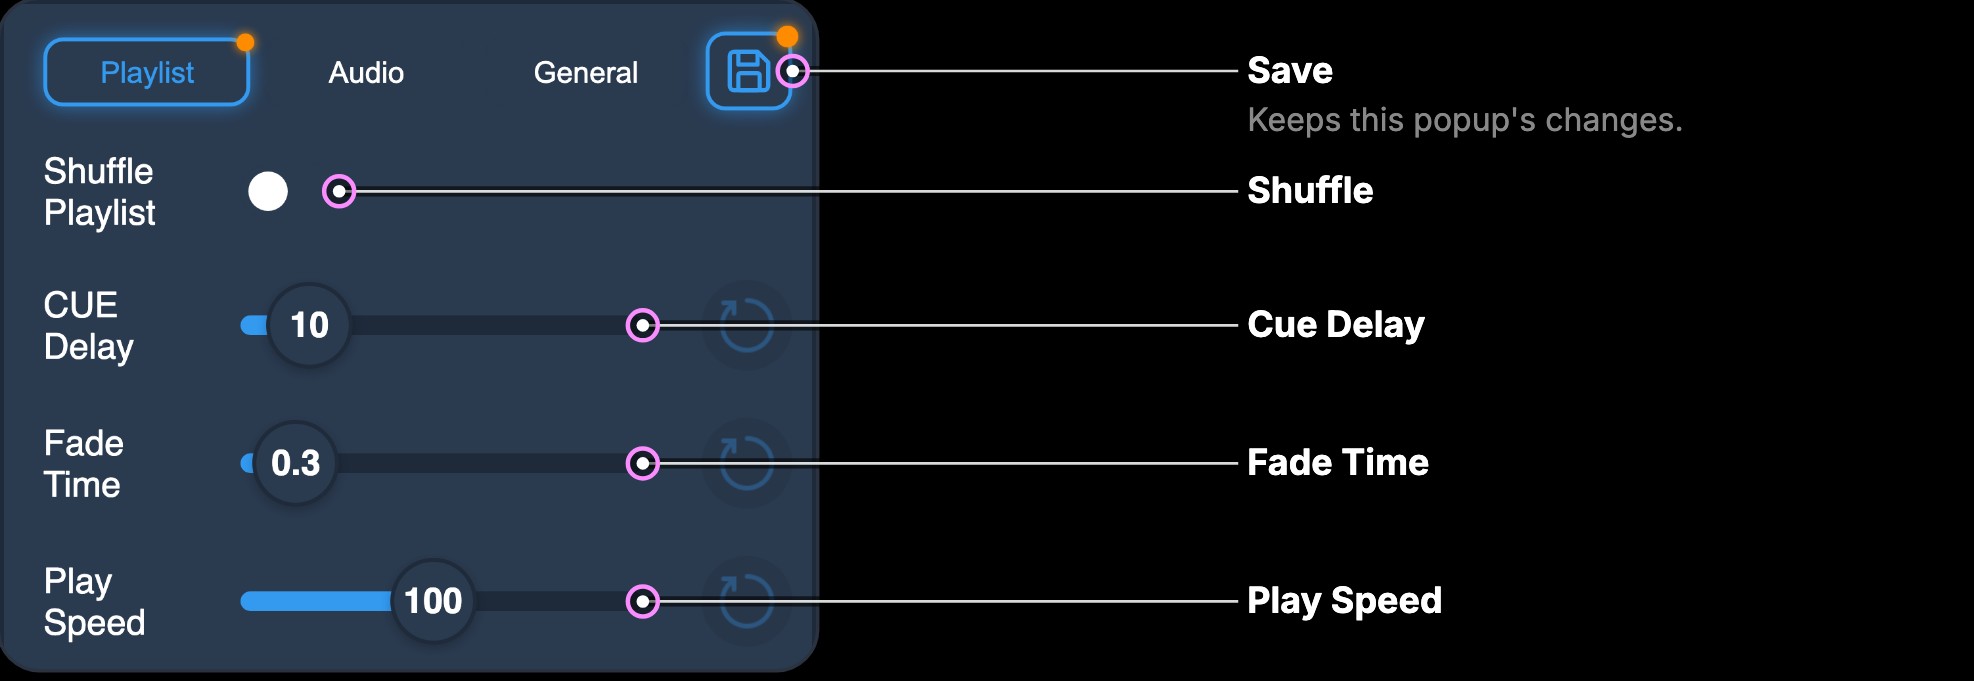
Playlist
- Shuffle: plays the cues in a random order.
- Cue Delay: how long each cue plays with Auto-Play on, 1 to 100 seconds.
- Fade Time: the fade between one cue and the next, 0 to 5 seconds in 0.1 second steps. 0 is no fade.
- Play Speed: the speed of animated cues, 10 to 200. 100 is normal speed.
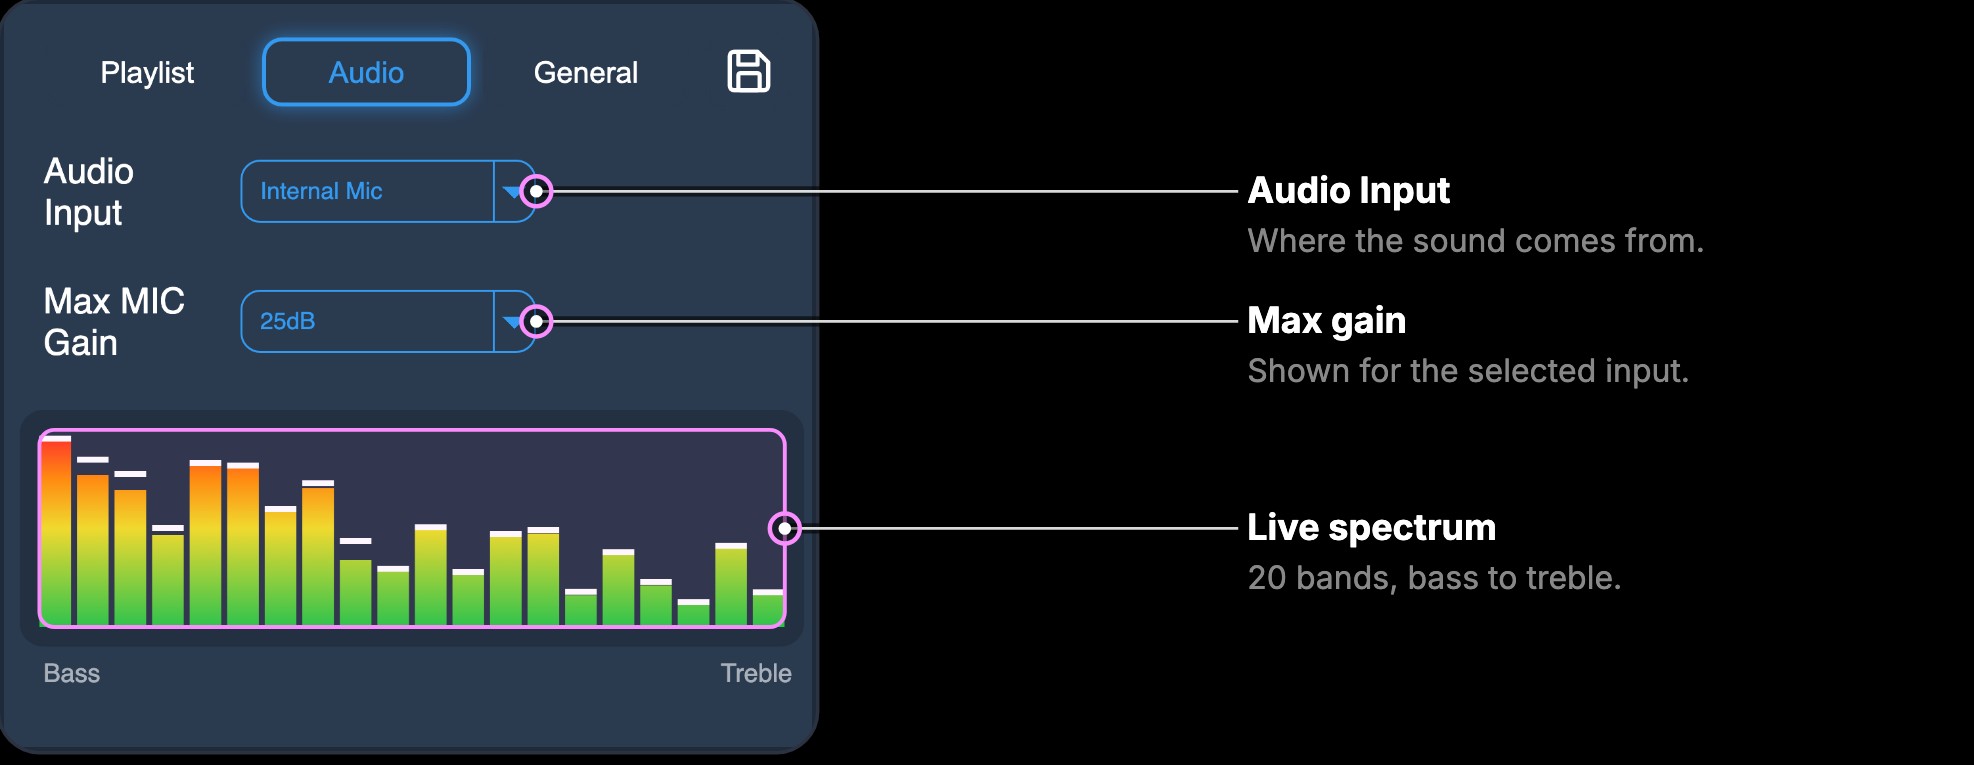
Audio is the cube’s audio input, as in the LCD’s Audio menu: Audio Input chooses where the sound comes from, with the maximum gain of that input below it. The live spectrum shows what the cube hears, in 20 bands from bass to treble. Bars that sit in the red mean the gain is too high.
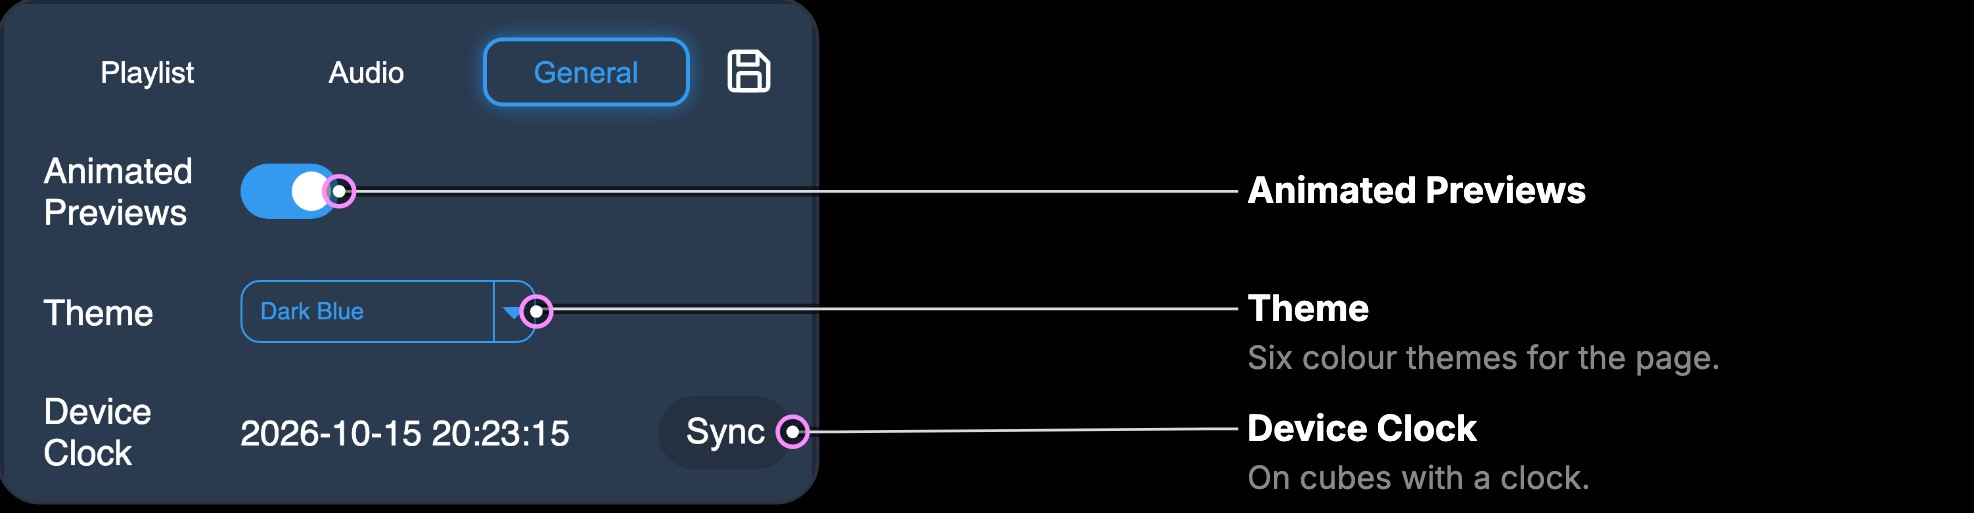
General
- Animated Previews: shows the cues as animated previews. This needs a fast device: Apple devices are slow with animated previews (animated .webp files), so leave it off on those.
- Theme: the page’s colour theme: Dark Blue, Icy Green, Dark Red, Pink, Purple or Orange. Your browser remembers it.
- Device Clock: on cubes with a clock (the Pro), the cube’s date and time. Sync sets it from your device; the page also sets it by itself when the cube’s clock has been lost or is more than a minute out.
Effects Menu
The colour wheel button opens the effects. The Image tab has the image effects and the Colorize tab the colour effects, and most of them react to the music. Tap an effect to turn it on, or No Effect to turn that tab’s effect off: one image effect and one colour effect can be on at once. An effect with settings, such as a speed, has a small triangle in the corner of its tile: press and hold it while it is on for its settings.
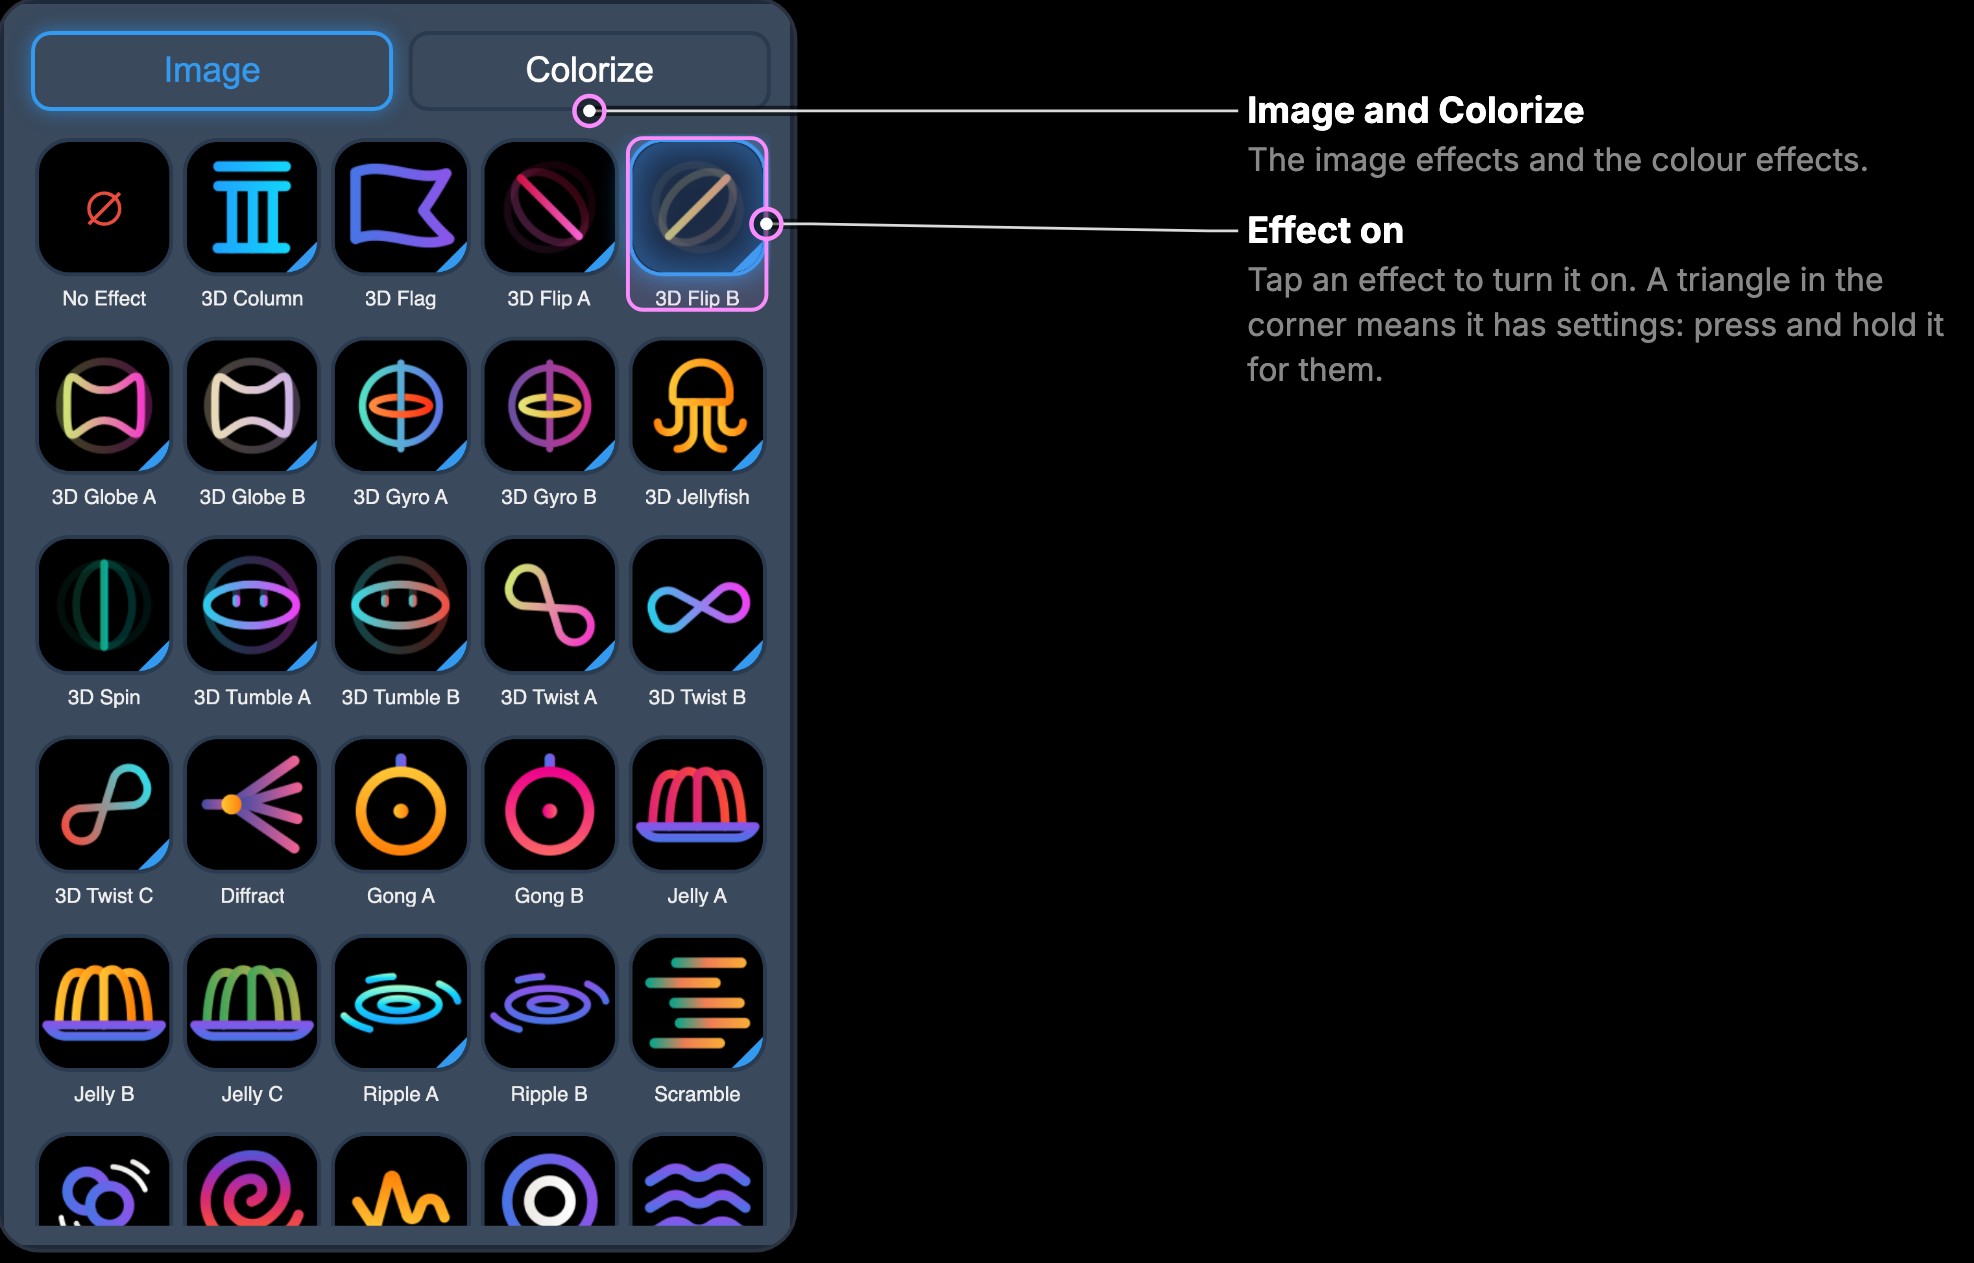
The effects are ready to use as soon as the page connects. See Built-in Effects for what each one does.
Playlist Options Menu
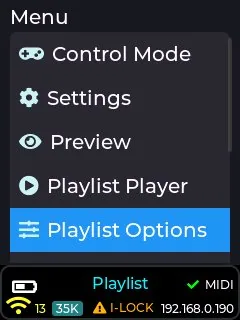
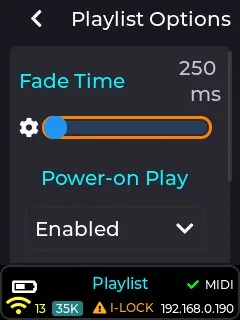
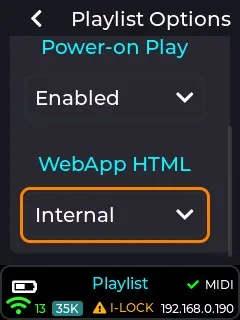
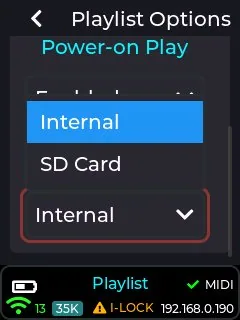
The playlist options menu is present on the top level menu (below the playlist player menu item) of the LCD UI when in playlist control mode
This menu allows you to adjust the fade in/out time between playlist items (default 250ms), the source of the web app html to be selected, and also allows the user to select whether the playlist starts projecting at power-on (immediately after interlock is enabled), or only after activating the projection button in the playlist player or web app. The default for power-on play is enabled, and any changes to this are retained thru power cycle.
The Fade time is used to control how fast the current item is faded out, and the new item is faded in. The fade is done through adjusting the brightness of the image/animation. Set this to 0ms for no fade in/out. Fade is retained thru power cycle.
The Options for Web html are internal factory app (default selection), or SD card. The SD card option is useful if the user wishes to customise the provided web app, assuming the user has the relevant HTML/CSS/JS knowledge.
Note: The web app is provided on the latest SD card image in the following location: /Lasercube/res/web/playlist_index.html
The file is a single HTML file containing all the HTML / CSS / JavaScript to run the web app.
The latest SD card contents are available on our GitHub Here: LaserCube SD Card Contents (https://github.com/Wickedlasers/mk2SDContent)
Laser Show Control Mode
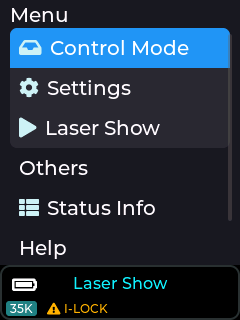
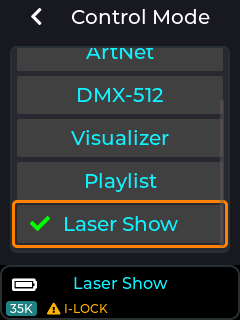
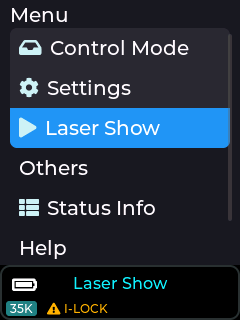
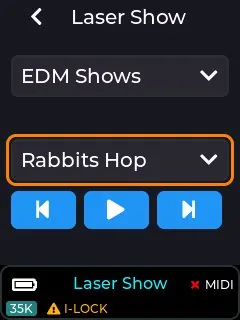
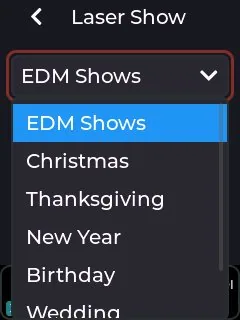
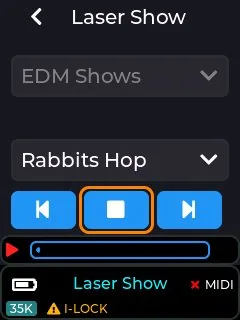
The latest version of the laser show player now has a categories selection drop-down menu, allowing the user to choose the type of laser show to play.
There are currently 38 shows to choose from throughout the 7 provided categories (EDM, Christmas, Thanksgiving, New Year, Birthday, Wedding, Halloween).
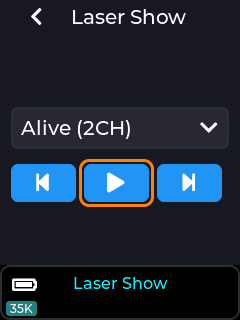
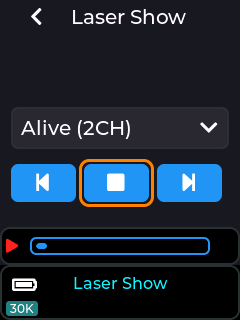
After choosing a category, selecting the Play icon will begin the show, and the player will advance to the next show in the selected category after the current show has finished playing. Manually choosing a different show from the playlist drop-down will also start the show, and also selecting via a connected MIDI controller.
Show audio will be played from the 3.5mm stereo audio output socket.
If Cube Link is enabled – see the Cube Link entry here: Cube Link
Selecting Play on a Cube Link Master will begin playback on the Master, plus any
Cube Link Slave devices configured with the same Link Channel and PIN.
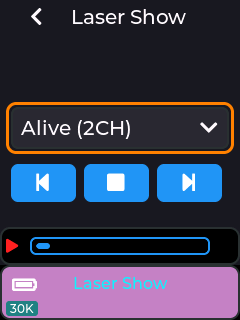
For laser shows designed for more than one projector, ensure the Group number is set on each Cube Link device. Cube Link connected Slave devices have the status area background changed to purple. Also ensure all cube link devices have the same show category selected before starting play (e.g. all devices have “EDM Shows” selected).
Note: The Laser shows are provided on the SD card supplied with the device. If no items are shown in the drop down then this could be due to the SD card not being inserted, or not having the factory contents present on the card. The latest SD card contents are available on our GitHub Here: LaserCube SD Card Contents (https://github.com/Wickedlasers/mk2SDContent)
Multi-projector Laser Shows
Using Cube Link, the playback of multi-projector laser shows can be synchronized.
Note: Ensure WiFi antennas are connected on all units before using Cube Link.
Example: Alive (2CH) Laser Show
Choose one LaserCube to be the Master. This will be the one which commands
playback to start on all the slaves. Set the Link Channel and PIN to be the same on all Cube Link connected devices. Select Group corresponding to the parts of the Laser Show, so for Alive (2CH) all Group 1 devices will project one part, all Group 2 devices the other.
Master
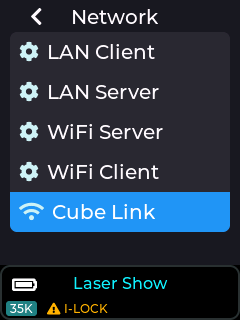
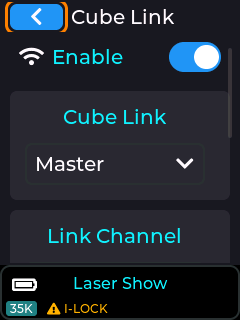
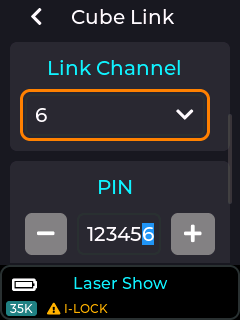
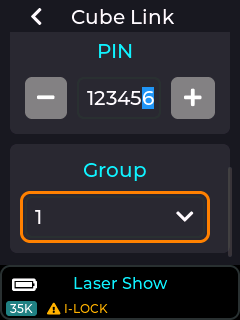
Slave
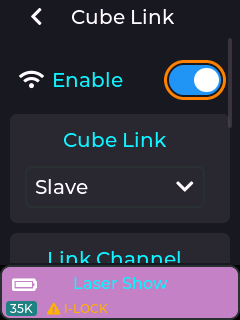
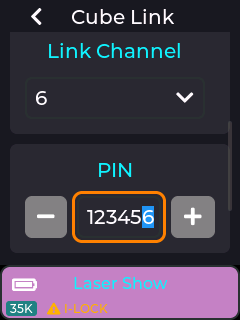
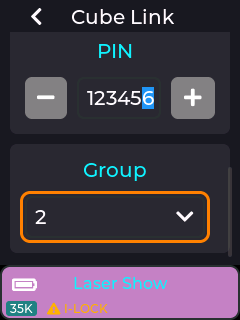
For a 2 channel show using 4 projectors, set 2 projectors to Group 1 and 2 projectors to Group 2. Only have one configured as a master though.
Selecting Alive (2CH) on the master will now start projection on all devices, providing the same playlist (EDM Shows in this example) is already selected on all devices.
Visualizer Control Mode
Since firmware 2.2, the Ultra MK2 / Pro has 197 built-in audio reactive visualizers, all listed below. A cube on older firmware has fewer (firmware 2.0 has 91) until it is updated (see Firmware Update). More visualizers will be added in future firmware updates.
The factory supplied SD card also includes example MIDI mapping of some of these visualizers to the APC40 MK2 / APC mini MK2 grid buttons.
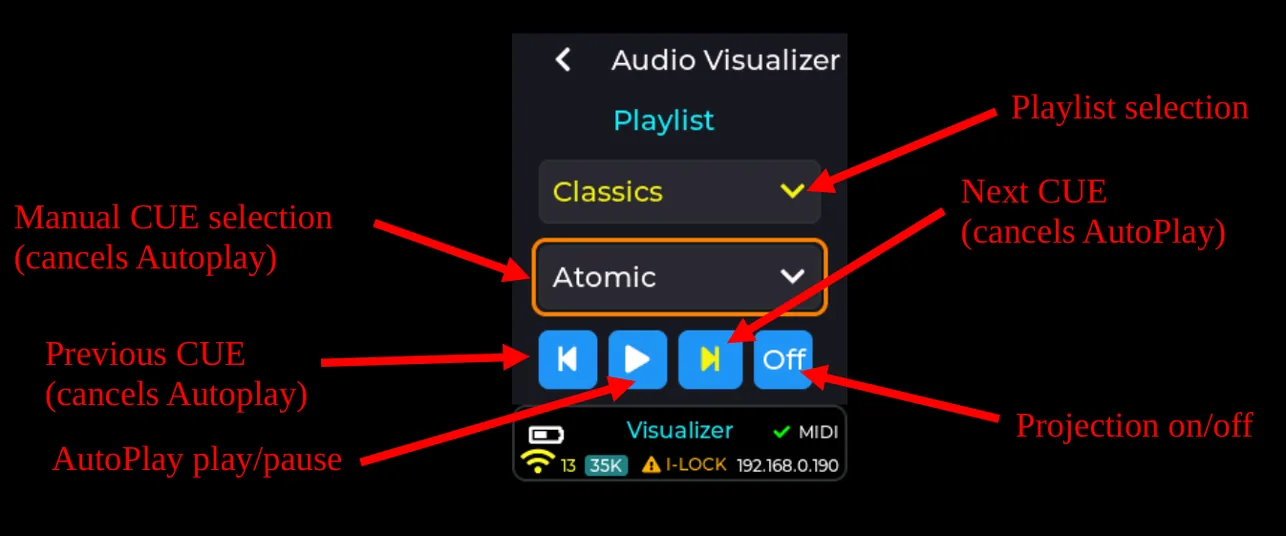
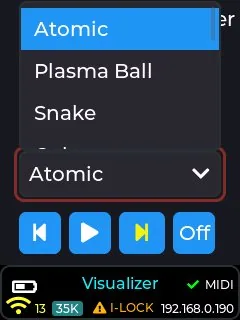
They are all built into CubeOS, and can be manually selected via the drop-down list once an active playlist has been selected (the “All” playlist holds every one of them).
These react to the Audio Input source configured in Settings -> Audio -> Audio Input, and the input can be either set to the built in microphone, or the 3.5mm stereo audio line input jack. The audio gain may also need to be adjusted based on the volume of the external audio.
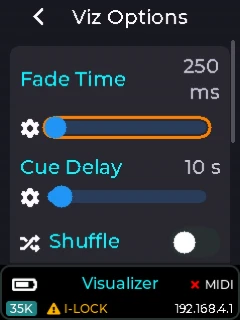
Some of the visualizers are also affected by the current tempo setting which can be set in Settings→Tempo menu on the LCD. The transition time when moving between visualizer CUEs can also be adjusted through the Viz Options menu. Auto play at power-on, the Cue Delay, Shuffle and the source of the web app (WebApp HTML) can also be set there.
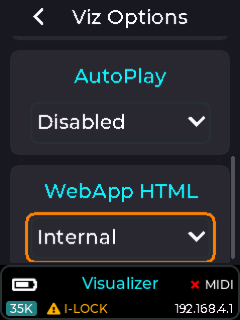
Below is the full list of the 197 visualizers in firmware 2.2, grouped by type.
Spectrum, Waveform & Audio Meters (26)
 | Spectrum 1 | FFT spectrum analyser - a row of vertical frequency bars rising from the baseline, coloured across the spectrum. |
|---|---|---|
 | Spectrum 2 | Spectrum-analyser variant drawn in a second bar style. |
 | Spectrum 3 | Spectrum analyser mirrored about the centre line, bars growing up and down from the middle. |
 | Voice | Voice / FFT-reactive visualizer that shapes the beam to the vocal content of the audio. |
 | Spectrum W1 | Terrain-style spectrum wave (port of ldTerra) - the FFT drawn as a rolling illuminated waveform landscape. |
 | Spectrum W2 | A second spectrum-wave style with a different rolling FFT waveform. |
 | Vocoder | Vocoder-style channels - the spectrum split into bands that pump with the music. |
 | Waveform | A live oscilloscope trace of the raw audio waveform drawn straight across the frame. |
 | FFT Beams | One radial beam per FFT bin fanning out from centre; length follows magnitude, hue runs bass=red to treble=violet. |
 | Audio Horizon | A mountain-skyline silhouette from 16 FFT bins, mirrored on a centre line; it scrolls and its peaks ride the audio. |
 | Audio River | A horizontal waveform from three bass/mid/treble sines with a dim reflection below, scrolling like a river of light. |
 | Audio Curtain | A column of hanging vertical strands that sway to their own FFT bin, with a travelling wave rippling through them. |
 | Audio Marquee | Vertical FFT bars scroll in from the right and wrap around the edges like a marquee; height, speed and hue track audio. |
 | Chord Choir | Seven staggered horizontal bars, each spanning with its own spectral band and drifting side to side; hues reshuffle on the beat. |
 | Pulse Matrix | A digital square-wave grid of rows toggling high/low with per-row FFT coupling; rows scroll together then split by phase on the beat. |
 | Mesh Wave | A woven cross-hatch of six warp and six weft lines; the raw waveform pushes each vertex radially so the sound ripples through the cloth. |
 | Spectrum Blob | A rainbow spiral of three loops round the centre, mirrored left and right, bulging outward with the bass and low mids. |
 | Spect Band 1 | Six bass-to-mid columns of dashes stacked green to red, each with a peak marker that drops back. |
 | Spect Band 2 | Eight evenly spaced frequency columns of dashes, green at the bottom to red at the top, with falling peak markers. |
 | Spect Band 3 | Ten columns across the whole spectrum lit green to red over a dim blue grid of unlit dashes, with falling peak markers. |
 | Spectrum Flower | Three nested petal rings turning in 3D, each petal reaching out with its frequency band, the bloom swelling when loud. |
 | Spectrum Mtn | Mirrored spectrum ridges, bass below and highs above, with echoes trailing into the distance as the range tumbles in 3D. |
 | Sine Bands | Mirrored rails of dotted sine waves, each band swelling with its own part of the music. |
 | Speaker Dots | Rows of dots pushed outward by the sound like a speaker cone, the colours cycling faster when louder. |
 | Sound Ribbon | A wide ribbon snaking across the frame, its width traced by the bass. |
 | Ocean Swell | Wave crests roll toward you, each wave’s height set by part of the music. |
Particles, Swarms & Trails (37)
 | Flying Stars | Stars flying through the frame to the beat (port of ldFlyingStars). |
|---|---|---|
 | Snake | A beam snake that slithers around the frame (port of ldBeamSnake). |
 | Warp Stars | Classic hyperspace warp - white stars streak outward from a vanishing point; bass drives the warp speed. |
 | Fireflies | A grid of bouncing dot particles, each trapped in its own cell, whose speed and movement style shift with the FFT every few bars. |
 | Constellation | Ten stars faintly linked in a cycle, each on its own audio-driven path bouncing off the bounds so the shape keeps morphing. |
 | Radial Bursts | Expanding ring bursts spawn at random angles on audio peaks, over a slow inner heartbeat ring. |
 | Meteor Swirl | Falling meteors on curved, wind-sheared trajectories, continuously spawned with audio-driven density and bend. |
 | Fireworks | Radial firework bursts fired on each audio peak (BPM-synced at silence); particles drift out under gravity and fade. |
 | Audio Fountain | Particles erupt from the bottom-centre, arc up and fall under gravity with bright trails - a fountain of light driven by sound. |
 | Polar Snake | A ring-buffer trail wandering toward random targets that re-roll on each bass peak; hue rotates along the trail. |
 | Warp Streaks | Particle streaks fly outward from centre along log-spiral arms; the scene rotates and flips direction on each bass peak. |
 | Radial Dots | Eight-fold radial symmetry of dwell-dots on curved outward paths; bins drive activity, bass speed, treble hue. |
 | Emberlight | An ember column rising from the bottom, each particle trailing a warm gradient tail along a swaying sinusoidal path. |
 | Facet Storm | Eight faceted hexagonal jewels orbit the centre, each spinning and flipping direction on bass peaks - a polyrhythmic storm. |
 | Flare Garden | Five flares rooted on a ground line, each a swept stem capped by a bloom; stems grow on bass, sway on mid, blooms pulse per bin. |
 | Radial Cascade | Twelve spokes each carrying a stack of tick marks travelling outward and wrapping back, each pulsing at its FFT bin’s rate. |
 | Lanterns | A swarm of hexagonal lantern silhouettes wandering on Lissajous orbits, each growing on hits of its own FFT bin. |
 | Spark Rings | Orbiting emitters on concentric circular tracks, each driven by its own band, spraying tight rings of spark dots. |
 | Fleas | Fleas settle inside a circular bowl; a beat hit makes them jump up and swirl again. |
 | Flow Field | Particles advected by a sin/cos vector field, leaving hue-aged curved trails. |
 | Gale Ribbons | Wind-streak particles flowing along a turbulent vector field; raw audio gusts them into long braided ribbon tails. |
 | Starfield Drift | A parallax star swarm streaming outward toward the viewer, bass warping the drift forward and easing back in quiet. |
 | Auto Draw 1 | Three rainbow trails scribble over a turning sphere, changing course on the beat and spinning a new way on peaks. |
 | Auto Draw 2 | Two pens hatch zigzag arcs over a large and a small spinning sphere, reversing on peaks and changing colour on the beat. |
 | Auto Draw 3 | Two pens draw rings round a turning sphere, changing axis and ring size with the bars, its spin changing on beats and peaks. |
 | Bubbles | Blue and white bubbles drift upward and squash into each other, pulsing with the beat and swapping in and out on peaks. |
 | Lattice | Trails crawl over a spinning 3D grid on the beat, the box swelling into a sphere and back; peaks reverse the spin. |
 | Particles 1 | Spinning squares flung out and curled back to the centre, bigger and wider when louder, colours stepping on each beat. |
 | Particles 2 | Spinning squares burst from the centre, bigger and wider when louder, turning from blue to yellow and red on bass hits. |
 | Polar Symmetry | Three colour trails wander a spinning sphere, mirrored four ways; louder music spins it faster and loud peaks reverse it. |
 | Stream | Four coloured ribbons pour down from one point at the top, each swaying with its own band; bass hits make them swell. |
 | Vortex | Coloured dashes spiral towards you down a swirling tunnel that flares on loud music, changing pattern every two bars. |
 | Worm | A braided worm of coloured dots coiling in 3D; treble widens and brightens it, bass twists it, peaks change its spin. |
 | Plankton Storm | Drifting clouds of plankton, each lit by its own frequency, shimmering with short tails. |
 | Starling Cloud | A starling murmuration wheeling through space, stretching on the bass. |
 | Galaxy Arms | Spiral galaxy arms sweep from an empty core, and peaks fling stars across the frame. |
 | School Fish | A shoal of fish sweeping in banking formation, scattering on peaks and regrouping. |
Geometric & Parametric Patterns (78)
 | Swirly Spheres | Nested swirling spheres of light (port of ldSwirlySphere). |
|---|---|---|
 | Synesthesia | A flowing synesthetic colour-and-form field reacting to the music (port of ldSynesthesia3). |
 | Cubes | A spinning 3D cube (port of ld3dCube). |
 | Sunshine | A radiant sun with pulsing rays reacting to the music (port of ldSunshine). |
 | Wave Circles | Concentric circles rippling with the audio (port of ldWaveCircles). |
 | Lotus | An unfolding lotus-flower geometry animated to the music (port of ldLotus). |
 | Circle Arc | A rotating 3D circle-arc figure (port of ld3dCircleArc). |
 | Atomic | Orbiting electron rings around a nucleus, spinning to the beat (port of ldAtomic). |
 | Plasma Ball | A plasma-ball orb with arcing tendrils reacting to sound (port of ldPlasmaBall). |
 | Butterfly | A butterfly-curve figure fluttering to the audio. |
 | Halo | A glowing halo ring that breathes with the audio. |
 | Turbine | Spinning turbine blades radiating from centre, rotating to the beat. |
 | Lissajous | Animated Lissajous figures morphing through figure-eight, pretzel and knot shapes; bass accelerates the phase across five ratios. |
 | Orbit Collider | Eight bright points orbiting an invisible circle with lossless elastic collisions; bass bins drive the circle radius. |
 | Tunnel | Concentric hexagonal rings flying toward the viewer for a warp-tunnel effect; each ring’s colour follows its FFT band, bass sets speed. |
 | Arc Carousel | Three concentric rings of arc segments spinning in alternating directions; bass expands radii, treble cycles hue. |
 | Orbital Chain | Eight dots on a closed chain morphing circle -> ellipse -> figure-8 with audio, traced by a thin connecting line. |
 | Phasor Grid | A 3x3 grid of little rotating radial phasors, phase-offset by cell so they read as a propagating wave when energetic. |
 | Radial Wedges | Pie-slice wedges fanning from centre, their widths and tip radii breathing unevenly with the audio bands. |
 | Ripple Grid | A coarse grid of horizontal curves poked by a moving radial ripple from an orbiting source; amplitude pulses with bass. |
 | Pulse Chevron | A vertical stack of chevrons sliding upward and wrapping; width and tilt breathe with the FFT bands. |
 | Kaleido Dots | A 3-fold kaleidoscope of always-on drifting dots; bass swells radii, mid widens the sway, treble cycles hue. |
 | Kaleido Lines | A 10-fold kaleidoscope traced as one continuous mirrored polyline through five reflection axes. |
 | Bell Pulse | Four bell-shaped silhouettes on the cardinal axes, their width breathing with bass and hue pushed by treble. |
 | Phase Swirl | A 3:2 Lissajous with a continuously drifting, bass-driven phase, walking the figure through every shape in the family. |
 | Red Hot | Eight rectangular arms forming an asterisk; each FFT band shortens an opposing arm pair, staying symmetric across centre. |
 | Damped Swirl | A harmonograph - one long damped Lissajous curve whose parameters drift so the figure morphs without ever resetting. |
 | Fractal | Recursive 5-branch fractal subdivision on triangle / square / line bases that morph on audio peaks, with a depth-based hue gradient (port of ldFractal4). |
 | Sine Grid | Phase-offset strands weaving through each other with a corkscrew twist; bass drives scroll and rotation, peaks flip direction. |
 | Sonar Ping | Concentric expanding wavefronts drawn as isolated radial tick-marks pinging outward, like a sonar sweep. |
 | Quasar Braid | Six strands twisted into one left-to-right braid; each strand’s FFT bin drives its sway, bass tightens the corkscrew twist. |
 | Spiral Fill | A space-filling Archimedean spiral with four colour modes (helix, bands, tri-helix, vertical bands) cycling every bar. |
 | Hypocycloid R | A single hypocycloid rosette whose inner-radius ratio sweeps each bar to morph cusp counts; treble runs hue, bass sharpens cusps. |
 | Pie Beam | Two rotating pie cones of stratified rays sweeping the frame; bass opens the cone angle, modes cycle each bar. |
 | Cissoid Flick | A mirrored pair of parametric cissoid cusps rotating with tempo; bass peaks flick the cusps to a new shape then settle. |
 | Black Hole | A tunnel of rings flies toward you along a winding path that turns on peaks, the rings squashing on the beat. |
 | Chaos 1 | A knot of spinning spiral-wound tendrils that shoot out on the beat, thicken with the mids and flash red on peaks. |
 | Chaos 2 | Nested shells of four leaf-shaped petals tumble in 3D, stretching with the volume and flashing red on peaks. |
 | Chaos 3 | Propeller-like pairs of bent petals tumble on three axes, swelling on peaks and changing spin on beats and bars. |
 | Corners | Six corner fans of a cube seen down its diagonal, morphing each bar between pyramid, cube and star shapes, the spin changing on peaks. |
 | Dance Floor | A 4x4 disco floor of red, green and blue tiles flashing with the beat and peaks, the lit tiles hopping across the grid. |
 | Disc | Two rainbow rings, inner swelling with the bass, outer with the treble, with lightning striking between them on the beat. |
 | Echo Ellipse | Five echoing rings tumble in one slowly shifting colour, spreading apart with the bass and in depth on peaks. |
 | Halo Rings | Two wavy rings seen edge-on make a wide rainbow band of crossing waves, one reversing on peaks, fraying when it gets loud. |
 | Hydra | Three serpent arms swim round the centre in 3D, swelling with the volume, swerving on peaks and changing colour each bar. |
 | Incal | An octahedron of eight triangles folds open and shut every few bars, changing colour on the beat and its spin on peaks. |
 | Polygon 1 | Two nested rainbow seven-point stars; bass bends the sides inward, treble makes the star denser, beats turn it a step. |
 | Polygon 2 | A smaller pair of nested seven-point stars whose sides bow outward with the bass, their colours sweeping with the volume. |
 | Rail | A twisted ladder tumbles through space, its two ends changing speed on peaks, its spin each bar and its colours on beats. |
 | Ribbon | Six looping rainbow ribbons fan out from the centre, reshaping each beat, spreading or bunching each bar, turning on peaks. |
 | Rotating Circles | Seven rainbow stars swirl in a pattern that changes every two bars, growing with the volume and pulsing on the beat. |
 | Grid 1 | A rainbow line lattice with a white centre that opens with the volume, turns with the bass and shimmers with the mids. |
 | Grid 2 | A rainbow lattice of dots pushed in and out by a ripple that jumps on treble beats, opening with the volume. |
 | Sphere Dancing | Five wavy rings round a tumbling sphere reverse their spin on each beat, reshape every two bars and recolour on peaks. |
 | Spinning Arcs | Nested rainbow quarter-circles spin, beats tipping them into a tumbling ball, the whole nest swelling with the volume. |
 | Spiral Tunnel | A rainbow spiral spinning to the tempo and slowly winding and unwinding, the sound rippling outward along its arm. |
 | Spirals | Four spiral ribbons wound round a turning ball, reshaping over the bars, recolouring on beats and changing spin on peaks. |
 | Stellar Sphere | Wire spheres of curved arcs morph every four bars into fans, sheets or nested rings, recolouring on each beat. |
 | Super Symmetry | A six-fold flower of comet trails for bass, mid and treble, swelling with the music and pulled to the centre on peaks. |
 | Symmetry 1 | A 3-fold kaleidoscope of elastic whips flicked by the volume, two sets in neighbouring colours, turning with the beat. |
 | Symmetry 2 | A 4-fold kaleidoscope of elastic whips flicked by the volume, two sets in neighbouring colours, turning with the beat. |
 | Symmetry 3 | A 5-fold kaleidoscope of elastic whips flicked by the volume, an opposite-colour set between the arms, turning with the beat. |
 | Symmetry 4 | A 6-fold kaleidoscope of elastic whips flicked by the volume, an opposite-colour set in alternate gaps, turning with the beat. |
 | Symmetry 5 | A six-armed jellyfish of whips kicked by the bass and beat, spreading wider on bass and reversing its spin on peaks. |
 | Triangles | Three tumbling 3D triangles with sweeping arcs that reshape every bar, recolour on the beat and re-spin on peaks. |
 | Tunnel Rects | Rectangular gates fly down a bending tunnel in tempo, sides filled like level meters and coloured blue to red by loudness. |
 | Wave | A rolling sheet of striped wave rows that reshapes every bar, recolours every two beats and changes its ripples on peaks. |
 | Lituus | A spiral swept from centre to rim in rotating kaleidoscope copies, turning with the beat. |
 | Op Art Warp | An op-art field of lines bent by a travelling bulge that deepens with the bass. |
 | Orbital Arcs | A sphere of orbiting arcs pulsing out in shells, one for each part of the music. |
 | Ripple Dome | Rings ripple over a dome: the bass raises the waves and the treble speeds them up. |
 | Spiral Stair | A spiral staircase round an empty core, each step driven by the music. |
 | Tesseract | A 4D hypercube turning through its extra dimension, seen as two wireframe cubes trading places. |
 | Cyclone Eye | Hurricane arms spiral round a calm eye that opens and closes with the volume. |
 | Phyllo Sphere | A dotted sphere tumbling on every axis as ripples roll pole to pole and the bass swells it. |
 | Cassini Split | Nested loops that pinch and tear into triangles of lobes as the music gets louder. |
 | Chord Cardioid | String-art chords forming morphing cardioid shapes in two counter-rotating webs. |
 | Clifford Bloom | Strange-attractor orbits trailing long filaments, reshaping with the music. |
Beams, Lines & Mirrors (21)
 | Crossed Lines | Beams drawn as crossing lines sweeping the frame (port of ldBeamCrossedLines). |
|---|---|---|
 | Solaris 1 | A sun-flare beam burst radiating from centre (style 1). |
 | Solaris 2 | A sun-flare beam burst radiating from centre (style 2). |
 | Rage Bass 1 | A high-energy beam pattern that slams with the bass. |
 | Dashed Lines | Dashed beam lines animated to the music. |
 | Spotlights C | Circular spotlights sweeping across the frame to the beat. |
 | Spotlights T | Triangular spotlights sweeping across the frame to the beat. |
 | Linear C | A circle base shape animated with linear beam sweeps. |
 | Linear L | A line base shape animated with linear beam sweeps. |
 | Linear S | A square base shape animated with linear beam sweeps. |
 | Mirror Curves | Symmetric mirrored curves reflected across the frame’s axes. |
 | Mirror Lines 1 | A mirror-symmetric straight-line beam pattern (style 1). |
 | Mirror Lines 2 | A mirror-symmetric straight-line beam pattern (style 2). |
 | Mirror Rays | Rays radiating with mirror symmetry across the frame. |
 | Hypnotic Lines | Twelve rainbow lines form a turning cylinder, star, wave or comb, morphing every few bars, colours jumping on peaks. |
 | Pendulums 1 | A fan of pendulums swings from the centre, drifting in and out of step, their arms lengthening as the music gets louder. |
 | Pod 1 | Four rays from the centre bend into curved streaks as they tumble, changing spin every other bar and colour each beat. |
 | Pod 2 | Six spikes whip round a pulsing core in warm and cool colours, trailing the spin, which flips direction on peaks. |
 | Rosace | Five dashed, wavy beams cross the centre in a spinning rosette, reshaping every two beats and changing colour on peaks. |
 | Symmetry Flip | Three fading trails driven by bass, beat and treble, mirrored across both axes; loud bass pulls them inward. |
 | Symmetry Rotate | Three fading trails driven by bass, beat and treble, copied in a quarter-turn pinwheel; loud bass pulls them inward. |
Characters & Novelty (14)
 | Disco Stu | A dancing stick figure that performs shuffled dance moves to the music, ending each on a bass kick with crossfaded poses. |
|---|---|---|
 | Sunflower | A potted sunflower that dances to the music, using the same move-sequencing engine as Disco Stu. |
 | Cactus | A potted saguaro cactus that dances to the music, sharing the dancing-figure engine. |
 | Lazer Lips | Two animated lip curves whose openness, spread and sibilance follow the audio - a lip-sync mouth. |
 | Dancing W1 | A dancer with 11 moves, including a leap, who breathes idly when the music goes quiet. |
 | Dancing Man | A streetwear dancer with disco points, hip swings, twists and shuffles. |
 | Dancing W2 | A dancer with a bob haircut, whose moves include a moonwalk and a spin. |
 | Dancing MJ | A dancer in a low fedora, short jacket, cropped trousers and loafers. |
 | Dancing Bear | A teddy bear with round paws, dancing on its short legs. |
 | Dancing W3 | A dancer in a black dress, working through 15 moves on the beat. |
 | Dancing Alien | A grey alien with a big egg-shaped head and long stick limbs. |
 | Dancing Bird | A crow-like bird dancing with its wings for arms. |
 | Dancing Elf | A Christmas elf in a floppy hat with a pom-pom, and pointed ears. |
 | Dancing Santa | Santa Claus with a round belly, flowing beard and fur-topped boots. |
Halloween (21)
 | Zombie Z1 | A shambling zombie dancing ten moves. |
|---|---|---|
 | Ghost G1 | A sheet ghost that hovers, swoops and fades in and out, banking as it moves. |
 | Pumpkin P1 | A candle-lit jack-o’-lantern on a curly vine that headbangs and cackles; its head can spin or pop off. |
 | Pumpkin P2 | A pumpkin-headed stick dancer with 17 moves, its grin following a voice. |
 | Skull S1 | A 3D skull with expressive brows, red eyes that keep eye contact, and a talking jaw. |
 | Dancing Bones | A full skeleton dancing 12 moves locked to the beat, standing and breathing in the quiet. |
 | Spider 2D | A purple spider on a silk thread, riding up and down it, swinging and spinning to the music. |
 | Spider 3D | The same spider built from solid shapes, seen in three-quarter view. |
 | Bat B1 | A bat that flaps, swoops and barrel-rolls, and sleeps upside down when the music stops. |
 | Bat B2 | The same bat drawn as one continuous silhouette line, with big round eyes. |
 | Witch 2D | A witch on a broomstick, hat and cape streaming, cackling on the strong beats. |
 | Witch 3D | The same witch in solid shapes, looping and diving through depth. |
 | Black Cat 2D | A soft cat that sways, hisses and prowls, and grooms its paw in the quiet. |
 | Black Cat 3D | The same cat in three-quarter view, with jointed legs and a long tail. |
 | Vampire 2D | Dracula sweeps his cape open on the bass and bursts into a swarm of bats on a drop. |
 | Vampire 3D | A vampire whose cape, purple outside and red inside, wraps forward like wings. |
 | Mummy 2D | A stiff, lurching mummy whose bandage unravels and whips round him. |
 | Mummy 3D | A shuffling mummy with bandages wound round solid limbs. |
 | Thing 2D | A disembodied hand that walks on its fingertips, taps, snaps and waves. |
 | Thing 3D | The same hand in solid shapes, doing handsprings, backflips and pirouettes. |
 | Slimer | A green ghost that flies about, chomps to the bass and eats from his hands. |
The Visualizers can also have additional audio reactive image/colour effects added to them, configured from the Effects menu.
See the effects page here: Effects or the online wiki for more info on the built in effects, and also the tempo menu which will affect the speed of some BPM based effects.
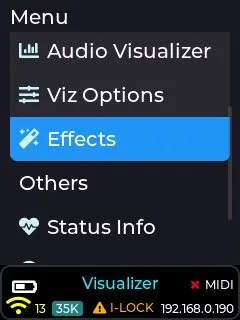
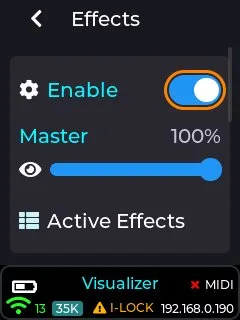
Select an effect to configure from the “effect config” drop-down list, or list the currently active effects using the “Active Effects” button.
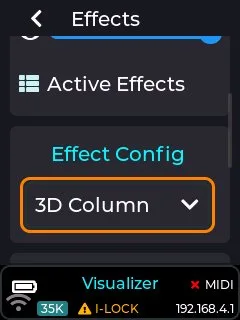
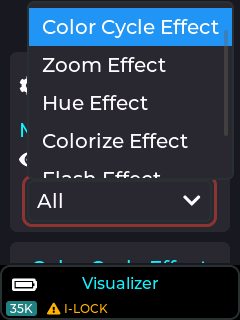
Color Cycle Effect adjustments
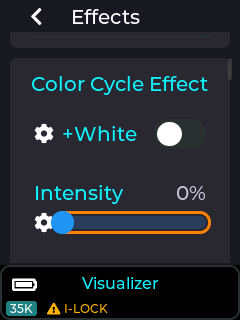
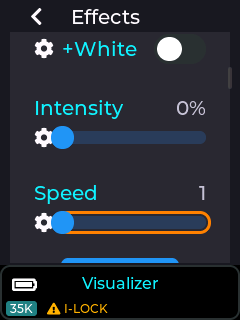
Zoom Effect adjustments
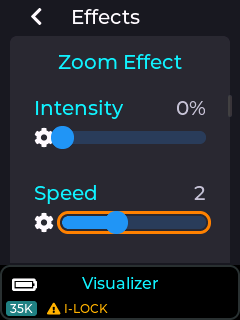
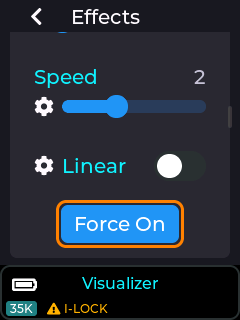
Hue Effect adjustments
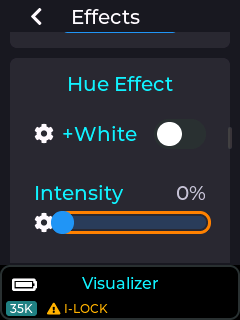
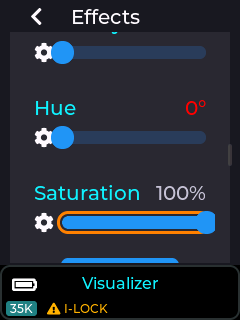
Colorize Effect Flash Effect Strobe Effect
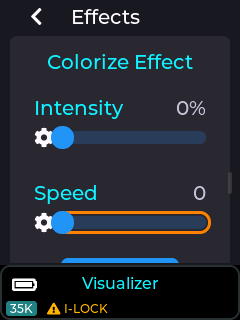
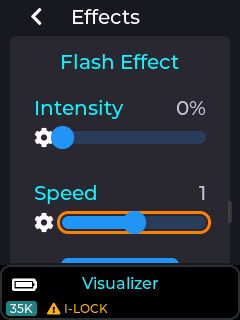
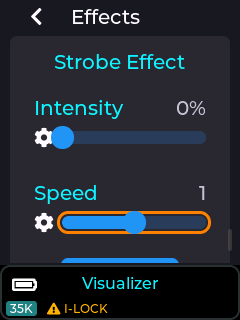
Note: There are currently over 70 effects to choose from, each with their own adjustments, and the above are only an example of some of these effects.
Visualizer Web App
In visualizer control mode the cube serves the same web app as in playlist mode (see Playlist Player Web App), with the visualizers in its grid. Connect to it in the same way: join the cube’s network, then enter the cube’s IP address in your web browser. The cube shows its address in the bottom right corner of the LCD status bar. In WiFi or LAN Server mode it is normally 192.168.4.1; on your home network, your router gives the cube its address.
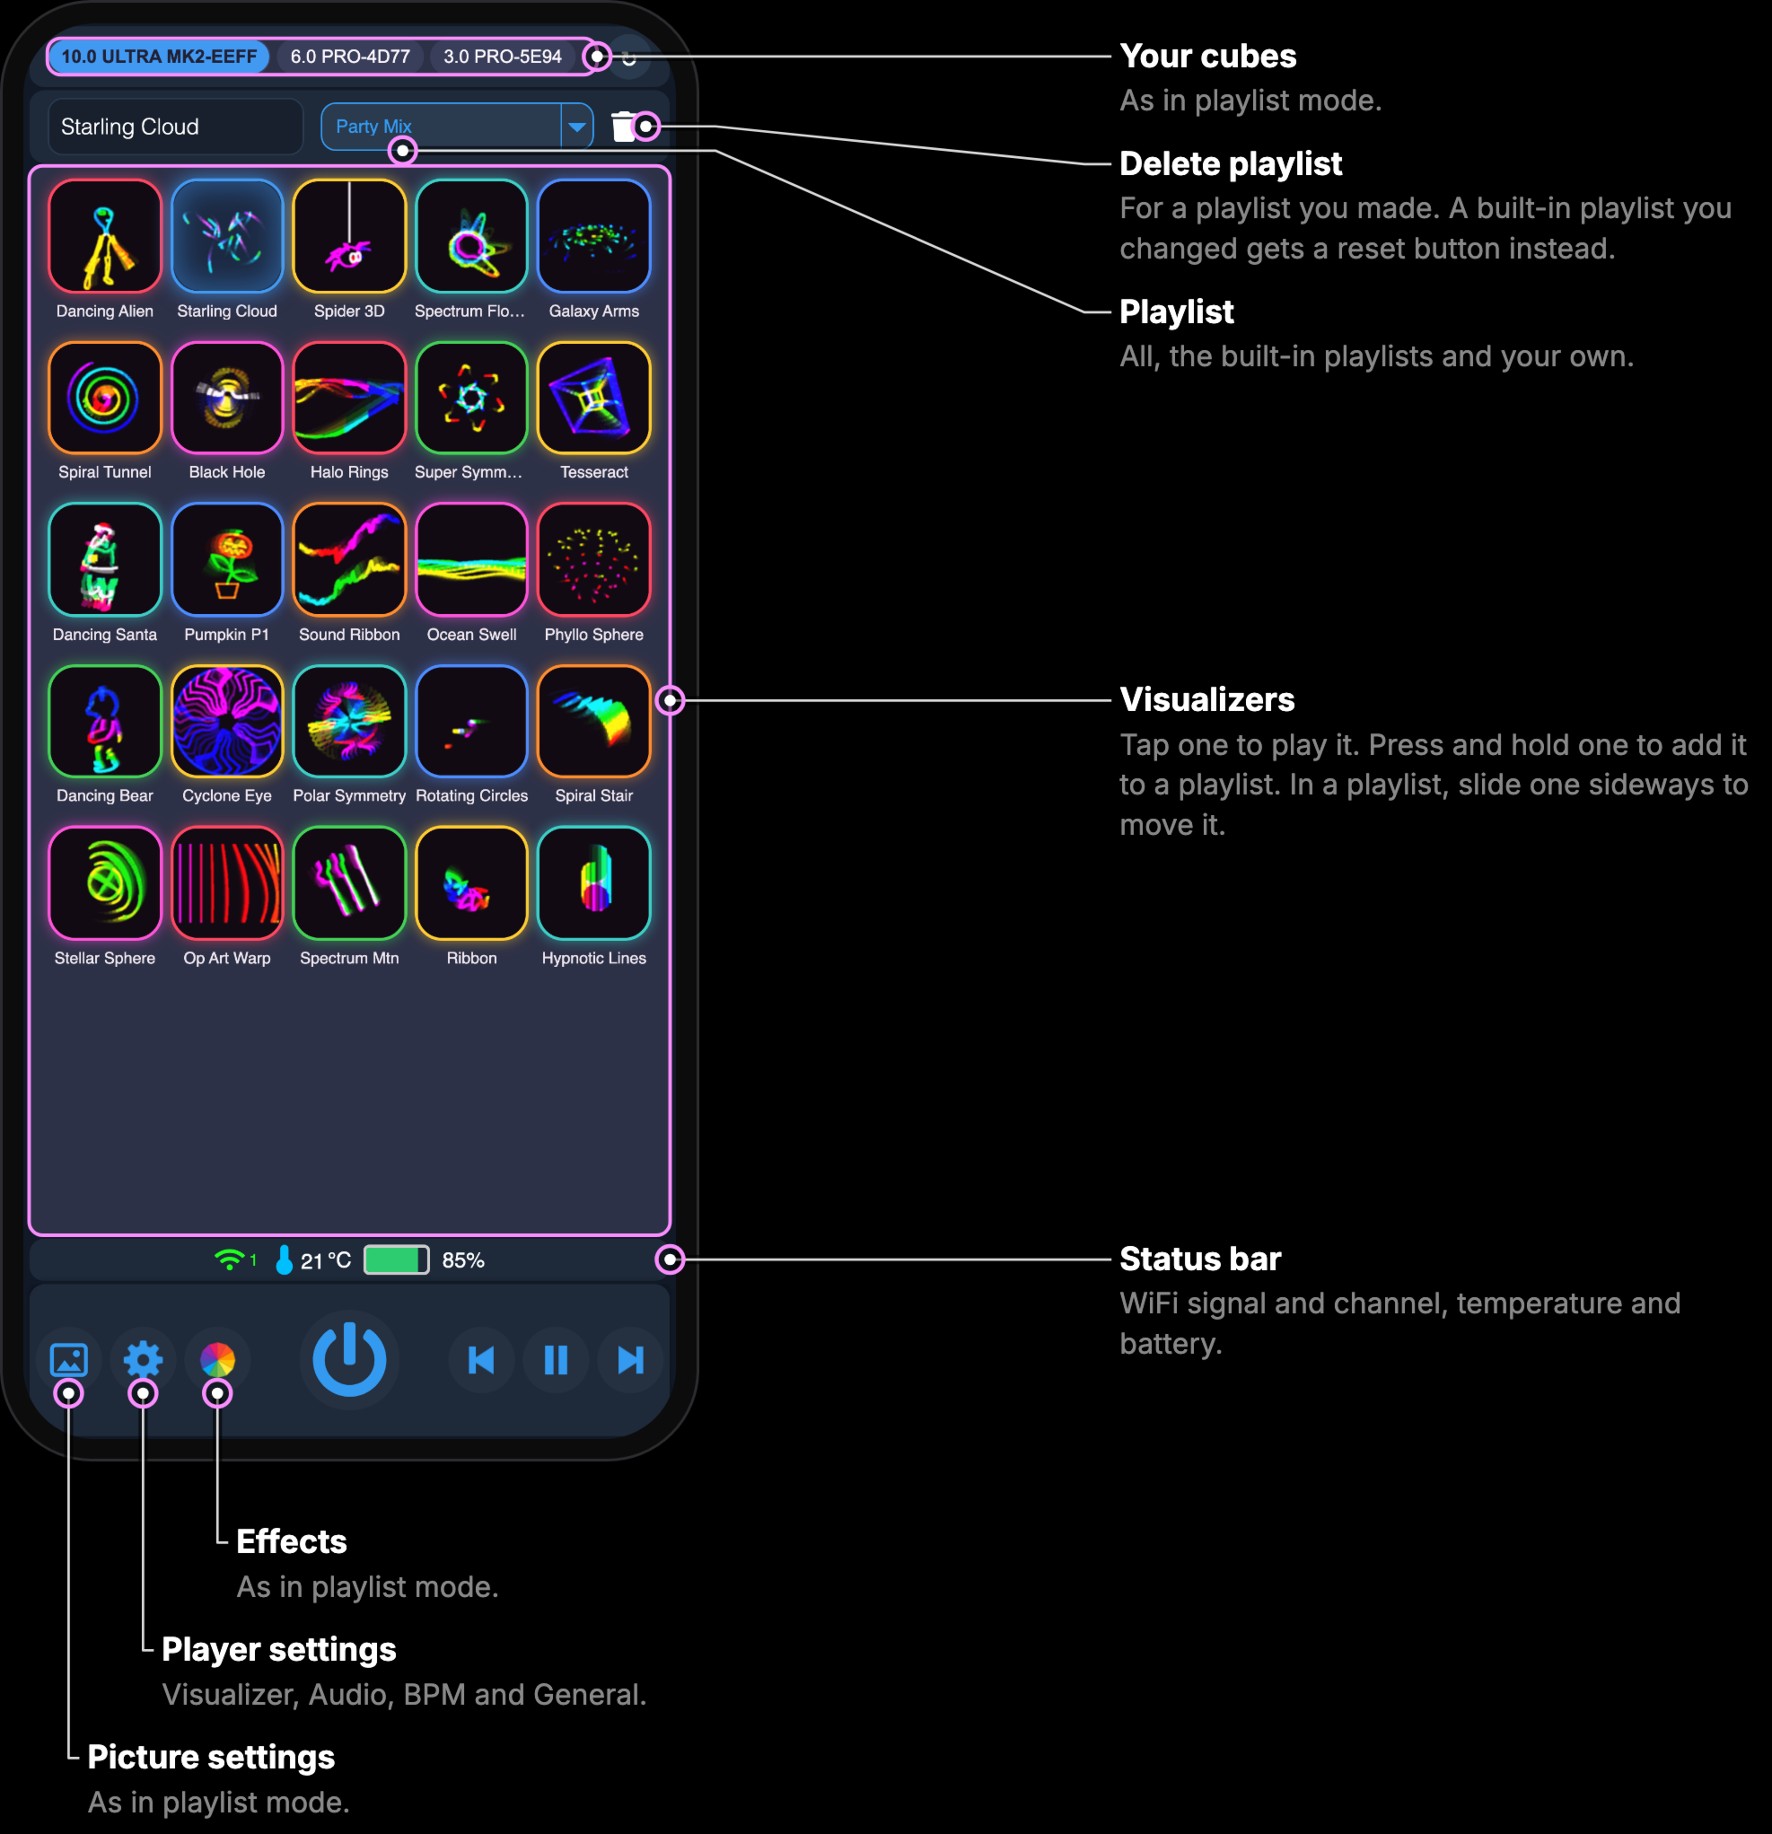
- Visualizers: tap one to play it.
- Playlist: All has every visualizer. There are also the built-in playlists, such as Classics, and the playlists you make yourself (see Your Playlists below). The SD card contents for firmware 2.2 add WL Halloween, a playlist of the 21 Halloween visualizers.
- Picture settings and Effects work as in playlist mode: see Picture Settings and Effects Menu. The player settings have a Visualizer tab and a BPM tab: see Visualizer Settings below.
Note: make sure your SD card has the latest SD card contents from our GitHub (MK2 SD Card Contents, see SD Card Information), or the visualizers and effects show as blank tiles instead of their previews.
Your Playlists
You can make your own playlists of visualizers, and change the built-in ones. Playlists are kept on the SD card, so the card must be in the cube.
Add a visualizer to a playlist: press and hold the visualizer (on a computer, right-click it). This popup opens:
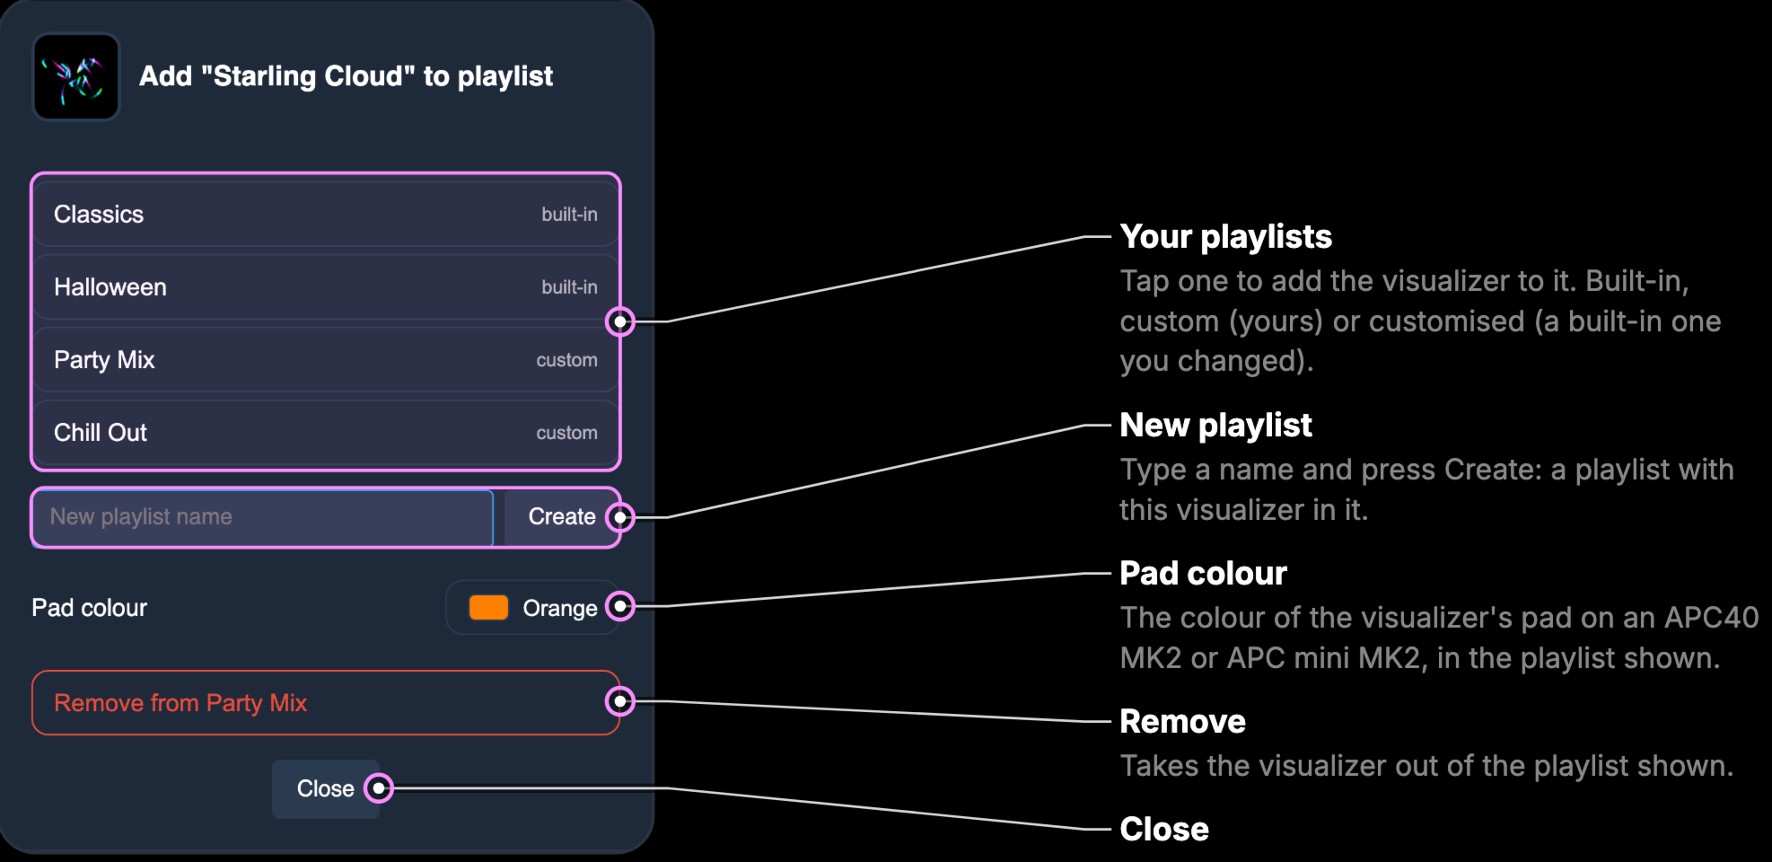
- Playlists: tap one to add the visualizer to it. A playlist holds up to 128 visualizers, each once. Each is marked built-in, custom (one you made) or customised (a built-in playlist you changed).
- New playlist: type a name and press Create. The new playlist starts with this visualizer in it.
- Pad colour: shown when a playlist is chosen on the main page (not All). It is the colour of this visualizer’s pad on an APC40 MK2 or APC mini MK2 in that playlist. Tap it for the colours; Default lets the cube choose.
- Remove from: takes the visualizer out of the playlist chosen on the main page, when that is one of yours or a built-in one you changed. A playlist keeps at least one visualizer: to remove the last one, delete the playlist.
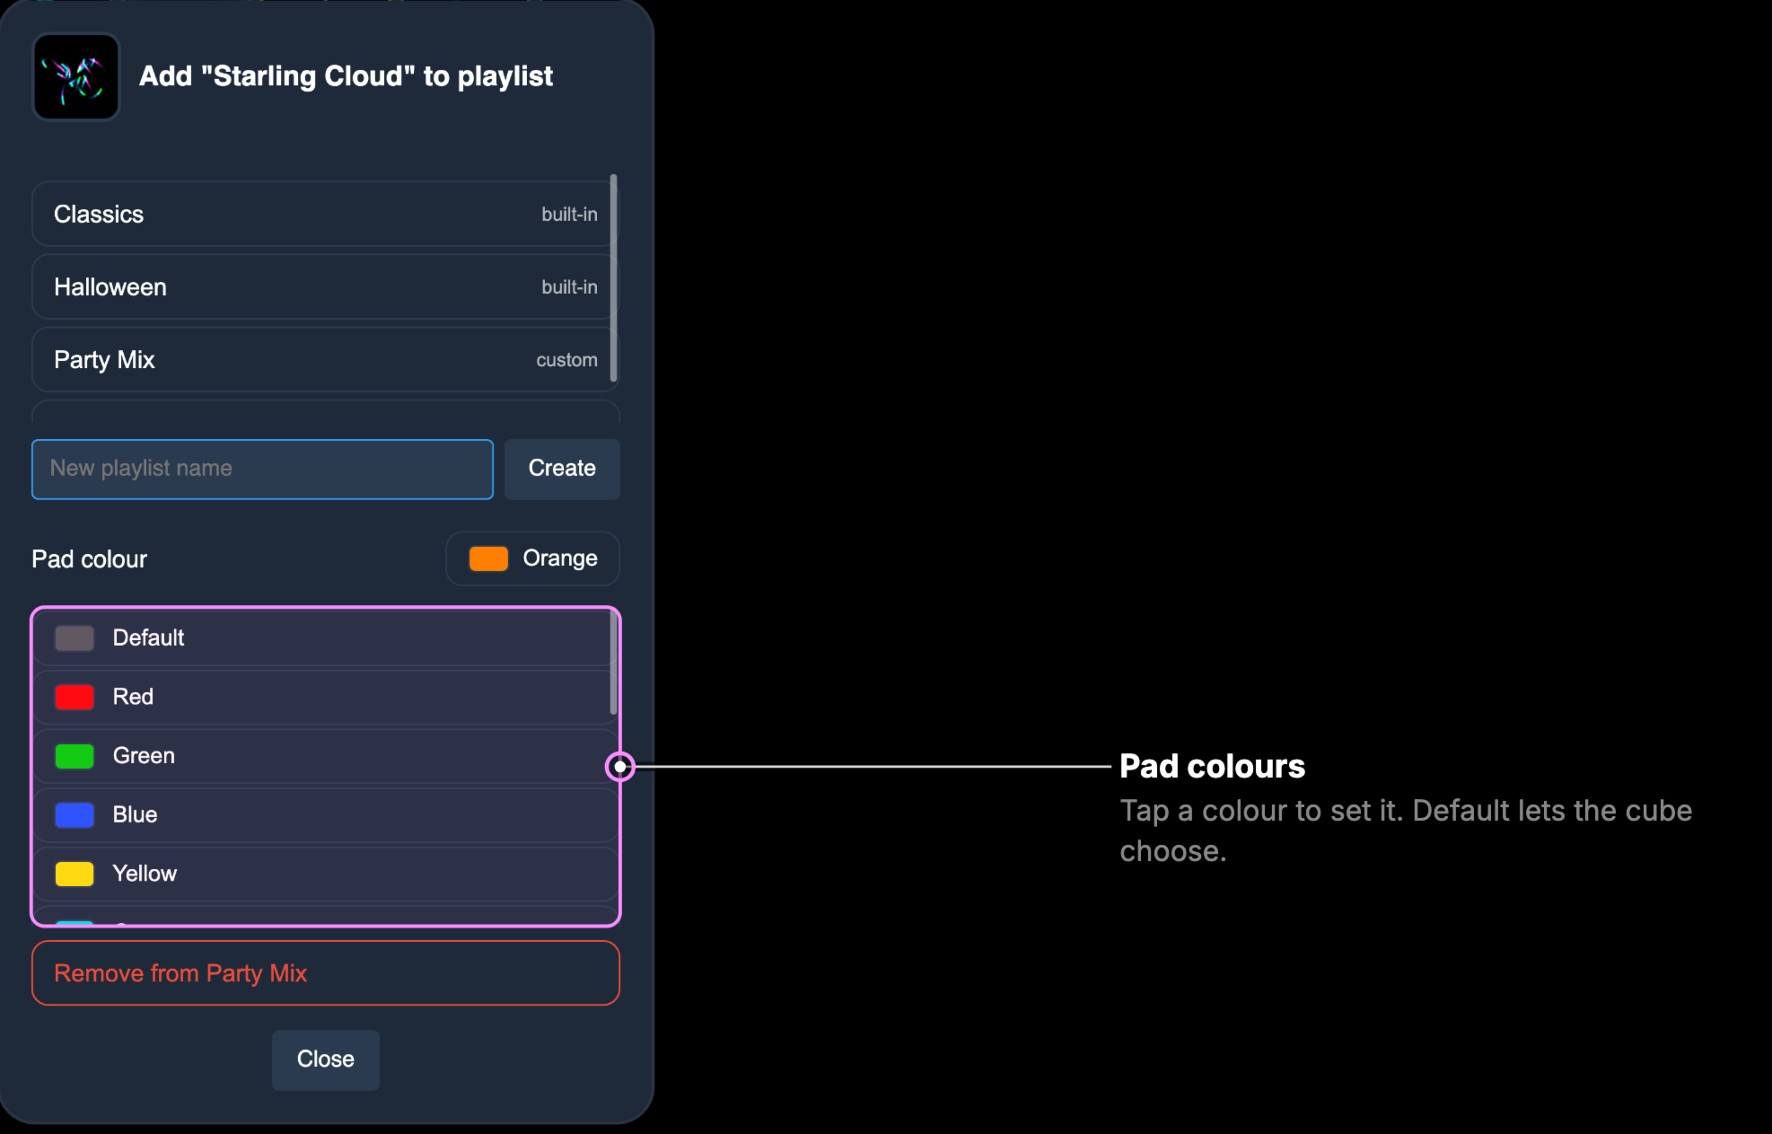
Move a visualizer: choose the playlist on the main page (not All), press a visualizer, and slide it sideways before the popup opens. The visualizer follows your finger: drop it where it should go in the playlist. With a mouse, drag it in any direction.
Change a built-in playlist: add, move or colour its visualizers in the same way. The cube keeps your changed copy on the SD card, marked customised, and the built-in one stays in the firmware.
Delete a playlist: choose it on the main page and press the bin beside the playlist list, then Delete. For a built-in playlist you changed, the button resets it instead: it puts the playlist back as it came. All and the built-in playlists cannot be deleted.

Visualizer Settings
The settings button opens the player settings. In visualizer control mode the first tab is called Visualizer, and a BPM tab is added. The Audio and General tabs are as in playlist mode, except that Animated Previews is only there in playlist mode: see Player Settings. Press Save to keep the changes.
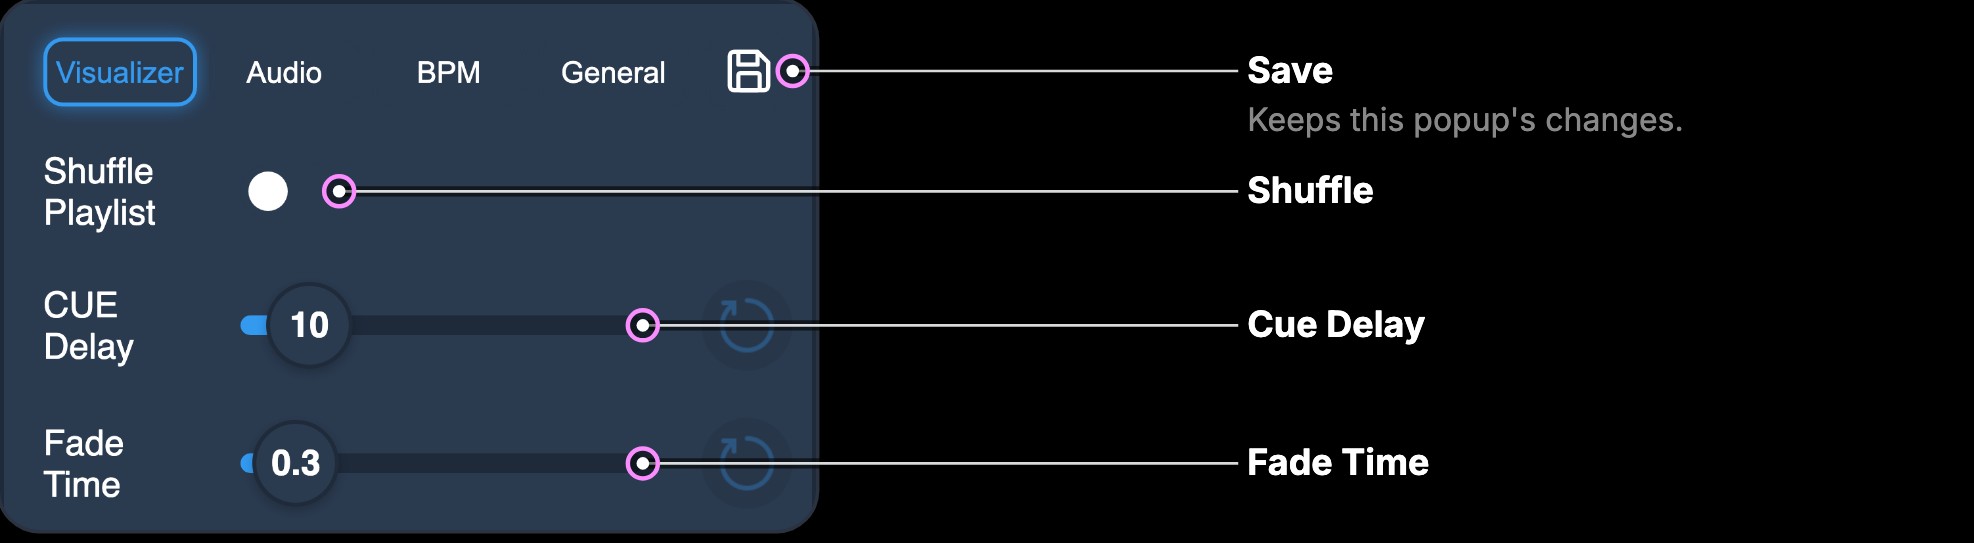
Visualizer: Shuffle, Cue Delay and Fade Time, as in the Playlist tab, for the visualizers of the playlist chosen.
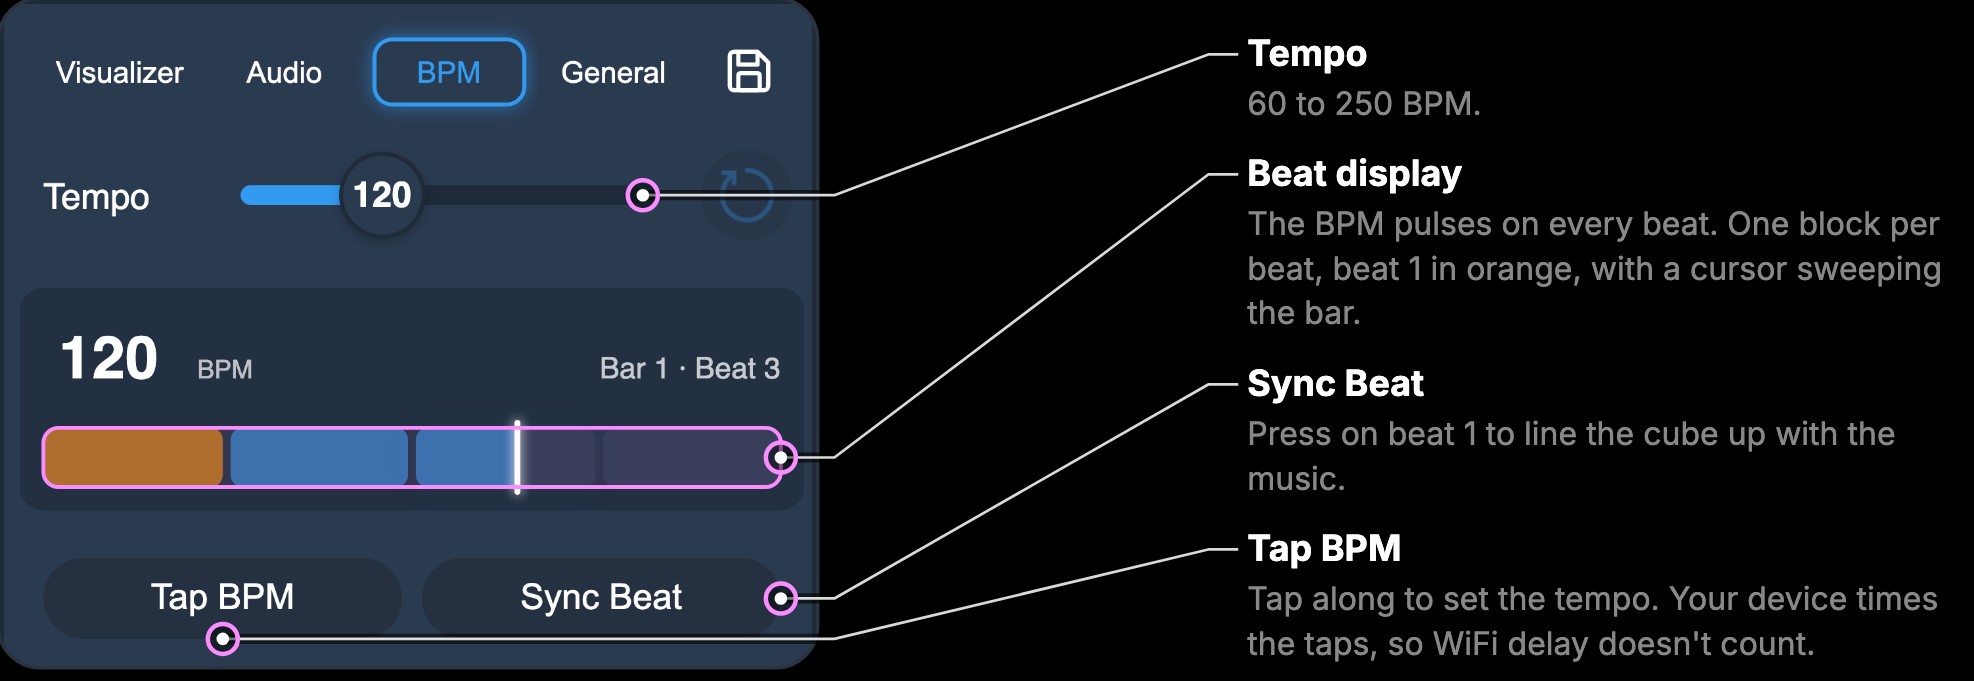
BPM: most visualizers move to the music’s tempo.
- Tempo: the tempo the visualizers move to, 60 to 250 BPM, as in the LCD’s Tempo menu.
- Beat display: the cube’s beat. The BPM pulses on every beat, with one block per beat of the bar (beat 1 in orange) and a cursor sweeping across them, so you can see whether the cube keeps time with the music.
- Tap BPM: tap along with the music to set the tempo. Your device times the taps, so the WiFi delay does not count.
- Sync Beat: press it on the first beat of a bar to line the cube’s beat up with the music.
Multi-Cube Control
Firmware 2.1 and later can control several Ultra MK2 / Pro cubes from one phone, tablet or computer, when one cube is in LAN or WiFi Server mode and the others are in LAN or WiFi Client mode, connected to it. Each cube found on the network gets a tab along the top of the web app, named by its model and the last 4 digits of its MAC address.
The most convenient configuration is one cube in WiFi Server mode and all the other cubes in WiFi Client mode. The client cubes then need the server cube’s SSID and password, so they can connect to it and be found by it. On firmware 2.1 and later, a cube in WiFi Server mode takes up to 8 phones, computers and cubes at once.
- Set one cube to WiFi Server. In Settings→Network→WiFi Server, make a note of its SSID and password.
- Set each of the other cubes to WiFi Client, and in Settings→Network→WiFi Client set its SSID and password to the server cube’s. On firmware 2.1 and later, a cube set to WiFi Client that has never been given WiFi details joins a WiFi Server cube that still has its factory network name and password, straight out of the box.
- Make sure every cube is in Visualizer or Playlist control mode. They can be in either mode and still be controlled from your device.
- Power on the WiFi Server cube, then each client cube, and watch for its blue LED to go from flashing to solid: it has connected to the server cube.
- Connect your phone, tablet or computer to the WiFi Server cube, and enter the server cube’s IP address in its web browser (normally 192.168.4.1), shown on the server cube’s LCD.
- Choose the cube to control from the tabs along the top. If a cube is missing, press the Rescan button at the right of the tabs.
ArtNet Control Mode
Setting the control mode to ArtNet
The ArtNet mode can be selected by going into Control Mode and selecting it
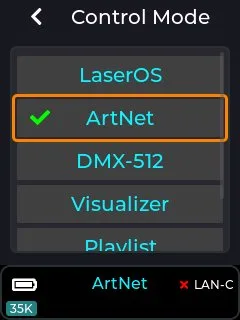
Once selected the device will restart into ArtNet mode, and the ArtNet settings will now be available from the top level menu as shown below:
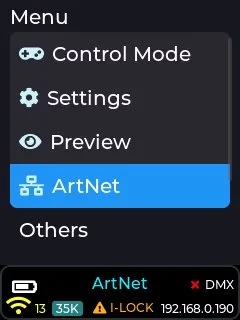
ArtNet Settings Menu
ArtNet Universe
This sets which universe the LaserCube will respond to on the network.
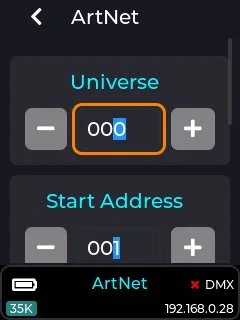
ArtNet Start Address
The start address can be changed (default is address 1) in order to move the 16 channel profile start address within the ArtNet/DMX address range of 1-512.
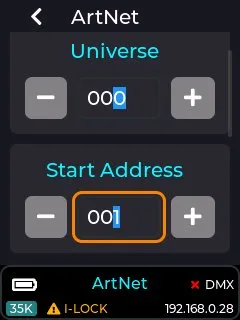
Fixture Profile
The Fixture profile can be changed using the fixture profile drop-down. Currently there is only one profile available which occupies 16 channels of the ArtNet/DMX address range.
A profile determines which ArtNet/DMX channels control what feature of the LaserCube. The default 16 channel map is available here: DMX Channel Map or the wiki (or PDF supplied on the factory SD card).
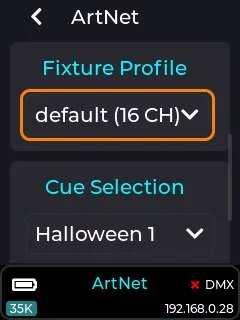
Note: The default profile is compatible with the FB3/FB4 16 channel profile, so any DMX/ArtNet capable lighting controller with FB3/4 support should also work with the LaserCube.
CUE Selection
This drop-down will allow you to select a playlist from the SD card to use when a CUE index is selected over ArtNet. You will need to export a playlist from LaserOS, or use one of the provided playlists on the SD card shipped with the unit.
The CUE selection is based on the order of items within the chosen Playlist, so the first CUE selected over ArtNet using the CUE/Page channel will project the first item in the playlist.
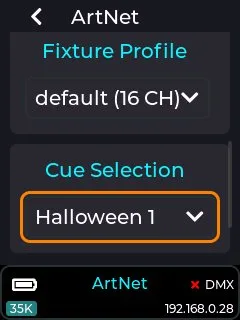
Defaults
This button will reset all items within the DMX menu to their factory defaults.
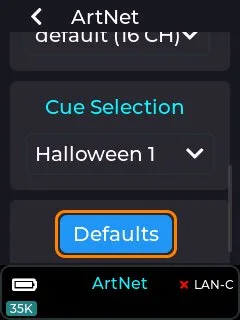
ArtNet Status
The status of the ArtNet connection is shown in the status bar at the bottom right of the LCD.
When the LaserCube is connected to a valid Ethernet network and ArtNet packets are being received on the correct ArtNet Universe then the status bar will show a green tick to the right of the DMX label and a valid IP address will be shown below it.
If ArtNet data is not being correctly received then the status bar will show a red cross instead of a green tick.
If the status shows as not connected when you have an Ethernet cable attached to your network which also has the ArtNet controller present, then please check for a network issue first like no IP address being shown in the status bar, and also check you are on the correct ArtNet universe.
DMX Control Mode
Connecting DMX cables to the LaserCube Pro
The Ultra MK2 has full-size XLR DMX In and Out, so standard DMX cables plug straight in. The LaserCube Pro uses 3.5mm TRS jacks for DMX In and Out instead. Adapter cables aren't included, so you'll need one for each port:
- DMX In: 3.5mm TRS plug to 3-pin XLR male
- DMX Out: 3.5mm TRS plug to 3-pin XLR female
Wiring (the same for both cables):
- Tip → XLR pin 3 (Data+)
- Ring → XLR pin 2 (Data−)
- Sleeve → XLR pin 1 (Ground / shield)
Standard 3.5mm-to-XLR audio cables are wired the other way round (tip to pin 2), so they won't work.
Where to buy:
- DMX In cable: Eurolite DMX-Adapter IN Jack 3,5/XLR (3.5mm TRS plug to 3-pin XLR male, 1m)
- DMX Out cable: Eurolite DMX-Adapter OUT Jack 3,5/XLR (3.5mm TRS plug to 3-pin XLR female, 1m)
These are wired for DMX, so they don't need a polarity-reverse adapter. Thomann ships from the EU, including to the US.
Setting the control mode to DMX
The DMX mode can be selected by going into Control Mode and selecting DMX-512
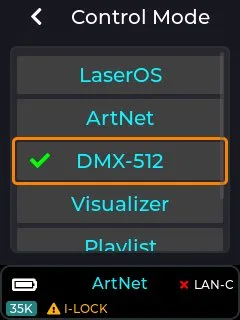
Once selected the device will restart into DMX-512 mode, and the DMX settings will now be available from the top level menu as shown below:
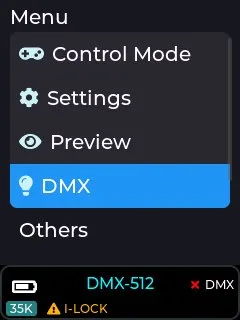
DMX Settings Menu
DMX Start Address
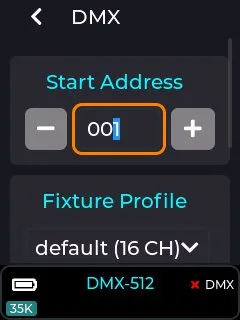
The DMX start address can be changed (default is DMX address 1) in order to move the 16 channel profile start address within the DMX address range of 1-512.
Fixture Profile
The Fixture profile can be changed using the fixture profile drop-down. Currently there is only one profile available which occupies 16 channels of the DMX address range.
A profile determines which DMX channels control what feature of the LaserCube. The default 16 channel map is available here: DMX Channel Map or on the wiki (or PDF on the factory supplied SD card).
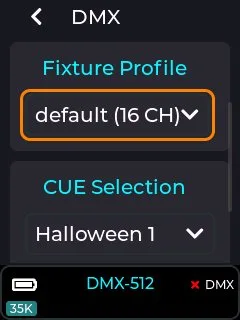
Note: The default profile is compatible with the FB3/FB4 16 channel profile, so any DMX lighting controller with FB3/4 support should also work with the LaserCube.
CUE Selection
This drop-down will allow you to select a playlist from the SD card to use when a CUE index is selected using the DMX Page/CUE channel. You will need to export a playlist from LaserOS, or use one of the provided playlists on the SD card shipped with the unit.
The CUE selection is based on the order of items within the chosen Playlist, so the first CUE selected over DMX using the CUE/Page channel will project the first item in the playlist.
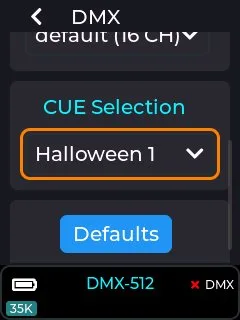
Defaults
This button will reset all items within the DMX menu to their factory defaults.
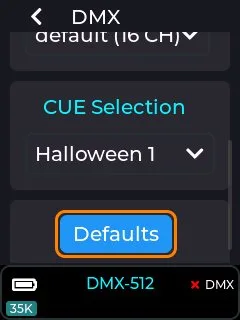
DMX Status
The status of the DMX is shown in the status bar at the bottom right of the LCD.
When the LaserCube is connected to DMX and receiving the 512 channels via the DMX In connector, the status bar will show a green tick to the right of the DMX label as shown below.
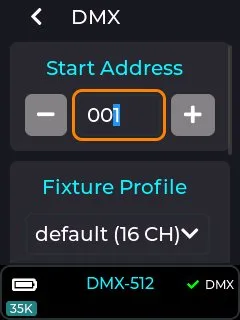
If DMX is not being received then the status bar will show a red cross.
If the status shows as not connected when you have a cable connected and are running DMX from a controller, then please check cabling and also check that the DMX is correctly terminated.
DMX/ArtNet Default Fixture Channel Allocation
Overview
The default DMX/ArtNet fixture uses from 4 to 16 channels depending on the Access Mode.
DMX Channels NOT Implemented in the default fixture implementation
• DMX CH 12 Reserved for future use.
• DMX CH 14 Reserved for future use.
• DMX CH 16 Reserved for future use.
DMX/ArtNet Channel Layout
| DMX value | Function |
|---|---|
| 0-31 | Blackout |
| 33-95 | Basic 4 CH |
| 97-159 | Standard 8 CH |
| 161-223 | Extended 12 CH |
| 225-255 | Full 16 CH |
Note:
• Invalid values (32,96,160,224) do not change the access mode from its previous value.
• Access mode Basic (CH 1-4 interpreted, CH 5-16 default values).
• Access mode Standard (CH 1-8 interpreted, CH 9-16 default values).
• Access mode Extended (CH 1-12 interpreted, CH 13-16 default values).
• Access mode Full (all channels interpreted).
DMX CH 2 (Page): Used as an offset into the cue playlist.
Example:
• Page 2 plays cues from index 48 onwards.
• Page 3 plays cues from index 96 onwards, etc.
• Allows up to 432 cues per playlist (9 * 48).
| DMX value | Function |
|---|---|
| 0-15 | 1 |
| 17-31 | 2 |
| 33-47 | 3 |
| 49-63 | 4 |
| 65-79 | 5 |
| 81-95 | 6 |
| 97-111 | 7 |
| 113-127 | 8 |
| 129-255 | 9 |
Note:
• Cue selection is based on Page & Cue DMX channels.
• Page 1 = Cues 1-48, Page 2 = Cues 49-96, etc.
• Maximum of 432 cues (48 cues per page * 9 pages).
| DMX value | Function |
|---|---|
| 0-31 | Blackout |
| 33-35 | Cue 1 |
| 37-39 | Cue 2 |
| … | … |
| 221-223 | Cue 48 |
Note: Used in conjunction with channel 2 (page) in order to select cues from the currently selected playlist.
| DMX value | Function |
|---|---|
| 0-15 | 100% |
| 17-31 | Pause |
| 33 … 64 … 128 … 255 | 25% … 50% … 100% … 200% |
| DMX value | Function |
|---|---|
| 0-255 | Black … Full Brightness |
Note: If access mode is below Standard, fade is fixed at 100%.
| DMX value | Function |
|---|---|
| 0-255 | Zero Size … Full Size |
Note: If access mode is below Standard, scale is fixed at 100%.
| DMX value | Function |
|---|---|
| 0 … 128 … 255 | Negative Full Size … Zero Size … Positive Full Size |
Note: Negative full size = Horizontally mirrored from original.
| DMX value | Function |
|---|---|
| 0 … 128 … 255 | Negative Full Size … Zero Size … Positive Full Size |
Note: Negative full size = Vertically flipped from original.
| DMX value | Function |
|---|---|
| 0 … 255 | 0 degrees … 360 degrees |
Note: If access mode is below Extended, no rotation will occur.
| DMX value | Function |
|---|---|
| 0 … 128 … 255 | Left … Center … Right |
Note: If access mode is below Extended, X Position is fixed at 128 (center).
| DMX value | Function |
|---|---|
| 0 … 128 … 255 | Down … Center … Up |
Note: If access mode is below Extended, Y Position is fixed at 128 (center).
| DMX value | Function |
|---|---|
| 0 … 255 | NOT IMPLEMENTED |
| DMX value | Function |
|---|---|
| 0-31 | Default (35K pps) |
| 33-223 | 6K-29K pps |
| 225-255 | 30K pps |
Note: If access mode is below Full, scan rate defaults to 35K pps.
| DMX value | Function |
|---|---|
| 0 … 255 | NOT IMPLEMENTED |
| DMX value | Function |
|---|---|
| 0-31 | Default |
| 33-223 | RED - ORANGE - YELLOW - LIME - GREEN - CYAN - BLUE - PURPLE - PINK - RED |
| 225-255 | White |
Note: If access mode is below Full, no re-colour occurs.
• Values 33-223 re-colour the CUE linearly through the HSV colour space,
with values 225-255 re-colouring the cue to full white.
• The values 33-223 adjust the hue range between 0 and 360 degrees with full saturation (S = 1.0, V = 1.0).
• If access mode is below Full, no re-colour will occur.
| DMX value | Function |
|---|---|
| 0 … 255 | NOT IMPLEMENTED |
Ether Dream Control Mode
In this mode the LaserCube works like an Ether Dream DAC (a network laser interface), so laser software with an Ether Dream output can send its content to the cube over the network. TouchDesigner is one: its Laser Device CHOP sends to an Ether Dream device.
- Connect the cube and your computer to the same network (see Connection Settings).
- Select Control Mode, Ether-Dream. Once selected the device will restart into Ether Dream mode, and the status bar shows Ether-Dream.
- Read the cube’s IP address in the bottom right corner of the status bar.
- In your software, add an Ether Dream device with that IP address. Ether Dream uses network port 7765. In TouchDesigner, that is a Laser Device CHOP with Type EtherDream, the cube’s IP address as Network Address and Network Port 7765, fed by a Laser CHOP.
Unlike LaserOS mode, the Settings→Projection menus stay available in Ether Dream mode: Image Setup, Colour Balance and the Safety Zone apply to everything the software sends.
To use LaserOS again afterwards, select Control Mode, LaserOS: LaserOS finds the cube only in LaserOS mode.
Video guide: our four-part TouchDesigner series by Motus Art starts with First steps with LaserCube and TouchDesigner.
Making Content in LaserOS
LaserOS is our app for making your own laser content and playing it on the LaserCube. It runs on a computer (Windows or Mac) and on a phone (iOS or Android). With the cube in LaserOS control mode, LaserOS streams what it shows to the cube. To install LaserOS and connect it to the cube, see LaserOS Control Mode.
This chapter covers LaserOS’s own tools: moving and tracing a picture, sound settings, text, the clock and timers, your own logo, video from a camera or another app, drawing and simple mapping, Beam Creator, the Timeline, shows for several cubes, LaserOS’s safety zones, MIDI controllers, and the games, Laser Harp and Light Painting apps. The screens are from LaserOS 0.18 on a Mac and an iPhone. Menus can differ slightly in other versions.
The LaserOS Screen
On a computer, the preview and the main controls are on the left. Next to them is the list of apps: Abstracts, Visualizers, Dancers, Animations, Beam Show, Images, Text, Timeline, Draw, Beam Creator, Import and more, with Settings at the top. The open app fills the middle, and the effects are on the right.
In the phone app, the apps are tiles on the main screen and the controls are in the bar at the bottom.
The Laser Button
On a computer, the Laser button at the top left shows whether LaserOS can send to a cube:
- NO LASER: LaserOS has not found a cube. Close LaserOS, connect the cube, then start LaserOS again (see Using LaserOS).
- LASER OFF, with a red power symbol: a cube is found and the laser is off. Click the button to start.
- LASER ON: LaserOS is projecting. Click the button, or press Esc, to stop.
The cube projects only when it is armed: interlock closed and key on, and with an E-Stop connected, the E-Stop started (see the E-Stop Setup Guide). If it is not, LaserOS shows the message “Interlock is not enabled on cube”: see Enabling the Laser E-Stop / Interlock.
In the phone app, the power button is in the middle of the bottom bar: red when the projection is off, blue when it is on.
Left Panel and Quick Controls
Under the preview are the Autoplay buttons and sliders such as Global Power, Power, Speed, Zoom and Rotate. While a tool such as Trace or Strobe is on, the preview shows its name in a small tag.
- To put a switch or slider from Settings on the left panel, hold Shift and drag it there. It stays in step with the one in Settings. To remove it, drag it off the panel onto the bin.
- Right-click a switch on the panel to give it a keyboard key or an APC controller pad, then press the key or pad. Backspace removes it.
- Right-click a slider to type an exact value.
LaserOS Effects
The effects panel on the right has four tabs: No Effect, Image Effects, Color Effects and Saved Effects. An effect plays on top of whatever is showing: an animation, your logo, a drawing or a Beam Creator design. The left panel shows the effect in use, with a button to reset it.
In the phone app, tap the effect name at the top of the screen (No Effect) and pick one. The arrows next to the name step through the effects.
LaserOS Settings
On a computer, Settings lists Projector Setup, Audio, Speed, Midi, Color, Colorize, Tools, Video Input, Apps and General.
In the phone app, tap the gear at the top right. Tap the page title at the top to choose another page: Projector Setup, Audio, Color, Colorize, Movement, Strobe, Trace, Video Input, Apps or General.
Projector Setup in LaserOS
In LaserOS control mode, LaserOS handles the image setup, colour balance and safety zone, so the cube greys out its own entries (see Projection Settings). In LaserOS they are under Settings → Projector Setup. A drop-down at the top switches between pages such as Info, Image, Color Balance and Safety Zones. Next to it, the device list shows the connected cube, with a Use This Device switch.
Projector Info
Info shows the connected cube’s model name and firmware version, its temperature and battery level, the connection mode and whether the interlock is enabled. It also shows the DAC Rate, the points per second LaserOS is sending, and the cube’s MAX DAC Rate (see Scan Rate).
Picture Size and Throw Distance
At full size the picture is square and about 0.7 times as wide as the throw distance, the distance from the cube to the wall (maximum scan angle over 37°): a throw ratio of about 1.4:1. The Expander makes it about 3 times wider and higher (a throw ratio of about 0.5:1).
| Distance to the wall | Picture at full size | With the Expander |
|---|---|---|
| At 2 m (6.6 ft) | 1.4 × 1.4 m (4.6 × 4.6 ft) | 4.2 × 4.2 m (14 × 14 ft) |
| At 5 m (16 ft) | 3.5 × 3.5 m (11.5 × 11.5 ft) | 10.5 × 10.5 m (34 × 34 ft) |
| At 10 m (33 ft) | 7 × 7 m (23 × 23 ft) | 21 × 21 m (69 × 69 ft) |
| At 20 m (66 ft) | 14 × 14 m (46 × 46 ft) | 42 × 42 m (138 × 138 ft) |
For another distance, multiply it by 0.7 (by 2.1 with the Expander). Like a fisheye lens, the Expander bends the edges of a full-size picture: for straight edges, use about 70–80% of that size. To make the picture smaller, or wide and low, use Zoom X and Zoom Y in Image Settings in LaserOS below, or X-size and Y-size in the cube’s Image Setup. The farther away, the bigger and dimmer the picture, and a smaller picture draws detailed content more cleanly. The beam block and the 3 m rule in Hardware Installation apply whatever the size; with a lens fitted the beam block can’t be used (see Fitting a Lens).
Image Settings in LaserOS
Image sets the size and position of the whole picture: Zoom X and Y, Position X and Y, Rotate, Flip X and Flip Y, and the keystone corners. With Lock Zoom X-Y on, both zoom sliders move together; turn it off to change the width or the height alone. The Test Pattern list at the top of Projector Setup has a Square that shows the whole projection area. In the phone app, tap the gear at the top right, then Image Setup on the Projector Setup page.
The beam block and the 3 m rule in Hardware Installation apply whatever the picture’s size and position.
Color Balance and TTL Mode
On a computer, the Color Balance page has a TTL Mode switch, set for each cube (pick the cube in the device list first). It is for compatibility with TTL projectors, which can only switch each colour fully on or off. With TTL Mode on, the cube does the same: its colours jump in hard steps between 8 combinations (black, red, green, blue, yellow, magenta, cyan and white) instead of fading. With it off, every LaserCube fades its colours smoothly. If colours jump instead of fading, check that TTL Mode is off.
Mono Color
On a computer, Settings → Color has Single Color (Off, White, Red, Green or Blue), Hue, Mono Color, Shift Color and Fader R, G and B. Single Color and Mono Color each turn all the content into one colour; Hue, Mono Color and Shift Color work only while Single Color is Off. Once you move Mono Color, a Saturation slider appears below it. If all your content shows in one colour only, check that Single Color is Off, Mono Color and Shift Color are all the way to the left and Fader R, G and B are turned up, or click Reset settings at the bottom of the page.
Movement, Strobe and Trace
Movement and Strobe work on any content. Trace works on images, animations and your own imported logo (SVG or ILD); with other content, such as a visualizer or text, its switch is greyed out. On a computer they are under Settings → Tools. In the phone app, tap the gear at the top right, then tap the page title at the top and pick Movement, Strobe or Trace.
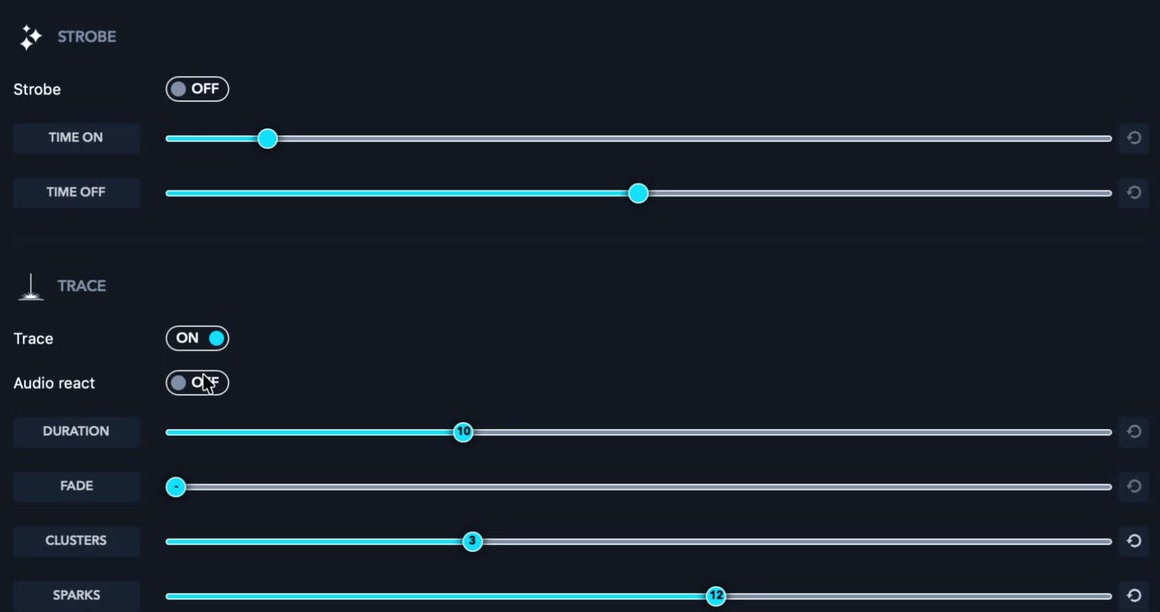
Movement
Horizontal and Vertical move the picture sideways and up and down; in the middle position it stands still. Rotate X, Y and Z turn it around each axis. The page also has Intensity and Mirror, and Reset settings puts everything back.
Strobe
Strobe switches the picture on and off. Time On and Time Off set how long it stays on and off.
Trace
Trace makes a logo, an image or an animation draw itself. Switch Trace on and it starts at once. Its settings are Audio react, Duration, Fade, Clusters and Sparks. Clusters sets how many points the drawing starts from. With Sparks at 0, only the logo is drawn, with no sparks.
In the phone app, the Trace page has Enable to switch it on, and Show on panel, which adds a small on/off button next to the name of the playing item.
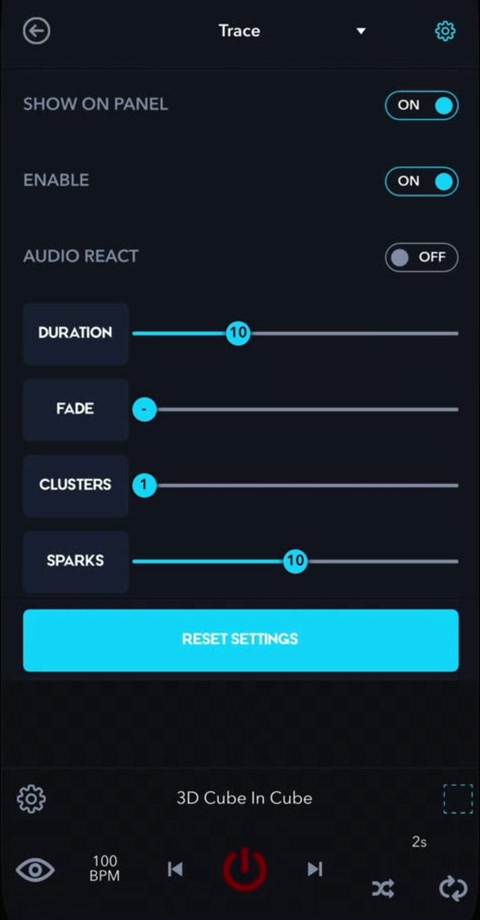
Video: Trace in the phone app
Sound in LaserOS
In LaserOS control mode, LaserOS handles the audio, so the cube’s own Audio Settings have no effect. On a computer, LaserOS’s sound settings are under Settings → Audio:
- Audio Input: the input LaserOS listens to, from the inputs the computer lists. Stub, in the same list, sends silence.
- Volume, and a meter that shows the sound level.
- Sound gate: sound quieter than the gate counts as silence, so the content doesn’t react to it.
- Blackout: switches the laser off whenever the sound is at or below its level. Keep it all the way to the left, where its value reads Disabled, or the laser goes dark in quiet parts. While Blackout is on, the preview shows a Blackout tag.
In the phone app, tap the gear at the top right, then tap the page title at the top and choose Audio: it has the same Sound gate and Blackout.
Projecting Text
Text projects your own words. In the phone app, type in the Add Text box: with the laser on, the cube shows each letter as you type. On a computer and on the phone, the Add Text box takes up to 200 characters.
- Font: the typeface.
- Style: Gradient, Striped, Rainbow, 3D, 3D rotate or No Style.
- Size and Spacing: the size of the letters and the gap between them.
- Speed and Direction (Left, Right, Up or Down): make the text scroll.
Save keeps the text under a name in Playlists → Saved Texts. In a playlist for the cube, a scrolling text can be set to play once: see the note on animation cycles in Adding a custom SVG to the Playlist.
Video: the Text app
Clock, Timer and Countdown
The Clock app projects the time. On a computer, its drop-down switches between Time and Chronograph. Chronograph has two modes:
- Timer counts up: Start, Pause, Resume and Reset.
- Countdown counts down from the time you type (hours, minutes and seconds, as 00:00:00): click Start.
In the phone app, Chronograph is an app of its own, with the same Timer and Countdown.
Importing Your Own Logo
LaserOS imports SVG, ILD, PNG, JPG and BMP files; SVG or ILD files give the best results. GIF files don’t import. On a computer, use the Import app as described in Adding a custom SVG to the Playlist.
In the phone app, scroll down the main screen to Import:
- Import location sets the playlist the file goes to (Imported, unless you pick another).
- Tap Import… and pick the file in the phone’s file browser. You can also paste a file’s web address under Import from URL.
- With Open imported in “Playlists” on, the imported item opens straight away. Tap it to play it.
Text in a logo: LaserOS reads the shapes in an SVG file but skips live text, so text that is still a text object doesn’t show. In your design program, convert the text to outlines (paths), then save the SVG.
Movement, Strobe and the effects work on any logo. Trace works on an SVG or ILD logo; on a PNG, JPG or BMP logo its switch is greyed out. If it flickers, see Flicker and Render Quality.
SVG Animations
An animated logo is a folder of SVG files, one per frame. Give them one base name and a running number with the same number of digits, for example seq-001.svg, seq-002.svg, seq-003.svg. Each frame is drawn on its own, so keep every frame simple. On a computer:
- In the Import app, choose the Import location (the playlist it goes to) and click Import folder with SVG animation.
- Under Select Folder, click Browse… and pick the folder.
- Enter the File prefix (seq- in the example) and the Mask Size, the number of digits (3 in the example). FPS and BPM set its speed. Click Ok.
The phone app can’t import a folder. Import the animation into one of your playlists on a computer, then move that playlist to the phone (see Moving a Playlist to the Phone).
Cast and Video Input
The Cast app draws a live picture as laser outlines, in the picture’s own colours. On a computer, it takes the picture from Settings → Video Input: Webcam (a camera), Desktop (the computer’s screen) or, on a Mac, Syphon.
Syphon takes the picture from another Mac app that sends it, for example Resolume: choose Syphon under Video Input, then pick the app under Server. Then open Cast and click Start Cast.
Draw and Simple Mapping
Draw lets you draw lines and shapes for the cube to project. With the laser on, the cube shows each stroke as you draw it, so you can trace the edges of a real object by watching the projection. This is the simplest way to map an object.
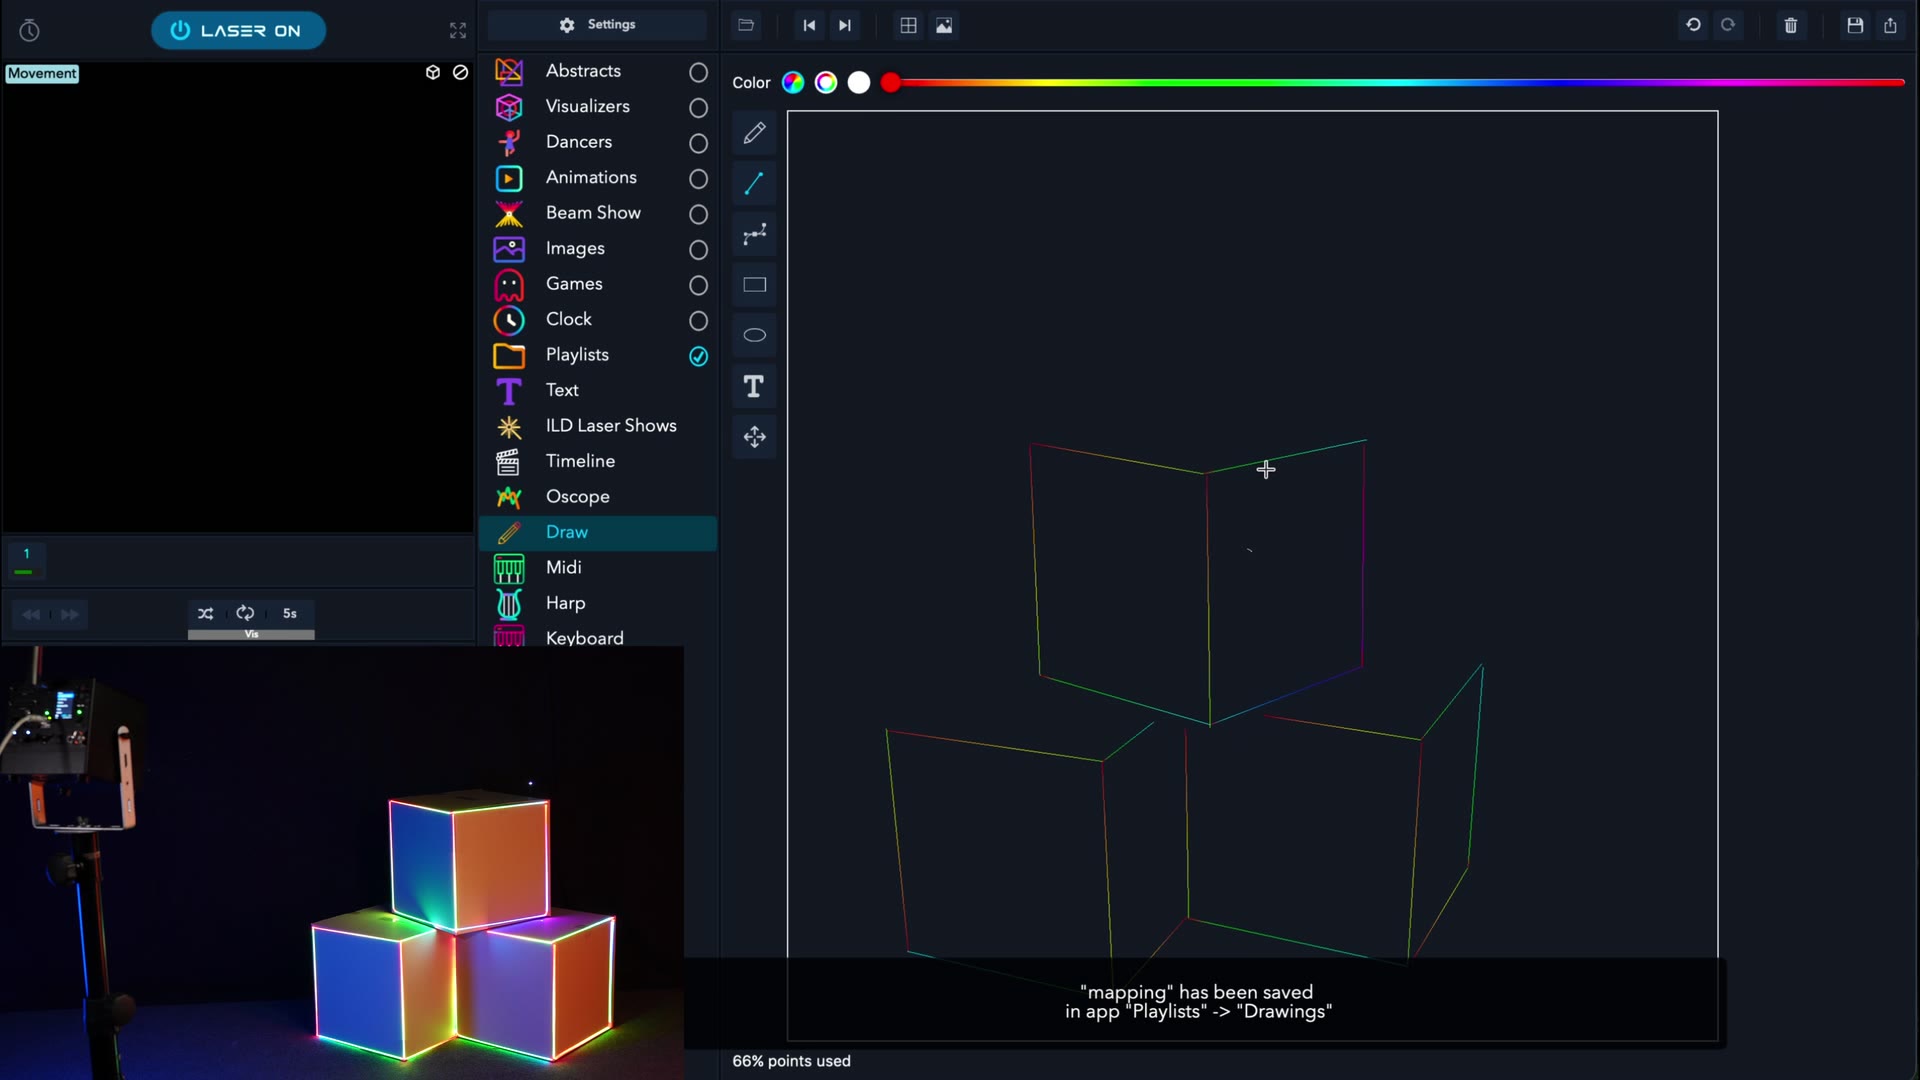
- Tools (the icons left of the canvas): freehand, straight line, Bezier curve, rectangle, ellipse, text and move.
- Color: pick a colour above the canvas.
- Points used: how many points the drawing needs, as a percentage. Over 100% the drawing is too complex: simplify it.
- Save: Save Drawing asks for a name and keeps the drawing in Playlists → Drawings.
The effects work on drawings too.
For more advanced mapping, the LaserCube also works with MadMapper, one of the third-party applications for LaserOS Control Mode. To map with Beam Creator instead, see Example: Mapping Box Edges.
Video: three ways to map with a LaserCube
Drawing on the Phone
The phone app has Draw too, with the same tools. To see where a line will start, hold one of the arrow buttons and slide a finger over the canvas: a dot on your object shows the spot. Let go of the arrow, then draw.
Beam Creator
Beam Creator builds your own beam patterns and animates them with effects. This section shows Beam Creator in LaserOS on a computer. You can build a design with no cube connected (the Laser button reads NO LASER) and check it in the preview. The cube icon above the preview switches between a 3D stage view and a flat 2D view.
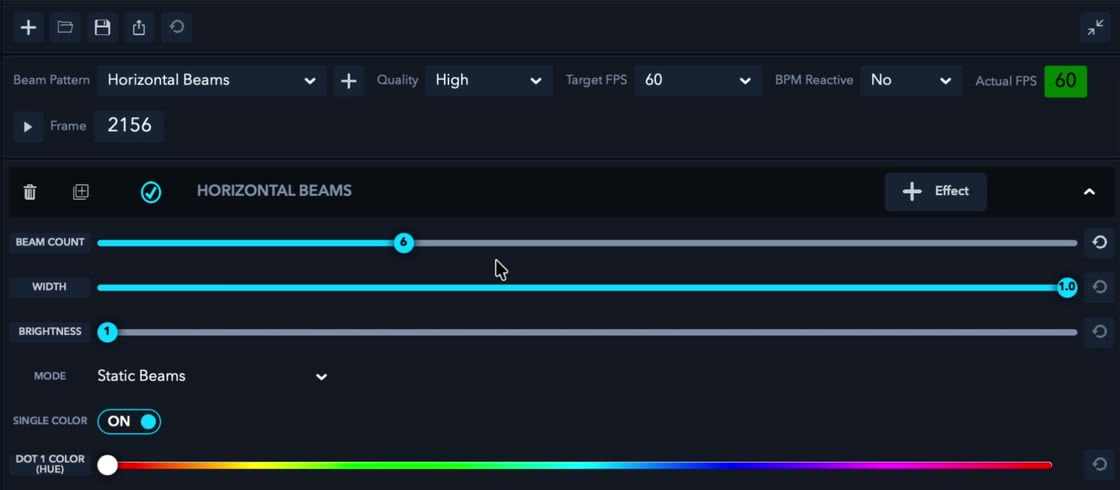
Video: multi-laser show tutorial, Beam Creator part
Patterns and Layers
Pick a pattern under Beam Pattern and click the + next to it: Horizontal Beams, Vertical Beams, Horizontal Line, Vertical Line, Simple Shapes, Sine Wave, Triangle Wave or Video Spiral Wave. Each pattern you add is a layer, and a design can have several. Each layer has buttons to delete it, duplicate it and switch it on or off, and + Effect to add effects.
Each pattern has its own settings, for example:
- Horizontal Beams: Beam Count, Width, Brightness, Mode (static, or sliding left or right, with Slide Speed) and Single Color, with hue and saturation.
- Horizontal Line and Vertical Line: Num Sections, Width, Brightness, Line Border (with border width and colour) and the line’s colour.
- Simple Shapes: shapes such as Circle, Square, Triangle, Rectangle, Hexagon and Octagon; Size; Style (Solid, Dotted or Dashed, with Dash Size); and Colours, with a hue for each colour.
Brightness draws the pattern several times over. That makes it brighter, but harder for the cube to draw, and it may flicker: leave it at 1.
Along the top are Quality (how densely the pattern is drawn), Target FPS (see Timing in Frames), BPM Reactive and Actual FPS. The icons above them start a new project, import a project into the playlists, save, export and reload a project from its file.
Beam Creator Effects
The + Effect button adds an effect to a layer. The effects on a layer can be moved up or down and switched off.
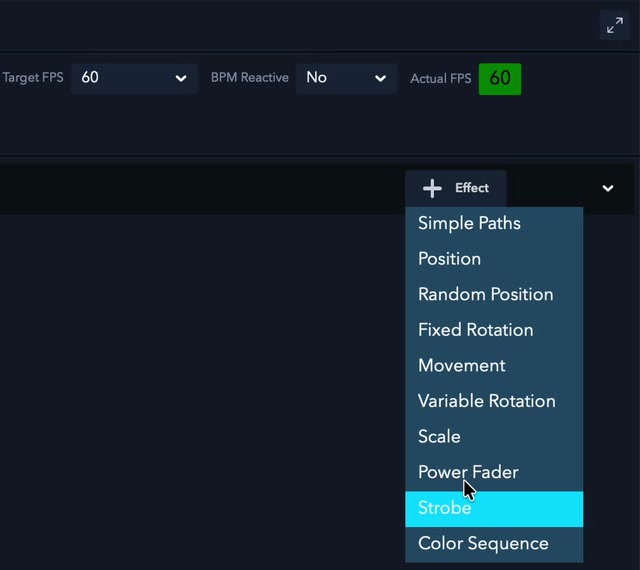
- Simple Paths: sends the pattern along a Rectangular, Circular, Ellipse, Figure 8 (Vertical or Horizontal), Linear Horizontal, Linear Vertical or Spiral path. Direction sets the way round, Frames how long one trip takes, and Start Pos where it starts (0 to 100; 50 is halfway round). Always Repeat makes it loop, and Stepped Path splits the movement into steps, to hit single notes. Simple Paths has its own position and size settings.
- Position: Offset X and Y place the pattern.
- Fixed Rotation: turns the pattern to a fixed angle (X, Y and Z angle).
- Movement: slides the pattern from Start Pos to End Pos, for example Horizontal (start->end->start); Always Repeat makes it loop. Positions are measured from the pattern’s centre, so large values push part of it out of the projection area.
- Variable Rotation: spins the pattern around its own centre (Rotate X, Y or Z).
- Scale: grows or shrinks the pattern, for example from 0.0 to 1.0.
- Power Fader: fades the power. Fade start->end from 1.0 to 0.0 over a few frames makes a single flash. With Frames above 0 it also shows Always Repeat and, while that is off, Repeats: Always Repeat makes it loop, Repeats sets how many times it plays, and Dwell adds a pause between repeats.
- Strobe: switches the pattern on and off, set with On Frames and Off Frames.
- Color Sequence: steps through a number of colours.
Timing in Frames
Beam Creator counts time in frames. Target FPS sets how many frames make one second: at the default 60, an effect of 60 frames takes one second and one of 120 frames takes two. Fewer frames make an effect faster, more frames slower.
To fit a part of a song, multiply its length in seconds by the Target FPS: a 7-second build-up at 60 FPS needs 420 frames.
Copies, Mirrors and Exact Values
The duplicate button copies a layer with all its effects. The copy runs exactly on top of the original until you change it, for example its Start Pos, Direction or Frames. For a mirror image of a Movement effect, swap the signs of the copy’s Start Pos and End Pos: −0.9 and 0.8 become 0.9 and −0.8.
To set Start Pos or End Pos exactly, right-click the slider and type the value.
Saving a Custom Beam
Click the save icon. Save Custom Beam asks for a name and saves the design in Playlists → Custom Beams. From there you can drag it onto the Timeline.
Example: Mapping Box Edges
Mapping with Beam Creator takes longer than with Draw, but each line can have its own effects. To light up the edges of a stack of boxes:
- Add a Vertical Line.
- Place it on an edge with Position, and turn it to the edge’s angle with Fixed Rotation.
- Add Scale (Scale start->end, from 0.0 to 1.0) so the line grows along the edge, and Color Sequence to change its colours.
- Duplicate the line for the next edge and adjust it.
- Save it as a custom beam.
Making a Beam with AI
Beam Creator designs are small text files ending in .ldbc. An AI chat assistant can write one from a description in your own words (a prompt). Our guide tells the AI how the file works.
- Download the guide: LaserOS Beam Creator guide for AI (.md).
- Start a new chat, attach the guide (or paste its text) and describe
the beam you want: what it shows, how it moves, how fast and in which
colours. For example:
- “Eight beams in a fan that spin slowly around the middle. Change their colour every second: red, blue, green, white.”
- “Police lights: red flashing on the left and blue flashing on the right, alternating fast.”
- “A rainbow wave for a 128 BPM track that flashes on every beat.”
- “A purple triangle spinning one way inside a cyan hexagon spinning the other way.”
- Save the AI’s file with a name ending in .ldbc, for example
“fan.ldbc”. If the AI shows the file as text instead, copy all of it
into a plain-text editor and save it under that name:
- Windows Notepad: set Save as type to All files first, or it saves fan.ldbc.txt.
- TextEdit on a Mac: choose Format → Make Plain Text first, and Use .ldbc if it asks.
- On a phone: ask the AI for a file to download and save it to your files, or do this step on a computer.
- In Beam Creator, click the import icon (the open folder, second from the left above the controls) and choose the file; in the phone app, tap Import “Custom Beam”. LaserOS adds it to Playlists → Custom Beams.
- On a computer, select it in Playlists → Custom Beams and click the pencil (Edit current item) to open it in Beam Creator. Check it in the preview with the laser off (see The Laser Button), change anything you like with the sliders, and save it.
A design is a short clip or loop. For a longer piece, ask for one design per part and line them up on the Timeline. Text, logos and drawings have their own tools: see Projecting Text, Importing Your Own Logo and Draw and Simple Mapping.
The AI can get things wrong. If the design doesn’t match what you asked for, tell the AI what to change, or adjust it in Beam Creator.
The LaserOS Timeline
The Timeline builds a show to a song: you place content along the song, on one layer per cube. This section shows the Timeline in LaserOS on a computer. Open Timeline in the list of apps; the timeline appears at the bottom of the screen.
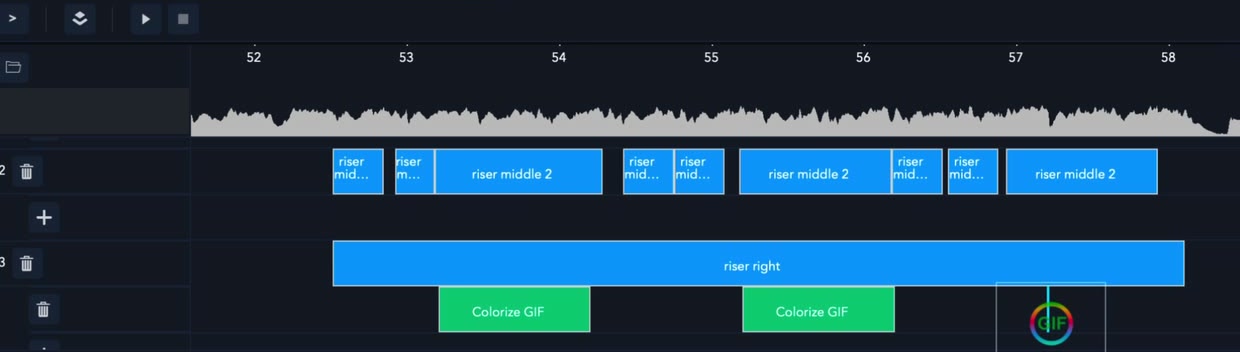
Video: multi-laser show tutorial, Timeline part
Song and Layers
- Drag your song onto the song lane. It must be a WAV file: 44.1 kHz, 16-bit, stereo (PCM). LaserOS does not read other files there.
- The timeline starts with one layer. Click + to add a layer for each cube.
- Click the layers icon in the timeline bar to open Timeline devices, and drag each cube’s tile into its row.
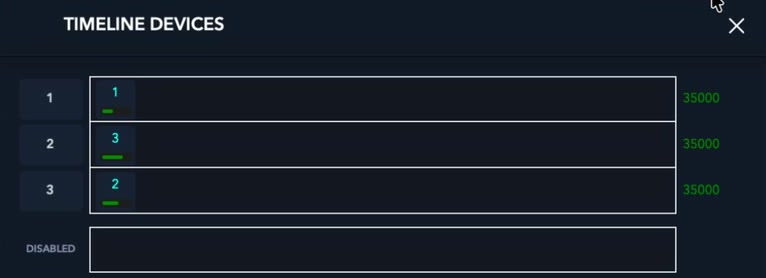
To find out which cube is which, put something on one layer and see which cube plays it. Swap the cubes between the rows if you need to.
Placing Content
- Drag content onto a layer, under the song’s waveform: animations, dancers, images, Beam Show patterns and your custom beams. The waveform helps you see where the notes are.
- To change an item’s length, drag its edge. This also changes its playback speed, so it fits. For a Beam Creator item you can instead change its frames, save it and place it again.
- Right-click an item for Locate item, Copy item, Edit item and Remove. Copy an item and paste it on another layer to use it on another cube.
- Stop the timeline to see the Beam Creator preview of the pattern you are editing.
- Save your timeline often, with the save icon in the timeline bar.
Effect Lanes and Saved Effects
The Timeline can also place effects, for variety without new patterns. Click + under a cube’s layer to open an effect lane, then drag effects from the effects panel (Image Effects, Color Effects or Saved Effects) onto it.
Zoom, Position, Strobe and Colorize Mono have settings of their own. Pick the effect, set it in the left panel and save it under a name: it then appears under Saved Effects. Position and Zoom together put a graphic or a text in one part of a wall. A second effect lane lets you combine two saved effects.
Ready-made Content and the 3D Preview
LaserOS comes with content you can reuse: the Demo Timeline folders under Timeline, and the Demo Beams playlist with the patterns of LaserOS’s own timeline shows. Ready-made shows are under Timeline and ILD Laser Shows: pick one and press Play.
The preview’s 3D view shows the show on a virtual stage, with settings such as the viewer’s position. It gives an idea of how the show will look before you set up the cubes.
A Show for Several Cubes
One computer can run several cubes, each with its own part of the show on its own Timeline layer. For several cubes we recommend Ethernet cables in LAN client mode (see Connection Settings):
- Set each cube’s beam block as in Hardware Installation: every beam at least 3 m above the floor where people may be.
- On each cube, choose Control Mode → LaserOS and Settings → Connection → LAN Client. Under Settings → Network → LAN Client, leave IP Mode on Auto IP.
- Connect each cube and the computer to an Ethernet switch. If the computer has no network port, use the USB-C to Ethernet adapter from the box.
- With no router on the switch, the cubes and the computer give themselves 169.254 addresses. Follow the steps in APIPA mode explained: WiFi off on the computer, and start LaserOS once the cubes have their addresses; the Laser button at the top left then no longer reads NO LASER.
- In the Timeline, give each cube its own layer (see Song and Layers).
A single cube needs no switch: connect it straight to the computer and use LAN Server Mode.
To play the built-in laser shows on several cubes without a computer, see Multi-projector Laser Shows.
Where Your Content Is Saved
LaserOS keeps what you make in the Playlists app:
- Drawings: from Draw.
- Custom Beams: from Beam Creator.
- Saved Texts: from Text.
- Imported: files imported in the phone app, unless you pick another playlist.
- Your own playlists.
It also holds ready-made playlists such as Demo Beams.
Adding to a Playlist
On a computer, right-click an item and use Add to playlist (see Creating a custom playlist). In the phone app, touch and hold an item (or select it and tap the gear at the left of the player bar), then open Add to playlist. Pick a playlist, or choose Create new playlist and give it a name, then tap Add. To play it, open Playlists and tap your playlist.
A playlist made on the phone plays from the phone. To put a playlist on the cube’s SD card you need LaserOS on a computer (see Playing Your Content on the Cube).
Changing the Playlist Order
To change the order of a playlist you made, on a computer: open it in the Playlists app and drag an item to its new place, or select the item and press Shift+Up or Shift+Down.
Moving a Playlist to the Phone
A playlist made in LaserOS on a computer can go to the phone app with your own content in it (LaserOS 0.17 or later on both):
- On the computer, open Playlists, open your playlist and click Export (the share icon). LaserOS saves a .ldplz file with your own items in it, such as drawings and imported SVG and ILD files.
- Copy the file to your phone or tablet.
- In the phone app, open Playlists, tap the gear at the top right, then Import Playlist, and pick the file.
The phone app can’t export, so this works from the computer to the phone only. To move a playlist to another computer, use the Import button in that computer’s Playlists app.
Autoplay
Autoplay moves from one item to the next by itself. Its buttons are under the preview on a computer and in the bottom bar on the phone: shuffle, repeat and the time per item (for example 3s). Click the time to set it in seconds or beats.
To autoplay one playlist only: open the Playlists app, then View options (the icon at its top right) and choose Toggle All → Disable. Then click and hold your playlist for about two seconds to switch it back on, and leave only Playlists ticked in the list of apps.
Flicker and Render Quality
The scanners can draw only so many points per second. Content with too much detail flickers, or looks distorted with rounded corners. To check, turn on Show FPS in simulator window in Settings → General: 45 FPS or more will not appear to flicker.
- Adjust the item’s render quality: lower it if the item flickers; raise it if corners look rounded, which can add flicker. On a computer, right-click the item and turn on Assign Render Quality (see Adding a custom SVG to the Playlist). In the phone app, tap the gear in the player bar, turn on Assign Quality and move Render Quality.
- Simplify it. In Draw, keep Points used under 100%. In Beam Creator, keep Brightness at 1.
- Make the picture smaller, or split it over more than one cube.
Scan Rate
The scan rate is how many points per second LaserOS sends to the cube. LaserOS sets it by itself, so there is nothing to set by hand:
- Each cube runs at the highest rate it supports.
- With several cubes in use, all of them run at the lowest of their rates, so a mix of models runs at the slower model’s rate.
- While a Timeline show plays, every cube runs at 30,000 points per second.
The DAC Rate on the Info page shows the rate in use (see Projector Info).
Safety Zones in LaserOS
In LaserOS control mode, LaserOS handles the safety zone (see Projection Settings). On a computer, open Settings → Projector Setup and choose Safety Zones in the drop-down at the top. In the phone app, tap the gear at the top right, then Safety Zone on the Projector Setup page. In the cube’s other control modes, set the zone on the cube itself (see Safety Zone).
- Attenuation Zones: switches the zones on.
- Preview: projects the outline of the zones.
- Shape: Rectangle, Ellipse, Triangle, Corner top left, Corner top right, Corner bottom right, Corner bottom left or Diamond.
- Invert Zones: when off, the zone is a keep-within zone with a green outline, and beams outside it are reduced; when on, it is a keep-out zone with a red outline, and beams inside it are reduced. Where zones overlap, red has priority over green.
- Attenuation: how much the beams are reduced, as in the cube’s own Safety Zone.
- X and Y: the zone’s position. Width and Height: its size.
- Add makes another zone. Next and Previous choose which zone the sliders change (in the preview it has white corners), and Remove current deletes it.
- Import and Export load and save the zone settings.
The phone app’s Safety Zone page has the same switches, sliders and buttons.
Use a keep-out zone to keep beams off a camera, a video projector or an object. Use a keep-within zone for a target area, such as a wall or a mapped object, where the beams can safely end. A zone works on top of the beam block and the 3 m rule in Hardware Installation, never instead of them. The laser must never be aimed at people (guideline 18 in Safety Guidelines and Proper Usage).
MIDI Controllers in LaserOS
In LaserOS control mode the cube’s own USB MIDI does not operate (see USB MIDI Settings). Plug the controller into the computer that runs LaserOS instead.
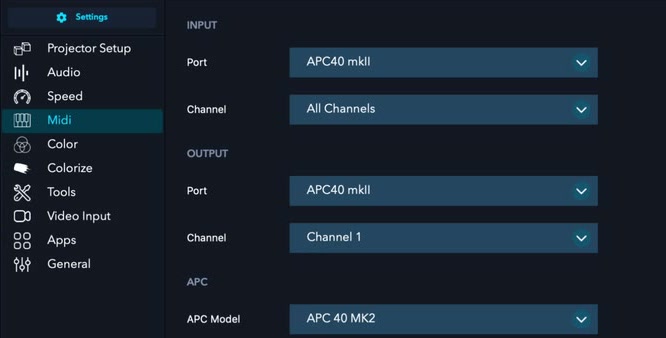
- Open Settings → Midi. Under Input and Output, set Port to your controller. For an APC40 MK2 or APC mini MK2, also pick it under APC Model. The Input port list has every MIDI input the computer lists, virtual MIDI ports included, so another program that sends MIDI (for example Stream Deck or OBS with a MIDI plugin) can start items and move sliders the same way as a controller.
- To start an item from a pad: right-click the item, pick a pad colour under Assign APC Color if you like, click Assign Hotkey and press the pad. The item then shows the pad’s note.
- To move a slider from a fader or knob: right-click the slider, click Link to MIDI Knob and move the fader. Backspace removes the link.
Switches on the left panel can get a pad or a keyboard key too (see Left Panel and Quick Controls). For a controller on the cube’s own USB port, in Playlist, Visualizer or Laser Show mode, see MIDI Mapping using an APC40 MK2 or APC mini MK2.
Video: LaserOS with a MIDI controller
Games, Laser Harp and Light Painting
Three more of LaserOS’s apps.
Games and Game Controllers
Open Games and pick a game. On a computer, double-click it, then click Start Game: each game lists its keys (such as the arrow keys and Space), so you can play with the keyboard. In the phone app, double-tap the game: on-screen controls appear.
A game controller works too, on a computer and in the phone app (Android, iPhone and iPad): connect it and LaserOS picks it up. On Windows, use a controller that works as an Xbox (XInput) controller.
Laser Harp
The Laser Harp is in LaserOS on a computer (Windows or Mac), not in the phone app. It turns beams into notes: a camera watches the beams (the computer’s webcam or another camera, chosen under Video Input Settings), and a note plays when a beam is interrupted. Note count sets the number of beams (one note each), and Enable LaserHarp starts it.
- With Auto create on, First/Main note, Musical Scale and Styles set the notes of all the beams.
- To set the notes one beam at a time (LaserOS 0.18 or later), turn off Auto create. Pick a beam under Edit Harp Note and its note under Select Note, or click Assign midi and press a key on a MIDI keyboard. Color Off and Color On set that beam’s colours.
The beam block and the 3 m rule in Hardware Installation apply to the harp’s beams too.
Light Painting
Light Painting is for long-exposure photos. The laser draws a JPG or PNG picture one line at a time, from top to bottom, in the picture’s own colours, and a camera on a long exposure records the whole picture. It is in LaserOS on a computer and in the phone app.
- Click or tap Import any JPG or PNG file and pick the picture. The cube projects the outline of the picture’s area: frame the camera on it.
- Set Blank Before Start, the seconds before the drawing starts (time to get to your camera), and Exposure time, the seconds the whole picture takes. The app suggests at least 15 seconds.
- Click or tap Start, then start the camera’s long exposure before the drawing begins, set to the Exposure time.
For the camera’s position, see Filming Lasers.
Playing Your Content on the Cube
In LaserOS control mode, LaserOS streams to the cube while it runs. To play a playlist on the cube without a computer, export it to the SD card with LaserOS on a computer; the phone app cannot export. The steps are in Creating a custom playlist, Exporting a Playlist to the micro SD card and Using the new playlist on the Ultra MK2 / Pro. The export button’s tooltip reads Export to SD Card (Lasercube MKII).
In Playlist mode the cube’s own Image Setup and Safety Zone apply, not the ones in LaserOS: set them on the cube before you play (see Projection Settings).
Using Other Gear and Software
The LaserCube can be run from a lighting desk, a DMX app or other laser show software. This chapter covers planning DMX addresses, ready-made fixtures, laser software and filming. The control modes themselves are in Control Modes.
Lighting Desks and DMX Apps
A lighting desk or app sends DMX to the cube’s DMX In (DMX control mode) or over the network (ArtNet control mode). The cube plays the items of the playlist chosen under CUE Selection, so the desk picks content from the SD card. A playlist you export from LaserOS can be played this way too (see DMX Settings Menu).
Planning DMX Addresses
- One DMX line (a universe) has 512 channels. Each device listens from its own start address. A LaserCube’s profile takes 16 channels: with start address 33, channels 33 to 48.
- Know how many channels each device uses, and don’t let their ranges overlap. For example: a 32-channel LED bar at address 1 (channels 1 to 32) and a LaserCube at 33.
- Cubes set to the same start address (and, for ArtNet, the same universe) get the same commands, and the desk treats them as one fixture; with the same playlist under CUE Selection they play the same thing. Give each cube its own start address to control it on its own.
- Run the cable from the desk to the cube’s DMX In, and on from its DMX Out to the next device. Plan the whole chain so no device is left out. Only connect real DMX equipment: never connect a fog machine unless you are sure it is true DMX, because many put mains power on their XLR socket, which damages the cube (item 22 in the LaserCube Parts Diagram). On the Pro, use the adapter cables in Connecting DMX cables to the LaserCube Pro.
- Set the control mode and start address before you mount the cube.
- Need more than 512 channels? Use another DMX line if your desk has one, or ArtNet.
Ready-made Fixtures
Some desks and apps have a LaserCube fixture in their library. These are named after the Ultra MK2; the Pro has the same 16-channel layout (see DMX/ArtNet Channel Layout).
- Wolfmix W1: in the Fixture Library, under Cloud, load “Lasercube Ultra MK2”. Pick the cube’s animations in the GOBO section; the W1’s colour pads and its own effects work with it too.
- SoundSwitch: in the Fixture Library, search for LaserCube and add “Ultra MK2 (Chn = 16)”. In performance mode you can add patterns or animations for the cube.
ChamSys and grandMA desks also work; if your desk has no LaserCube fixture, build one (below). Desks with FB3/FB4 support should work too: the default profile is compatible with the FB3/FB4 16-channel profile (see DMX Settings Menu).
Building Your Own Fixture
If your desk or app has no LaserCube fixture, build one from the channel list in DMX/ArtNet Channel Layout. Give every channel a plain value control (0 to 255), because each channel needs its own value ranges: for example, Access Mode on channel 1 needs 225 to 255 for all 16 channels, and pick a cue on channel 3 (33 or more: 0 to 31 is blackout). From Standard (8 channels) up, raise Fader (channel 5) and Scale (channel 6), or nothing can be seen, and set X Size and Y Size (channels 7 and 8) to 255: at 0 the picture is mirrored and flipped, at 128 it has no size. From Extended up, set X and Y Position (channels 10 and 11) to 128 to centre it. In the Photon 2 iPad app, the fixture creator is under Devices → + → Create myself. If the cube doesn’t respond, see No Response to DMX or ArtNet.
Video: what DMX is and how to use it with LaserCube
Laser Show Software
Laser software on a computer can drive the cube over the network (a cable is best), with no extra interface (DAC): the cube has one built in. Which control mode to use depends on the program:
- LaserOS control mode: LaserOS, and programs that support the LaserCube directly, such as Liberation, LaserShowGen, MadMapper and Millumin (see LaserOS Control Mode).
- IDN (ILDA Digital Network) and Ether Dream: two network protocols that some laser programs use. Neither is better: use the one your program supports. TouchDesigner uses Ether Dream (see Ether Dream Control Mode).
For a network cable: through a router or switch, use LAN Client; with one computer on the cable, LAN Server (LAN Client also works: see APIPA mode explained).
With an external ILDA DAC instead, for example Pangolin’s FB3 or FB4, plug it into ILDA In: the cube switches to it by itself, whatever the control mode. In that DAC’s software we suggest 30,000 points per second (item 21 in the LaserCube Parts Diagram). If a faint beam stays on, raise In Mute (see ILDA Input Config Settings). The Pro has ILDA In only.
MadMapper
MadMapper drives the cube with its laser add-on, MadLaser. With the cube in LaserOS control mode and connected, it shows up as a LaserCube output with its IP address (192.168.4.1 by default in WiFi Server mode). MadMapper projects nothing until you add a laser surface. We use an output of 30,000 points per second.
- To map an object, put a Laser Grid on Laser Quad surfaces, one quad per face, and drag each quad’s corners onto the real face. Laser Lines traced on the edges, with MadMapper’s materials, light parts of the edges in moving patterns.
- More detail means more points and a lower frame rate: in our video, 500 points ran at 60 frames per second and about 4,000 points at about 7. So keep mappings simple (see Flicker and Render Quality).
Video: laser mapping in MadMapper
Writing Your Own Software
Developers can stream laser data from their own program to the Ultra MK2 and Pro over the network, with the cube in LaserOS control mode. Our protocol specification describes the commands and data packets and includes a complete example sender in Python: UDP DAC Streaming Protocol Specification (PDF, 210 KB). Firmware 2.2 changed how the cube answers some of its commands: see the specification.
Software that already has an Ether Dream or IDN output needs no code of your own: see Ether Dream Control Mode and Control Modes. Libraries other people have written are listed on our GitHub page: github.com/Wickedlasers. We don’t test or support them.
Other LaserCube models: the LaserCube WiFi and the first LaserCube Ultra work with the programs that support them, such as MadMapper, Liberation, LaserShowGen and Millumin (our list of compatible apps), and with LaserOS; the specification above also applies to them (the same commands), but its buffer size and top point rate are the Ultra MK2 and Pro's. For the first, USB-only LaserCube 1W and 2W, use a program with a maintained driver for them: Liberation, LaserShowGen or Millumin. Our old USB library and TouchDesigner plugin for those cubes are archived and no longer maintained. libLaserdockCore, on our GitHub page, is the open-source engine of the LaserOS app, not a library to build your own program on.
Filming Lasers
- Keep the camera out of the projection area: a beam straight into the lens can damage its sensor. A keep-out zone can keep the beams away from a camera: in LaserOS control mode the cube’s own zone is greyed out, so use the program’s zones, if it has them (LaserOS: see Safety Zones in LaserOS); in the cube’s other modes, on the cube (see Safety Zone).
- The shutter speed changes how beams look on camera. At 25 frames per second, a 1/500 shutter shows short dashes, 1/50 longer pieces and 1/25 whole beams.
- Laser banding, the ribbon look from music videos, comes from matching the laser’s scanning speed to the camera: in MadMapper, adjust the Scan Speed for each pattern, with a 1/50 shutter at 25 frames per second. With banding set up, a faster shutter (such as 1/100) makes the beams thinner and sharper.
- Haze or fog makes the beams visible on camera (see Nano Fogger, Haze and Fog).
Settings
Projection Settings
When in LaserOS control mode, the Image Setup, Colour Balance and Safety Zone settings are handled by LaserOS, so their CubeOS entries remain greyed out.
Test Patterns are still accessible though.
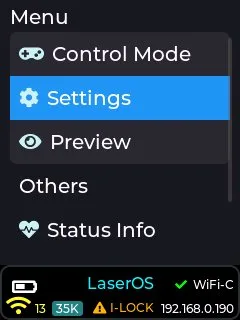
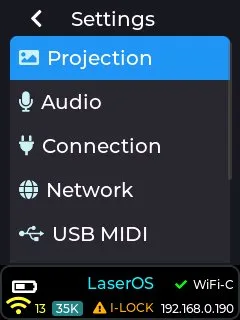
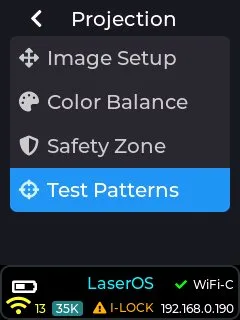
By selecting one of the other control modes, such as Visualizer, the CubeOS stand-alone image settings are made available:
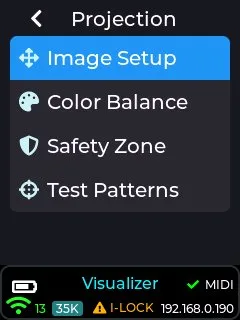
Image Setup
Image Setup holds the picture’s power, zoom and rotation, its size, flips and position, the keystone correction, and a grid to line the picture up. Each control has its own icon.
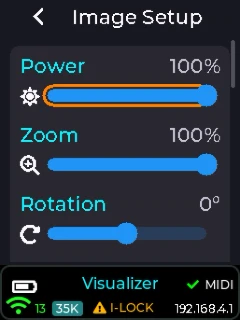
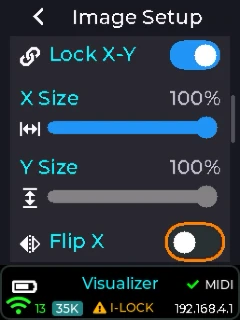
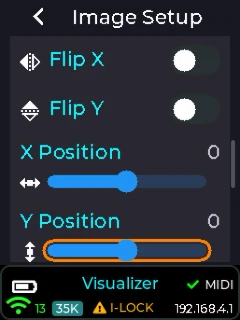
- Power: the projection power, 0 to 100%.
- Zoom: the picture size, 10 to 100%.
- Rotation: up to 90° either way.
- Lock X-Y: with it on, Y Size follows X Size, and the Y Size slider is greyed.
- X Size and Y Size: the picture’s width and height, 10 to 100%.
- Flip X and Flip Y: mirror the picture.
- X Position and Y Position: move the picture, from -128 to +128. When X and Y size are at 100%, the position sliders have no effect, as they cannot move the full-size image beyond the full-size projection area. If the X and Y size are reduced to 50%, the position sliders move the image with settings between -64 and +64.
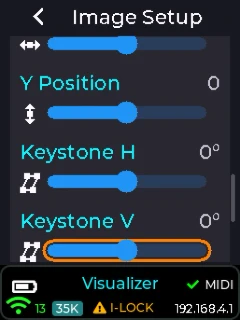
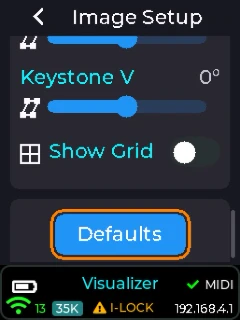
- Keystone H and Keystone V: keystone correction, below.
- Show Grid: projects a square, to line the picture up. It stays off while a test pattern is showing, and goes off when you leave Image Setup.
- Defaults: sets every Image Setup setting back to its default, Zoom and keystone included. Show Grid stays as it is.
Keystone H, Keystone V and Show Grid are new in firmware 2.2.
A good way to get a feel for how the image size affects the amount of positional movement available is to turn on Show Grid (or the RGB THold test pattern, see Test Patterns below), then adjust the image size and position.
Keystone Correction
Projecting onto a wall the cube isn’t facing straight on turns a square into a trapezoid. Keystone correction reshapes the picture so it lands square: horizontally (Keystone H), vertically (Keystone V) or both, up to 45° each way.
- Open Settings→Projection→Image Setup.
- Turn on Show Grid: the cube projects a square.
- Turn Keystone H and Keystone V until the square looks square on the wall.
- If the square comes out a little wide or narrow, adjust X Size or Y Size.
The picture gets a little smaller so it stays inside the scan area: about 90% of full size at 15°, 83% at 30° and 77% at 45°. Size, position and rotation still act on the picture as the audience sees it, and safety zones stay put in the room. The web app’s Keystone pad does the same from your phone: see Picture Settings. In LaserOS control mode, use the keystone corners in LaserOS instead (see Image Settings in LaserOS).
Colour Balance
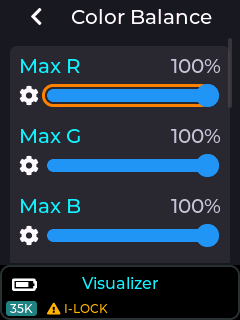
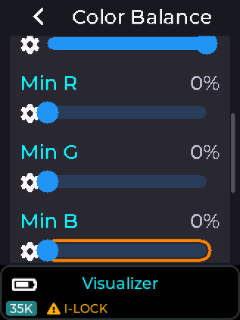
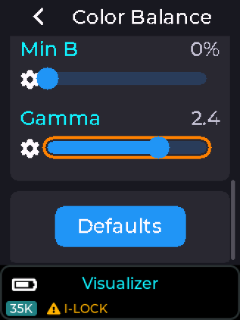
Colour balance settings allow for fine adjustments of maximum and minimum outputs for each colour laser, plus one gamma curve for all three. The minimum outputs go up to 20%. The default values should be adequate for most situations, but adjustments are available to allow for precise colour matching of multiple projectors.
Safety Zone
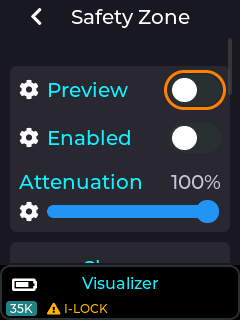
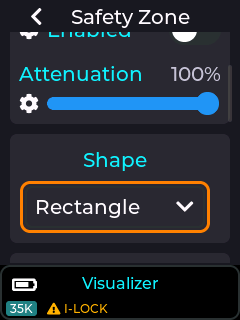
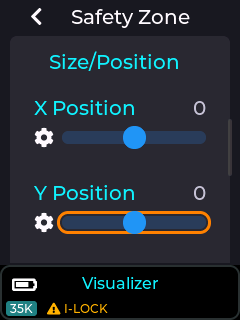
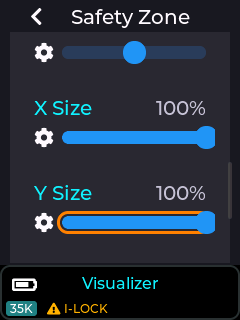
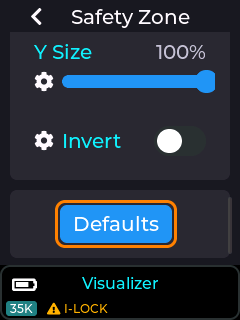
The Safety Zone setting, when enabled allows a basic shape to be created for a keep within or keep out zone. The preview toggle (with Laser Interlock Enabled) will project the outline of the safety zone.
By default, it is a keep-within zone and the projected preview colour is green.
By setting the invert toggle, it becomes a keep-out zone and the projected preview colour is red.
Whilst outside of a keep-within, or inside of a keep-out zone, the laser power is reduced according to the attenuation setting. 100% attenuation means that the out of zone beams are fully blanked. A 90% attenuation would mean that the out of zone beams are reduced to 10% of their normal power.
The Zone shape is selectable between Rectangle, Circle or Ellipse.
The size and position of the zone shape is adjustable using the respective sliders.
The keep-within zone may be useful for defining a target area where the beam may be safely terminated. The keep out zone may be useful for excluding beams from an area when a camera or digital projector is located.
Keep Within Safety Zone
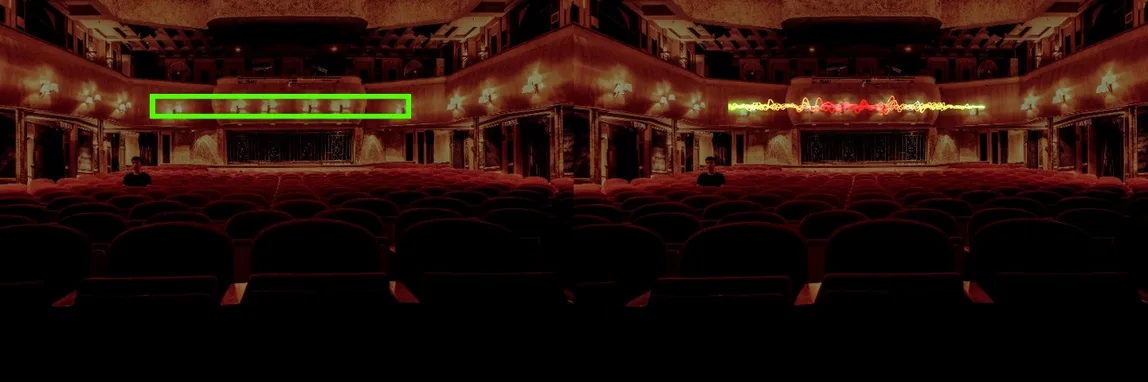
Keep Out Safety Zone
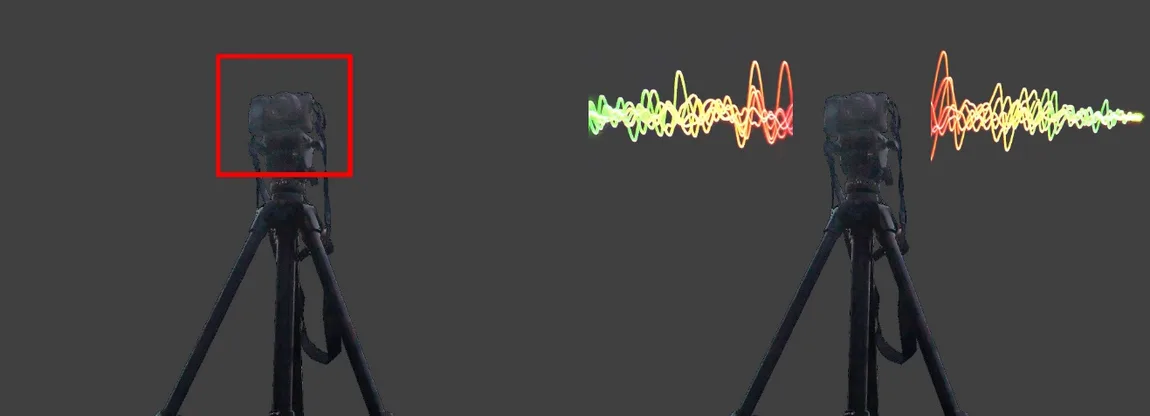
Test Patterns
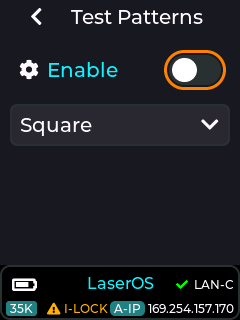
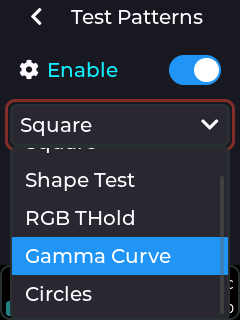
The built-in test patterns are provided to verify correct operation of the lasers and the scanning system. The RGB THold pattern is a low brightness one, used for factory setting of the internal laser diode driver. It can also be useful for setting up projectors on site as it has a border that shows the projected image size. Note that this is affected by the rotation, X-size, Y-size, X-Position and Y-Position sliders in Image Setup.
Example test patterns available
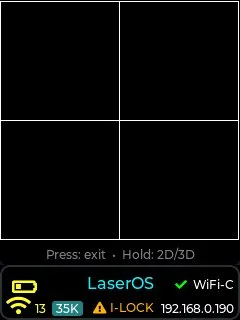
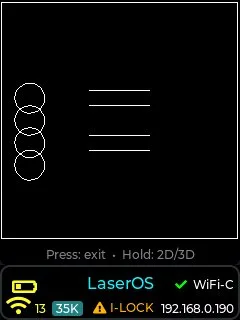
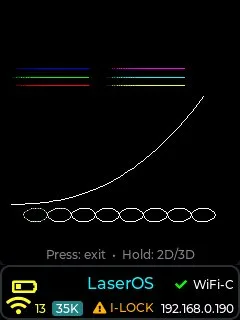
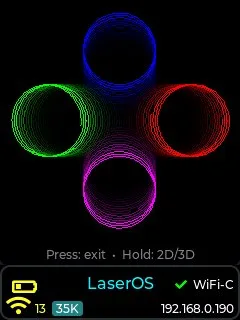
Tempo Settings
The tempo settings are used to control the speed of any enabled effects applied to the projection (see device effects wiki or in this guide here: Effects), e.g. The strobe effect will flash faster as you increase the BPM slider in the tempo menu, and flash slower when reducing the BPM slider.
The purpose of the tempo menu is mainly for live DJ effects while a music track is playing.
In order for the supplied effects to work to the beat of a music track, you must first set the correct BPM, preferably using the tap BPM feature, then use the sync button to mark which beat is the first beat of a bar. Once this is done the effects will then be in sync with any music that is playing allowing the user (with the aid of an APC40 MK2 MIDI controller) to perform live adjustments to the projection using effects assigned to dials/faders on a MIDI controller.
The tempo menu can be accessed by going to Settings→Tempo when in either playlist or visualizer control mode.
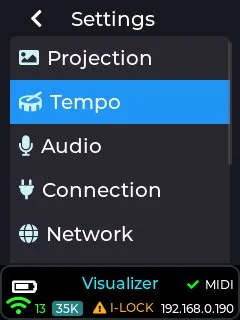
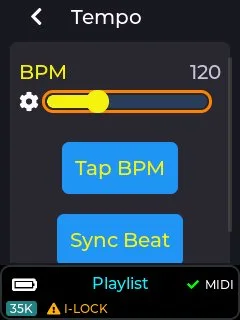
The tempo can be set using the BPM slider, or can be set using the “Tap BPM” button.
Continuously pressing the “Tap BPM” button to the beat of any externally playing music track will allow the LaserCube to calculate the actual BPM of the music.
The “Sync Beat” button will synchronize the beat to beat 1 of a 4 beat bar.
The tempo parameters are also MIDI mapped to the dedicated tempo buttons on an APC40 MK2 if using the factory supplied MIDI mappings.
Note: Menu items in yellow (as shown in image above) mean they have been MIDI mapped to a dial/fader on an external MIDI controller. They will only show in yellow when a compatible MIDI controller is connected to the USB port of the LaserCube.
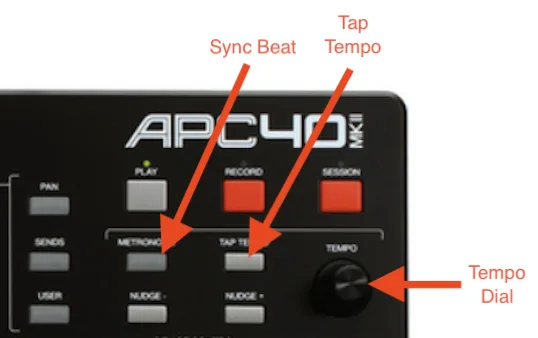
Audio Settings
Audio settings can be adjusted by going into Settings->Audio as shown below:
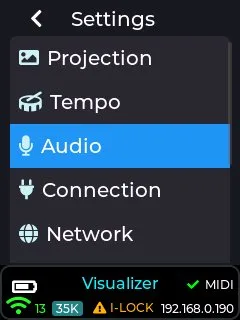
The audio settings allow changes to the audio output volume, audio output delay, audio input selection, and input gain controls.
Audio Output Volume
The audio output volume can be adjusted from 0 to 100%. This control will adjust the current volume while a laser show is playing, and this slider can be midi mapped to an APC MIDI controller.
This control will directly affect the audio coming out of the 3.5mm audio connector on the rear of the device, and is labelled A-OUT (green connector)
Press on the menu knob to edit the slider and make adjustments, then press again on the knob to exit and save this value (preserved through power cycle).
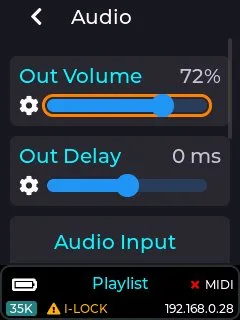
To map the audio volume output slider to a MIDI controller then ensure USB MIDI is enabled in settings->USB MIDI and a compatible APC MIDI device is connected, then single press the menu knob to enter slider edit mode (slider bar turns orange), then long press again on the knob and a context menu will appear allowing you to link this slider to a dial or fader over MIDI, or unlink from an existing MIDI fader, or reset the slider to its default value.
Note: The audio output volume slider comes pre-configured to a MIDI dial on an APC40 MK2 if using the factory supplied SD card.
Audio Output Delay
This slider allows the audio output to be either delayed, or started earlier (with respect to a projection, like when using the LaserCube in laser show mode) in order to compensate for any audio processing delay due any extra audio processing present on the device connected to the line output port of the device.
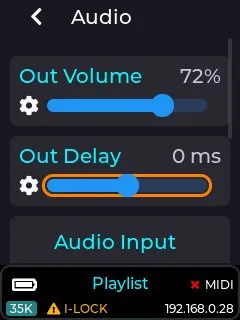
Example: Some portable amplified speakers have a DSP in order to provide audio reactive light effects etc, and this can cause the audio going into the unit to be delayed by as much as 300 milliseconds. This would cause laser shows played on the device to be completely out of sync with the audio, so adjusting the out delay slider can compensate for this.
Note: Once a laser show on the device has started, this slider will have no affect on the audio output delay until you stop and start the laser show again.
The audio settings also have no effect when using the device in LaserOS mode, as all audio is handled by LaserOS in this case.
Audio Input Selection
This dropdown is used to change the audio input source used by the device, and can be set to either the built in microphone or the stereo line input connector.
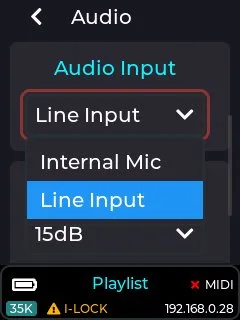
The audio reactive visualizers and effects built into the device will be affected by this setting.
When line input is selected as the audio input source, you will need to apply audio from a PC or other analog audio capable device via the 3.5mm stereo jack to the rear of the unit labelled A-IN (pink connector).
Max Line Gain / MAX MIC Gain
This dropdown allows the user to change the amount of gain that is applied to the audio input source. Setting the gain too low here will result in some audio reactive visualizers showing very little change. Equally setting a too high gain will result in over driven visualizers. Both inputs can have their gain adjusted from 0dB to 50dB in 5dB steps.
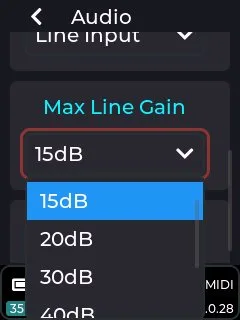
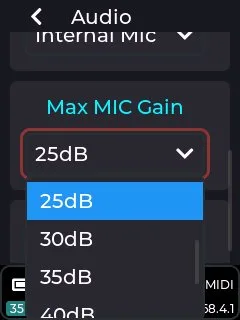
Audio Defaults
The entire audio settings can be reset to factory default values by clicking this button and accepting the pop-up message box asking to reset the values.
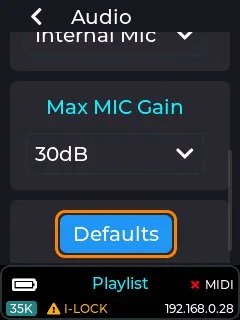
Connection Settings
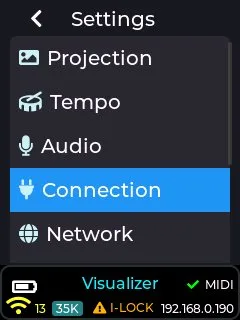
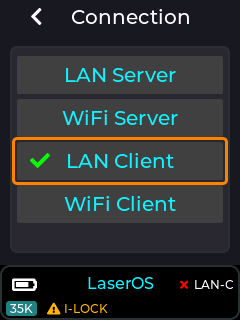
Note: On firmware before 2.1, if the connection mode is changed, the LaserCube will need to restart: move the red cursor to highlight “Yes” and push the rotary knob to confirm. Firmware 2.1 and later change the connection mode, IP settings and WiFi credentials without a restart.
Select the connection type (required for network control via LaserOS, ArtNet or Liberation etc.)
The LaserCube has no Bluetooth: LaserOS reaches it over WiFi or an Ethernet cable.
For multiple LaserCubes, and especially in areas where local WiFi may be congested, we recommend using an Ethernet cable in LAN client mode. When set to LAN client mode on a network without a DHCP server, the LaserCubes will self-assign an APIPA address.
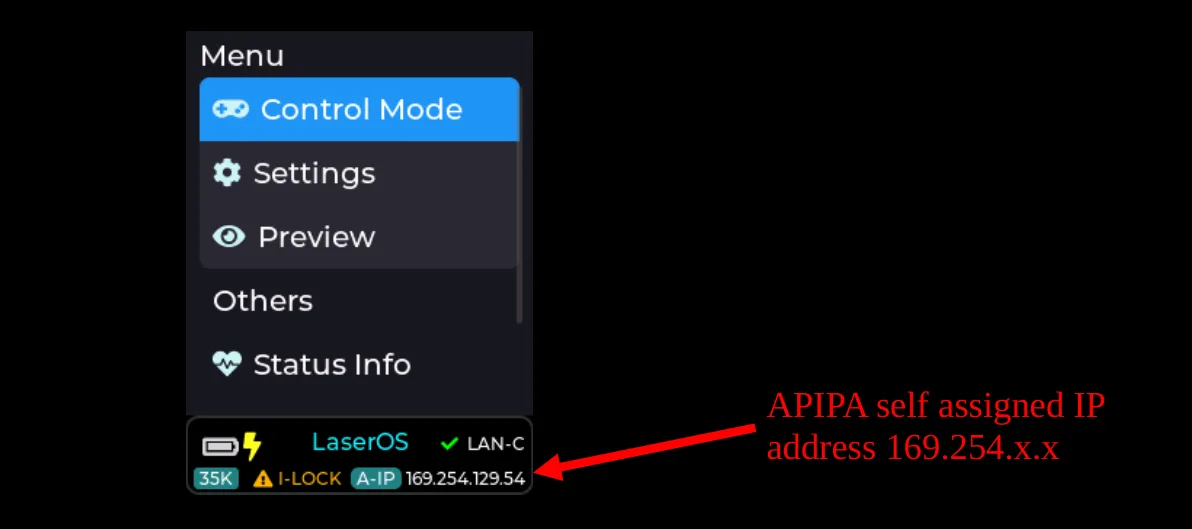
The tick by LAN-C indicates that the LaserCube has connected in LAN Client Mode.
The A-IP indicates that the IP address shown – 169.254.129.54 is an APIPA one.
The Network settings can be customized under the Network menu.
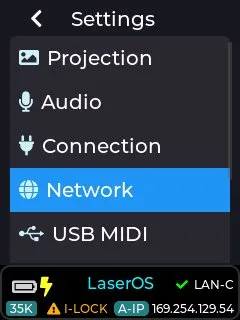
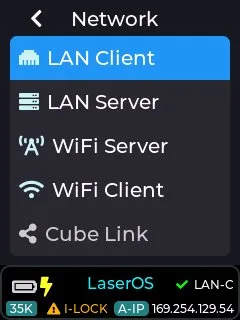
APIPA mode explained
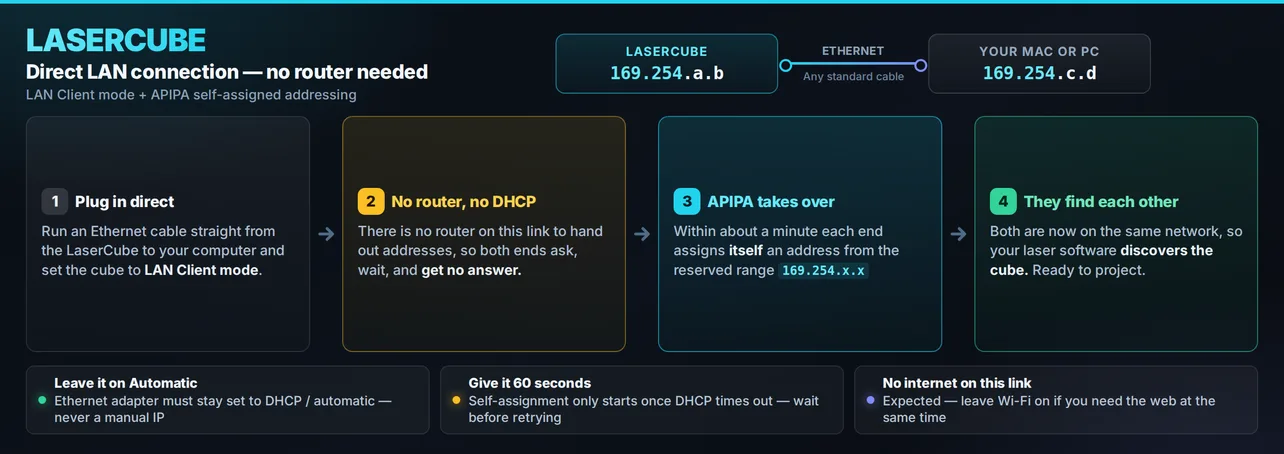
When using LAN client mode, the LaserCube will try to obtain an IP address from a DHCP server on your network. If you have connected the LaserCube directly to your home router, or via an Ethernet switch to your home router then the cube will be given an IP address according to your network (e.g. 192.168.x.x).
If you are not connecting the cube via a home router or DHCP server (due to connecting a cable directly between PC/Mac/iOS and the LaserCube) then the cube will assign itself an IP address using the Auto IP protocol after around 20 seconds.
APIPA addresses start with 169.254.x.x.
If you are using Windows or an Apple MacBook then the following should be done in order to connect with our LaserOS software using APIPA:
- Temporarily turn off WiFi on your PC/MacBook
- ensure LaserOS is not running, and close it if it is.
- Turn on your LaserCube and connect an Ethernet cable from the LAN port on the cube to the LAN port on your PC/MacBook.
- Wait until the cube self-assigns an APIPA address.
- Start LaserOS on your MacBook and check that the device is detected (the Laser button at the top left of LaserOS should no longer read NO LASER; see The Laser Button).
- Turn your PC/MacBook WiFi back on if you need internet access.
Network Settings
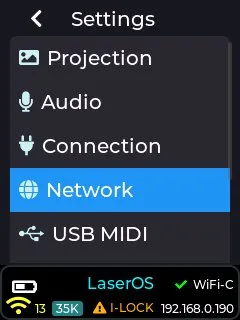
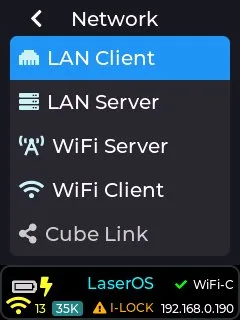
LAN Client Mode
For multiple LaserCubes, and especially in areas where local WiFi may be congested, this is the recommended connection mode. When connected to a network without a DHCP server, the LaserCubes will self-assign APIPA addresses, otherwise your home router (or network switch connected to your home router) will provide the IP address automatically.
LAN Client Mode Customisations
IP (Address) Mode - Auto IP / Static IP
Auto mode. Uses DHCP server if present, or APIPA.
Static IP. Manual configuration of IP Address, Net Mask and Gateway
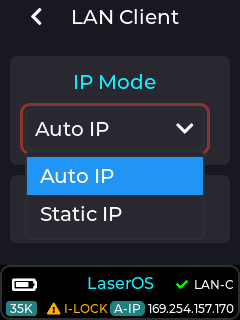
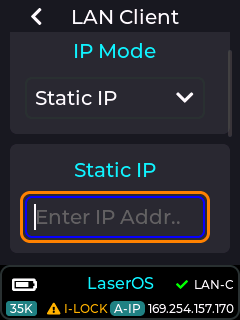
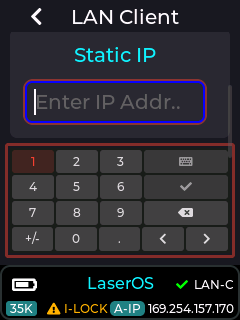
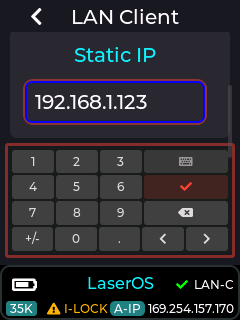
To enter the IP address, short press with the entry box highlighted.
The gateway IP address and subnet mask can be edited in the same way (Gateway IP is the IP address of your home router / DHCP server)
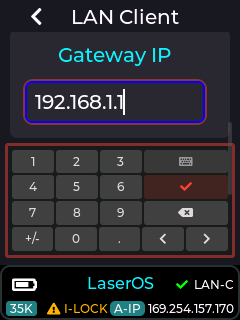
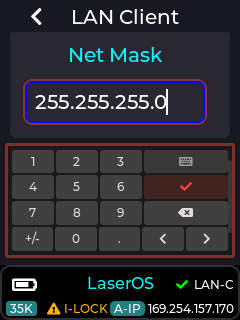
LAN Server Mode
This is recommended if you want to use a direct wired connection to a single device like a MacBook or Laptop, or mobile device with the provided USB→LAN adapter.
LAN Server Mode Customisations
Manual configuration of the LaserCube device IP Address and Net Mask
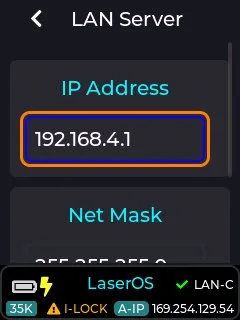
WiFi Server Mode
Useful for cable free, single cube LaserOS operation in areas with no WiFi congestion.
Note: Make sure you connect the provided WiFi antenna before using any wireless modes.
It is preferable to leave the WiFi channel set to Auto, which will make the device scan for the quietest WiFi channel to use at each power on of the device.
WiFi Server Mode Customisations
SSID, Password, Channel (including Auto), Bandwidth (20 MHz or 40 MHz), IP Address, Net Mask
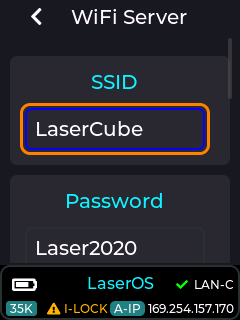
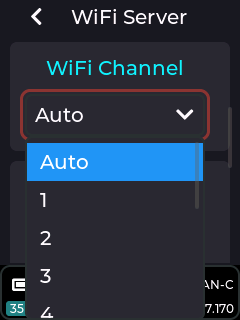
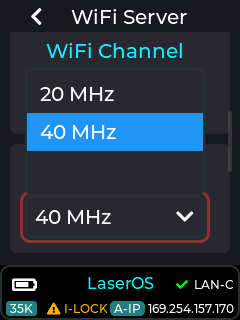
The example images below show the manual WiFi server IP address and net mask entry
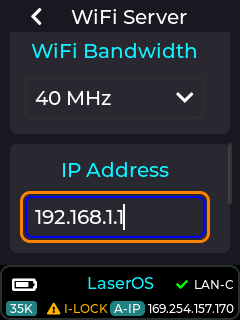
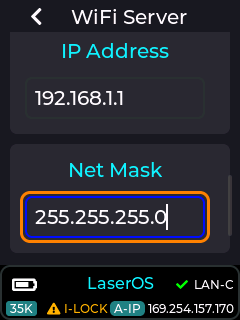
The WiFi Server page also has a “WiFi Scan” button under WiFi Channel. When pressed, it shows “Scanning...” while it checks the 2.4GHz channels, then a channel list showing how busy each channel is with other devices, with the quietest one marked as the best channel. The cube then moves its WiFi server to that channel, so devices connected to it drop off for a moment and join again.
If the channel list is mostly red then your location is congested due too many other 2.4GHz devices in operation (like in an apartment / building complex), and you should consider using the provided USB→LAN adapter as a wired connection instead, thus avoiding projection break-up due to potential network packet loss.
This is only important when using LaserOS control mode since this mode streams UDP DAC sample data at a high data rate over the wireless network, but for other modes like playlist/visualizer mode then this should have no impact on projection quality, since these modes render content locally from SD card rather than over the network.
Example images of the WiFi server scan button and popup channel list page
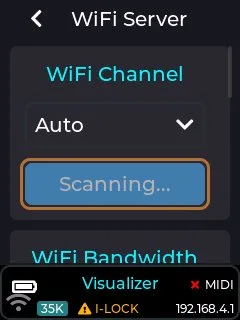
Note: The “WiFi Scan” button is greyed out unless the cube is running its WiFi server (WiFi Server connection mode, in any control mode except DMX and Laser Show) and WiFi Channel is set to Auto. It also stays greyed out while a scan is running.
WiFi Client Mode
For connecting to an existing WiFi router. Performance may vary depending on the quality of the router, amount of WiFi congestion and the amount of existing network traffic.
Note: Make sure you connect the provided WiFi antenna before using any wireless modes.
WiFi Client Mode Customisations
SSID, Password, IP Mode - Auto / Static (IP Address, Gateway, Net Mask)
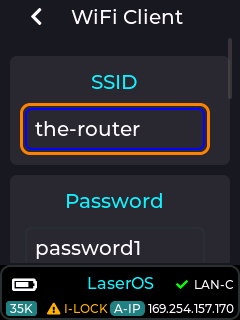
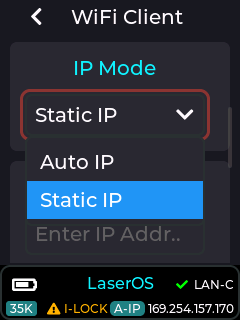
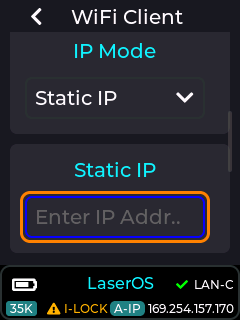
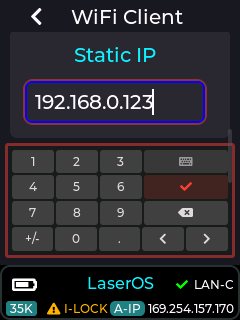
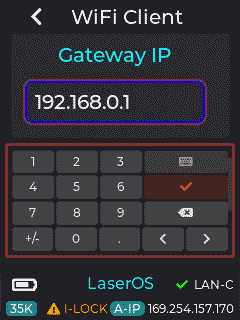
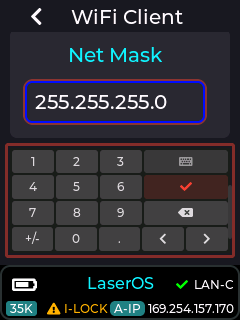
To enter the IP address, short press with the entry box highlighted.
Select the tick button to close the entry box.
Cube Link Mode
Wireless Cube Link (only available when connection mode is not set to WiFi) is a method of synchronising playback of content across multiple LaserCubes. Cube Link does not require a WiFi network to be present as it creates its own wireless network to communicate between master and slave devices within ~20-40m line-of-sight range using a low data rate communication protocol.
Note: Make sure you connect the provided WiFi antenna before using any wireless modes.
In order to set up a Cube Link network, it must be enabled on each LaserCube, then one cube must be set to Master, and the others as slaves. To exist on the same Cube Link Network, they must all share the same Link Channel and Link Pin. The Group determines what content that cube will project. For a 2 projector Laser show, the first projector content will be shown on all cubes set to Group 1 and the second projector content will be shown on all cubes set to Group 2.
Slave devices that are in range of a Master that have a matching channel and pin configuration will be indicated by the status bar background on each slave turning from black to purple.
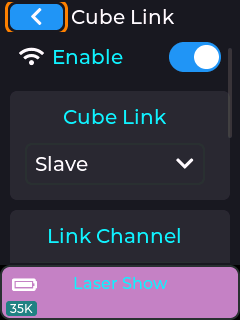
Each cube plays the content from its own SD card. The master only sends short timing messages over the 2.4 GHz band, telling the other cubes what to play and when: press play or pause on the master and the others follow. The PIN and Link Channel keep your cubes apart from other Cube Link setups nearby. Keep metal objects out of the way between the cubes’ antennas.
The Ultra MK2 and the Pro can be linked, and so can cubes of different power: for example, a brighter cube in the middle and lower-power cubes at the sides.
Cube Link Mode Customisations
Enable, Master/Slave, Link Channel, PIN, Group
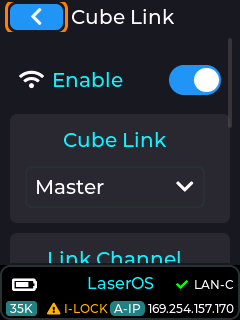
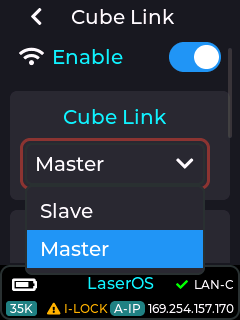
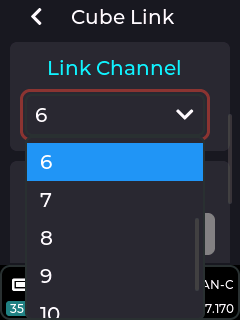
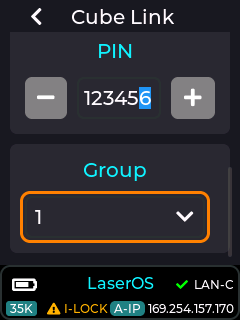
To set the PIN, either use the + and – buttons to increase / decrease the selected digit, highlighted in blue, or short press with the PIN entry box highlighted.
When in the PIN entry box:
Short press to change the highlighted digit.
Rotate the knob to increase/decrease the highlighted digit
Long press to exit the PIN entry box.
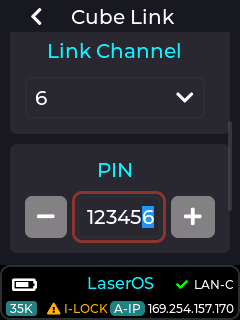
USB MIDI Settings
In order to use any of these MIDI devices, the USB must be enabled by going to the Settings ->USB MIDI menu.
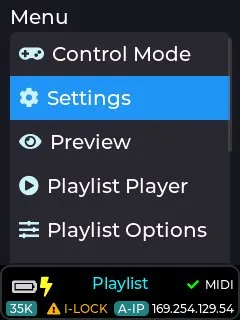
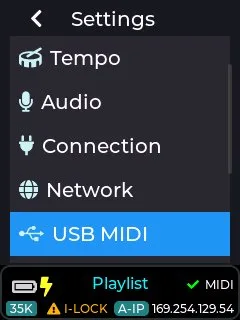
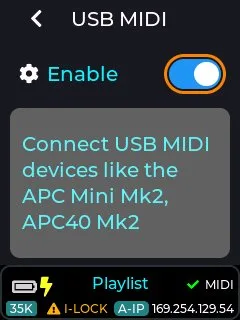
Note: USB MIDI does NOT operate when the unit is in LaserOS / ArtNet / DMX / IDN / Ether Dream control modes, as these modes are controlled using alternate communication protocols.
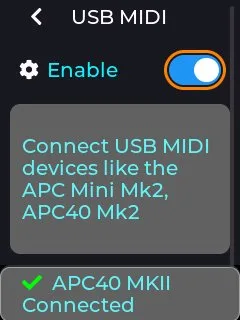
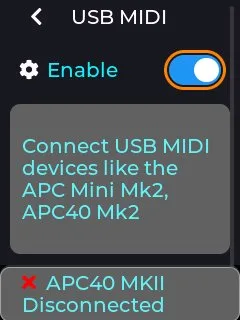
If a compatible device is detected on the LaserCube’s USB port, then the status bar will briefly show an updated connected status, and unplugging a device will show the disconnected status as shown above. The status bar will also show a green tick or a cross next to the MIDI label on the RHS of the status bar.
Playback Speed Settings
The user can adjust the playback speed of any CUE being projected while in the playlist control mode. This can be done using the Settings→Playback Speed menu
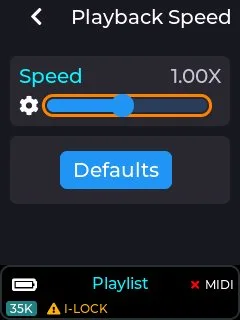
The playback speed slider can also be assigned to a MIDI knob or fader if using an APC40 MK2 or APC mini MK2 (see MIDI Mapping in this guide, or the online wiki).
General Settings
This menu has options to change the LCD brightness, enable backward compatibility with original WiFi cubes, battery percent display, and preview mode style.
When the battery percentage option is enabled, the battery gauge in the status bar will periodically display the actual percent remaining in addition to the simple battery gauge.
The preview mode style can also be set to 2D or 3D, which will affect the preview screen when it is opened from the main menu.
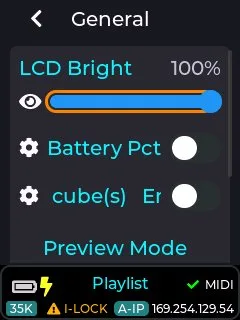
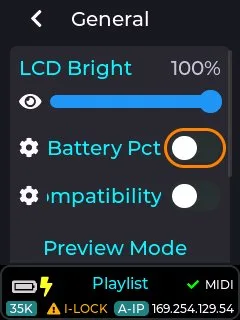
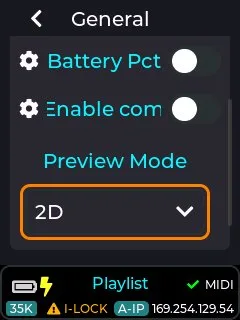
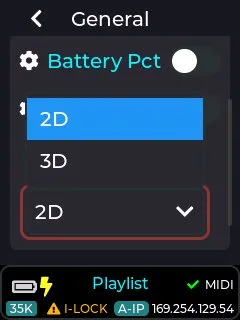
Note: The backward compatibility option will only need to be enabled if you intend to use a mix of old WiFi cubes and new Ultra MK2 / Pro LaserCubes on the same network with our LaserOS software (you will also need LaserOS version >= v0.17.7).
ILDA Input Config Settings
The parameters set in the ILDA Input Configuration menu are valid when an external DAC is connected to the ILDA input connector on the back of the device. With no ILDA cable is connected, this item will be greyed out on the LCD menu UI.
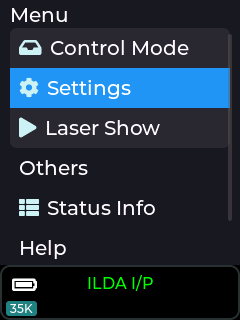
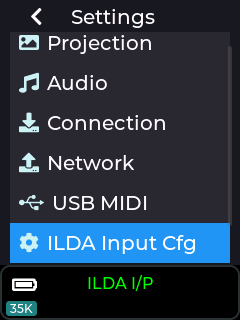
When an external DAC is connected via the ILDA input connector, an additional menu item is available under Settings – ILDA Input Cfg.
This is for digitally tuning the Laser Diode Driver to compensate for any errors in the third-party DAC hardware. One common problem is “ghost beams” where one or more channels of the ILDA colour signals have a small voltage present on the output pins when those channels are meant to be off (blanked).
The In Mute R, G and B levels allow a threshold to be set, below which the beams are forced to be off. For example, a DAC with a higher than normal “zero output voltage” on the green channel could cause a faint green beam to always be emitted, regardless of any master brightness setting in the controller software for that DAC. The ILDA Input Cfg -> “In Mute G” level could be raised until the green ghost beam is extinguished.
There being an increased offset on the green channel would also affect the colour balance at low intensities. To compensate, the ILDA Input Cfg –> “Diode th G” could be reduced until the correct colour balance is restored. This allows errors from external DACs to be tuned out.
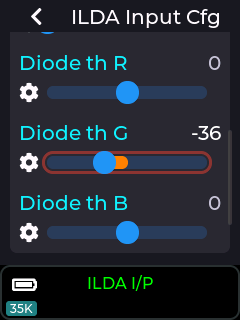
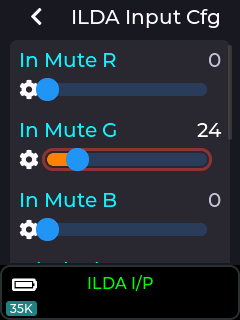
Menu Language Settings
The LCD menu can be set into any one of 12 available languages (default is English): English, Deutsch, Français, Español, Italiano, Português, Nederlands, Polski, Čeština, Magyar, Română and Türkçe.
The device needs to restart when the language chosen differs from the current menu UI language.
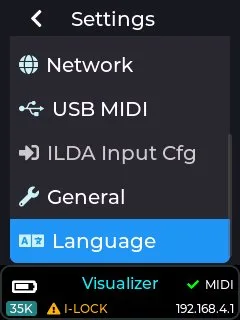
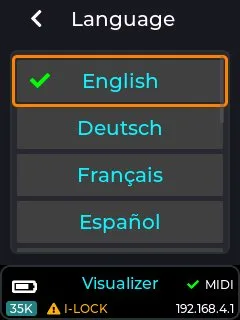
Note: In order for the UI labels to fit within the screen width without horizontal scrolling, some UI labels have had to be shortened, so they may not be the most suitable word(s) available in each language.
Built-in Effects
The effects menu will be available on the top level menu of the LaserCube when it is in any mode that allows additional audio reactive effects to be used.
The effects can be used to warp or re-colour the currently projected image, and each effect can contain either an audio reactive element, or tempo based modifier.
If an effect is dependant on the current setting of the tempo, then this can be accessed from settings→tempo, or set using tap tempo on an APC40 MK2 device (see wiki section on tempo).
Any of the effect parameters can be MIDI mapped to an APC40 MK2 or APC mini MK2 in order to allow live modification of the effects (see our DEMO APC40 MK2 MIDI mapping on the SD card provided with the LaserCube).
Note: Some effect parameters like “Force On” are intended to be MIDI mapped only, and are used for live effect activation using an APC40 MK2 / APC mini MK2 MIDI device.
The Effects menu can be accessed from the top level menu when the device is in playlist or visualizer control mode as shown in the image below:
In order to be able to use the effects they must be enabled. If no effects are required then it is recommended to have the effects disabled to prevent unintentional changes to the projection.
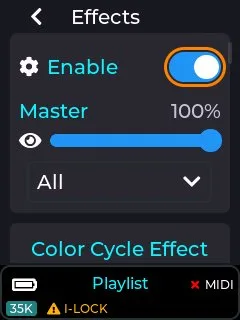
Any of the effect parameters changed via the LCD menu UI will be preserved through a power cycle. This is to allow the unit to start up with any effect chosen by the user without any additional actions which is perfect for when the device just needs to be powered on and interlock activated.
Available Effects
There are currently 78 effects that can be applied to the currently projected image, and each effect has its own set of user adjustable parameters depending on the chosen effect.
Movement & 3D (17)
 | Zoom Effect | Scales the whole image in and out with an eased sweep, locked to the tap tempo. A Linear switch gives constant-rate zoom. |
|---|---|---|
 | 3D Spin | Spins the image about the vertical axis in an eased forward / rest / reverse / rest cycle, synced to tempo. |
 | 3D Column | Wraps the image around a rotating vertical cylinder whose radius slowly breathes in and out, with perspective depth. |
 | 3D Globe A | Re-interprets each point as yaw/pitch on a rotating sphere, projected back to 2D with a perspective depth fade. |
 | 3D Globe B | Globe spin at half speed and reversed, sitting closer to the camera with a quadratic radius depth fade. |
 | 3D Gyro A | Tumbles in 3D on three spinning axes; each tempo tick starts or stops a random axis. Telephoto perspective. |
 | 3D Gyro B | Gyro that swaps axes twice as often, spins faster, and uses the closer perspective with a radius fade. |
 | 3D Flip A | Performs one full revolution per cycle around a random in-plane axis with a telephoto perspective, tempo-synced. |
 | 3D Flip B | Flip with an added out-of-plane tilt and a close-up perspective with radius fade. |
 | 3D Twist A | Rotates about the horizontal axis with the angle offset by x, twisting the image like a ribbon that rolls continuously. |
 | 3D Twist B | Ribbon twist that eases back and forth in a raised-cosine wobble instead of rolling all the way round. |
 | 3D Twist C | Corkscrew wobble about the vertical axis, blending sine and cosine oscillation from the bottom to the top of the frame. |
 | 3D Tumble A | Tumbles end-over-end around the horizontal axis, with lit strokes pushed out in front of the image plane. |
 | 3D Tumble B | Tumble where each stroke gets a random depth offset whose strength rides a bass x treble audio energy gate. |
 | 3D Flag | Drapes the image onto a rippling flag surface with a drifting wave phase and two slow sways around the pole. |
 | 3D Jellyfish | Ripples the image radially through a damped-sine bell while five slow oscillators wobble it around in 3D. |
 | Spiral | Twists the image into a spiral (rotation grows with radius); the twist steps through quarter/half turns on tempo. |
Warps & Distortion (19)
 | Warp Circle | Radial remap using a chebyshev/euclidean ratio so square framings bulge outward into circles. |
|---|---|---|
 | Warp Square | The inverse remap - circular framings squash inward into squares. |
 | Warp Clover | Manhattan-distance ratio pinches the image into a four-lobed clover-leaf shape. |
 | Warp Diamond | The inverse of Clover, stretching the image out into a diamond. |
 | Warp Orbital | Circle warp without the square root - a double-strength radial bulge. |
 | Warp Bubble | Magnifies the centre up to 1.68x inside a fixed ring, like looking through a bubble lens. |
 | Telescope | Fisheye radial zoom - magnifies the centre, compresses the edges, clipped to a clean circular rim. |
 | Ripple A | A travelling pond ripple: a radial wave scales each point’s distance from centre. Plain speed slider. |
 | Ripple B | The same ripple, but its position rides the tap-tempo phase. |
 | Gong A | A wave crashes outward from the centre on each tap-tempo beat. |
 | Gong B | A standing radial wave pumped by the audio reactor’s fast bass spin (music aware). |
 | Wavy | A three-octave sine ripple displaces the image horizontally; amplitude rides the bass, the pattern scrolls on tempo. |
 | Jelly A | Squashes the image on two oscillating axes so it wobbles like jelly, driven by slow bass and treble walkers. |
 | Jelly B | Beat-locked jelly wobble: x squashes at double the beat rate, y on the beat. |
 | Jelly C | Beat-locked jelly wobble: x squashes per beat, y per bar. |
 | Squiggle | Adds a continuously rotating circular offset so straight lines are drawn as tight corkscrew squiggles. |
 | Scramble | Squiggle’s alt: the offset circle reverses each revolution, scribbling instead of corkscrewing. |
 | Shake | Jolts the whole image along a circular path on each beat onset - still between hits, alternating direction. |
 | Diffract | Displaces points sideways by an amount taken from their hue, so differently coloured strokes separate like a prism. |
Colour & Recolour (31)
 | Colorize Effect | Recolours the image with a single hue that sweeps over it, cycling on a speed slider. |
|---|---|---|
 | Colour Cycle Effect | Smoothly cycles the whole image through the colour spectrum over time, with a +White exclude option. |
 | Hue Effect | Fades every colour toward one fixed hue and saturation; intensity blends, with an optional +White exclude. |
 | Hue Shift | Rotates every colour’s hue by a set angle (an RGB rotation about the grey axis); greys and white pass through. |
 | Shimmer A | Wobbles the whole image’s hue sinusoidally around its original value, two wobbles per beat. |
 | Shimmer B | The hue jumps to random offsets on strong audio events, scaled by the current level (music aware). |
 | Colorize Acid A | A drifting acid-wash colour field from four crossfading, zooming plasma grids, mapped over the full hue wheel. |
 | Colorize Acid B | Acid wash mapped through a black-primary-secondary-white ramp that permutes its channels once per bar. |
 | Colorize Aura A | A glowing aura colour wash - noise grids plus a radial centre glow, with a brightness floor so it never goes dark. |
 | Colorize Aura B | Aura with a rotating channel permutation each bar and deeper, sub-white colours. |
 | Colorize Scroll A | Horizontal scrolling bands of hue sweep across the image at a fixed speed, keeping the original brightness. |
 | Colorize Scroll B | Vertical hue bands whose scroll speed rides the bass, with the band curve warped by it. |
 | Colorize Scroll C | Horizontal S-curved hue bands with a saturation dip and hue drift driven by the treble. |
 | Colorize Panel | A 5x5 grid of hue panels flood-fills to new colours with hard edges, drops fired by bass onsets. |
 | Colorize Crumble | A 12x12 bilinear-smoothed hue grid crumbling to new colours, free-running. |
 | Colorize Rainbeam | Broad curved rainbow bands radiate from an orbiting far-off centre; the hue scrolls and troughs flash white. |
 | Colorize Flames | Audio-reactive fire recolour - a rippling flame edge licks up from the bottom; bass raises it, beats flare. |
 | Color Prism | Colours each segment by its direction: angle picks the hue, beam speed picks saturation. A stained-glass look. |
 | Color Beat Prism | Prism colouring that rides the audio onset envelope, fading back to the original colours between beats. |
 | Color Blobs A | 48 soft colour blobs drift outward on a polar plane while the whole palette slowly rotates the hue wheel. |
 | Color Blobs B | Harder-edged blobs at 4x drift speed with a constant red floor. |
 | Color Blobs C | Double-size blobs over three channels, colourised through the tempo/beat palette (music aware). |
 | Color Volt A | Electric recolour through a black->primary->secondary->white ramp keyed to each point’s original hue sector. |
 | Color Volt B | Hue sweeps with brightness, pushed further up the spectrum by the bass level (music aware). |
 | Color Shiny A | Concentric white specular shine bands sweep in from the corners, breathing with the bass level. |
 | Color Shiny B | Shine bands run from the centre outward on volume, darkening between bands with a colour sparkle. |
 | Color Freq A | Colours the image like a spectrum analyser from the live FFT - below the level green, above red, on it white. |
 | Color Freq B | Spectrum colouring mirrored around centre from bass/mid/high meters, slowly rotating the hue. |
 | Color Freq C | Spectrum-analyser colouring like A/B, but the meter is recoloured through the tempo/beat palette. |
 | Color Beat Saturate A | Colour purity pumps with the music - colours over-saturate on hits. |
 | Color Beat Saturate B | Inverted and snappier - colours wash toward white on hits. |
Beat, Texture & Flash (11)
 | Beat Ring | Each beat radiates outward as an expanding ring of brightness, mixing the tap tempo with live audio onsets. |
|---|---|---|
 | Cross A | A rotating cross orbits over the image, whitening everything inside its arms and fading the rest toward black. |
 | Cross B | Draws only the white outline band of the orbiting cross, its centre breathing in and out on the bass. |
 | Stripe | Uses the same orbiting, rotating frame as Cross but paints three red / green / blue colour bands across it. |
 | Dots | Chops the beam into regular on/off dots, blanking the gaps so it burns points instead of streaks. |
 | Dashes | Randomised chop lengths give irregular dashes. |
 | Dots Bright | Dot chop where the gaps get a 180-degree hue flip instead of being blanked. |
 | Dashes Bright | Randomised dash chop with the hue-flip gaps. |
 | Flash Effect | Flashes the whole image bright then decays on each beat - a tempo-synced brightness pulse. |
 | Strobe Effect | Blanks the image on and off in time with the tempo; intensity sets the blackout depth. |
 | Vignette | Fades brightness toward all four edges so the frame darkens to black at the borders. |
More effects will be added with each firmware release for the Ultra MK2 / Pro product range, allowing for more varied live projection modifications.
Master Effect Slider
The intensity applied to the projection from any of the available effects are controlled by a master intensity slider. This is set to 100% by default, and can be changed via the menu UI or MIDI mapped to a dial/fader. With this slider at 0% then none of the effects will be applied to the projection.
Note: The default MIDI mapping provided with the factory SD card for an APC40 MK2 has the main effect intensity slider mapped to the APC40 MK2 Master fader, and must be moved to a value >0% for any effects to be applied,
Effect Config Drop-Down
In order adjust one of the many built-in effects, the user can use the effect config drop down followed by selecting the effect you wish to adjust.
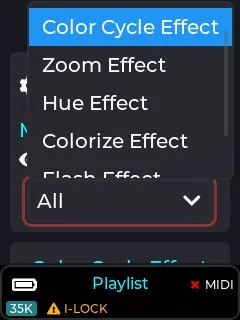
Colour Cycle Effect
This effect will cycle through a series of primary colours to the current beat or multiple of the beat based on the current tempo and effect speed setting (tempo can be set via settings→tempo menu).
The colour sequence is currently fixed to the following:
Blue → Green → Cyan → Red → Magenta → Yellow
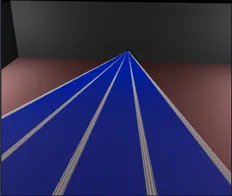
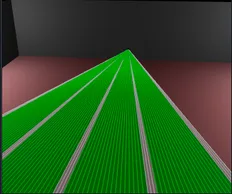
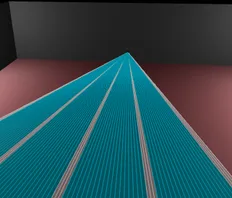
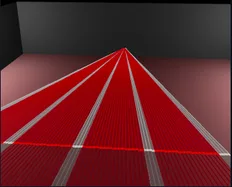
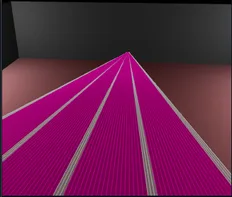
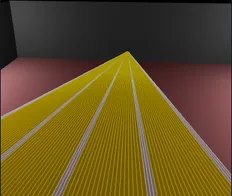
The above images show the colour cycle effect colours when +White parameter is OFF.
Colour Cycle Effect Parameters
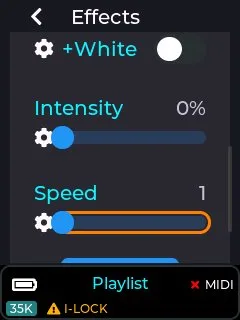
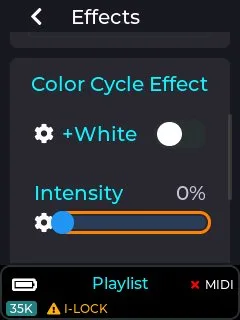
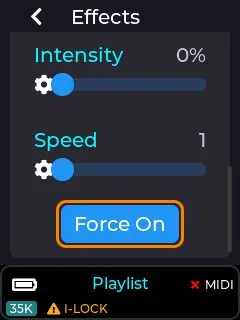
The adjustable parameters for the colour cycle effect are Intensity, Speed, and Include White (+white).
Intensity parameter is used to select how much of the original CUE colour is modified by this effect. e.g. 50% intensity will equally mix the original CUE colour with the cycle effect colour, and 100% will completely replace the original CUE colours with the colour from this effect.
These parameters can be MIDI mapped to a dial/fader when using an APC MIDI device.
Speed parameter is used to control how often the colour cycle occurs. With a speed of 1, the colour will change on every beat, and a speed of 2 will change on every other beat etc.
The “Force On” button is only present so it can be assigned to an APC MIDI button in order to live trigger the effect, overriding the intensity slider. Pressing an APC button mapped to this button will cause the intensity to be briefly set to 100% while the button is held down.
The +White parameter is used to control whether any parts of the currently projected CUE which contains full white will be overridden by the cycle colour.
The +White parameter is useful when using fan beam patterns as shown below.
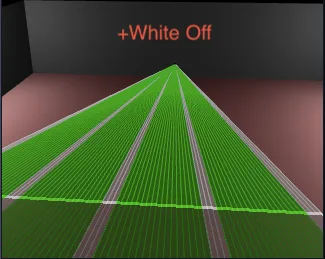
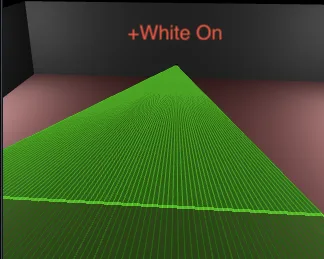
With +White off, only non white parts of the beam pattern will be replaced by the cycle effect colour. With +White On, the whole beam pattern will be re-coloured.
Default APC40 MK2 Colour Cycle Effect MIDI Mapping
The image below shows how this effect is mapped to an APC40 MK2 when using our default MIDI mapping provided on the SD card shipped with the LaserCube.
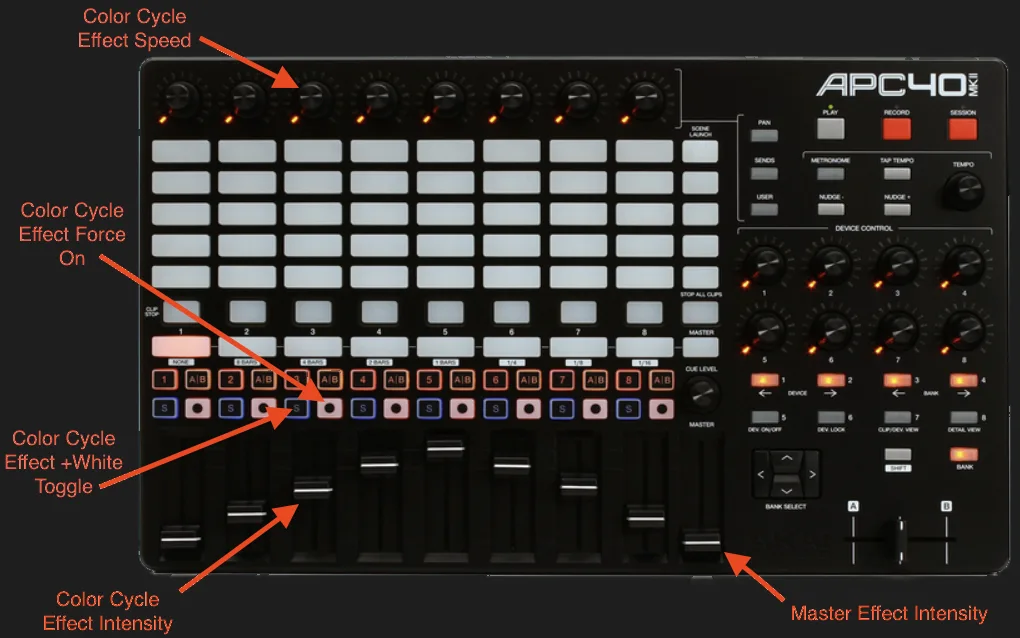
Zoom Effect
This effect will zoom the projection in/out in sync with the beat based on the current tempo (see tempo in the wiki).
Zoom Effect Parameters
The zoom effect has several parameters that can be adjusted by the user, including intensity, speed, and zoom type.
The intensity slider adjusts how much of the zoom in/out effect is applied to the current projection between 0% and 100%.
The Speed slider allows the rate of zoom in/out to be adjusted. This parameter is based on the current tempo, and can be adjusted between fractions of the current beat to multiples of the beat.
The Linear parameter changes whether the zoom in/out is done in a linear fashion or a logarithmic one.
The “Force On” button is intended to be MIDI mapped to an APC button for live activation of the effect. When this button is activated, the intensity slider is briefly changed to 100% while the button is held down, and then returns to its previous value once released.
Default APC40 MK2 Zoom Effect MIDI Mapping
The image below shows how this effect is mapped to an APC40 MK2 when using our default MIDI mapping provided on the SD card shipped with the LaserCube.
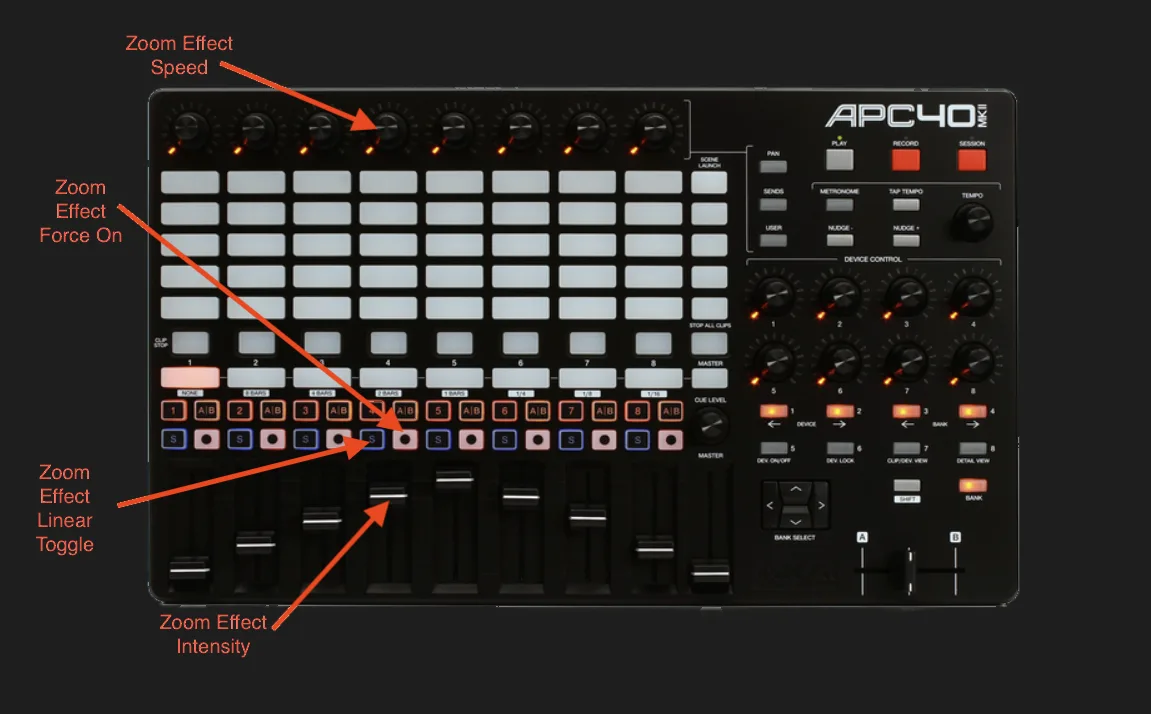
Hue Effect
This effect will re-colour the current projection to a user selected colour based on the hue, saturation, and intensity parameter adjustments.
Hue Effect Parameters
The images below show the available user parameters for the hue effect.
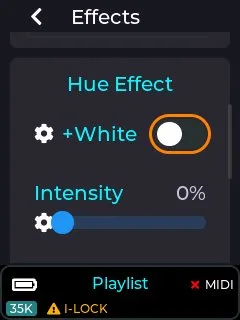
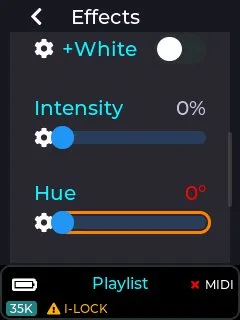
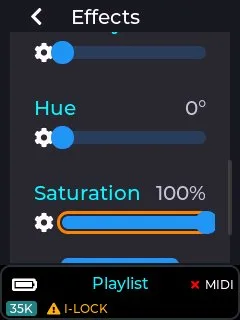
The “+White” works the same as described in the Colour cycle effect documented previously, and determines whether white portions of the projection will include the colour override or not.
The intensity slider determines how much of the selected hue colour will be applied to the projection.
The saturation slider will set how vivid the colour will be, so a low saturation level will result in pastel colours, and a high saturation will give the most vivid colours.
The hue slider allows a colour to be selected within the hue range of 0 to 360 degrees as shown in the image below.

The “Force On” button is intended to be MIDI mapped to an APC button for live activation of the effect. When this button is activated, the intensity slider is briefly changed to 100% while the button is held down (fully activating the hue effect), and then returns to its previous value once released.
Note: Any effect parameters adjusted via the LaserCube's LCD menu UI will be preserved through a power cycle, but any adjustments made via a connected APC MIDI device will not. If an APC40 MK2 is attached to the LaserCube then any dials assigned to an effect or other device setting will indicate the current power on value using the associated APC LED ring. Absolute faders will always override any effect slider value set in the menu UI, since Faders have a finite start and end position.
Default APC40 MK2 Hue Effect MIDI Mapping
The image below shows how the hue effect is mapped to an APC40 MK2 when using our default MIDI mapping provided on the SD card shipped with the LaserCube.
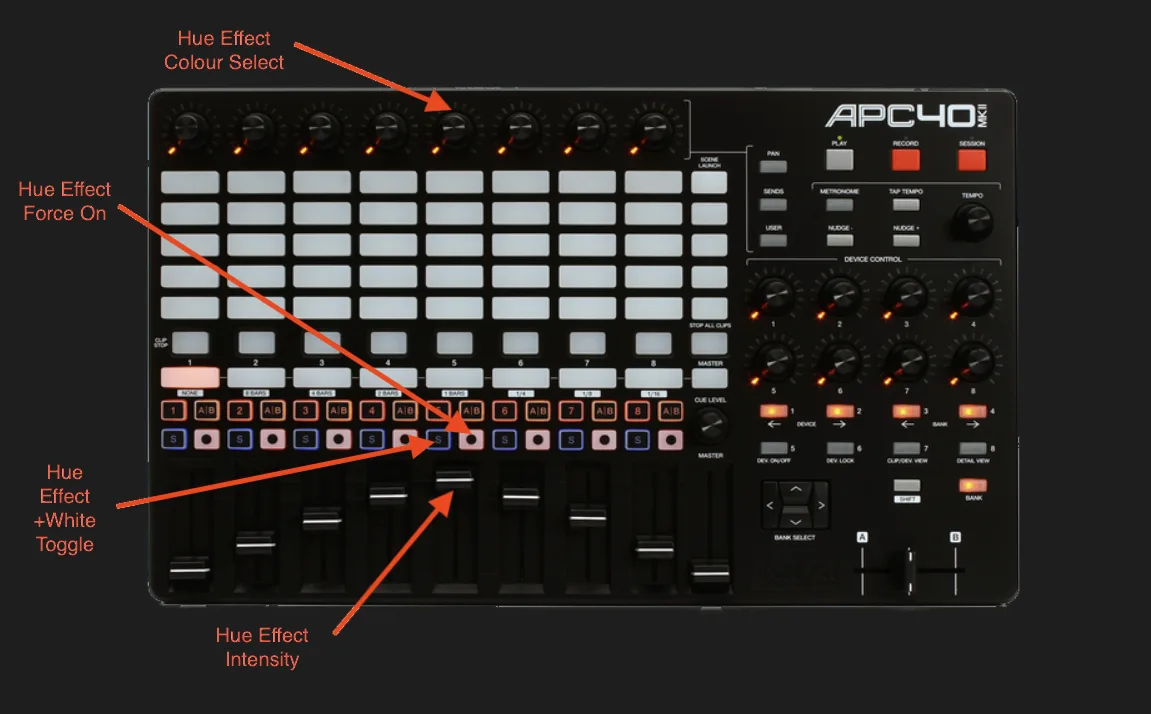
Colourize Effect
This effect will apply a rotating colour hue on the projection.
The left image is without the effect applied, and the right with the effect applied.
Colourize Effect Parameters
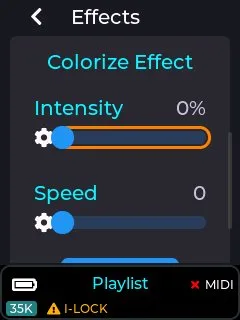
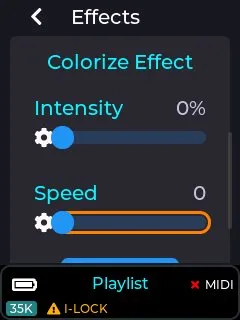
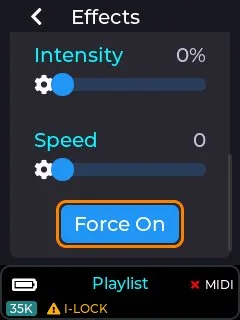
The intensity parameter determines how much of the colour effect will be applied to the projection between 0% and 100%.
The speed parameter changes the rate at which the colour moves, and is not related to the current tempo setting.
The “Force On” button is intended to be MIDI mapped to an APC button for live activation of the effect. When this button is activated, the intensity slider is briefly changed to 100% while the button is held down (fully activating the colourize effect), and then returns to its previous value once released.
Default APC40 MK2 Colourize Effect MIDI Mapping
The image below shows how the colourize effect is mapped to an APC40 MK2 when using our default MIDI mapping provided on the SD card shipped with the LaserCube.
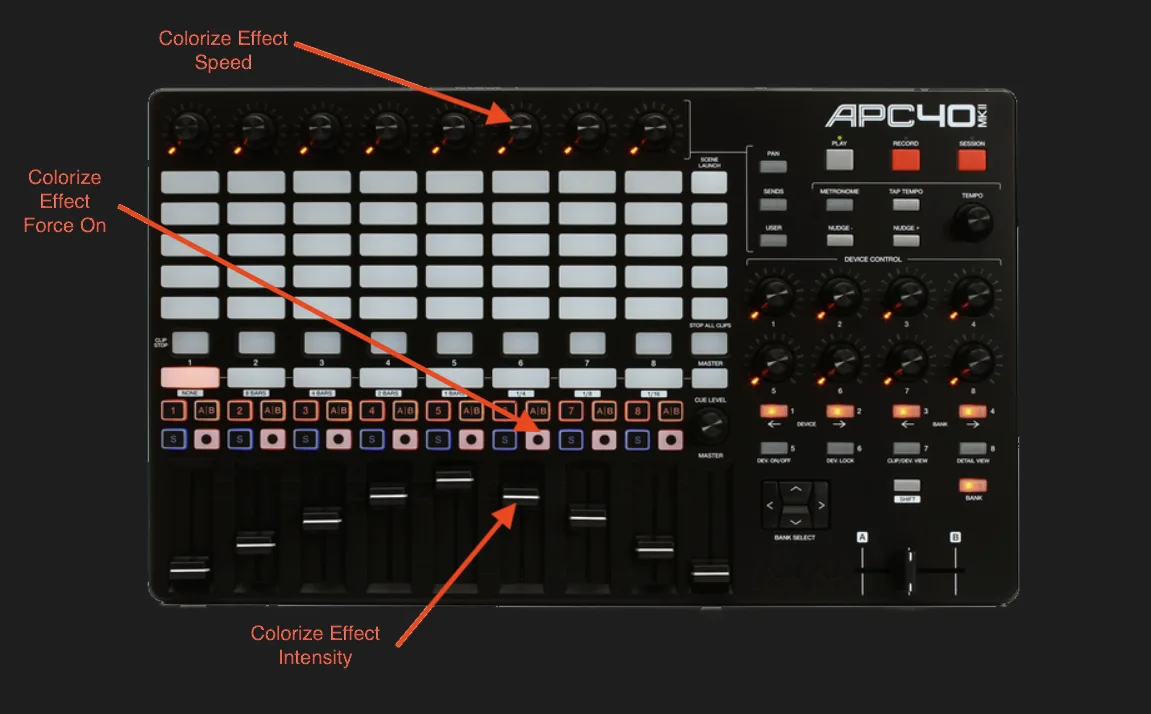
Flash Effect
The flash effect will fade the current projection in/out to the beat or multiple of the current beat, based on the current tempo.
Flash Effect Parameters
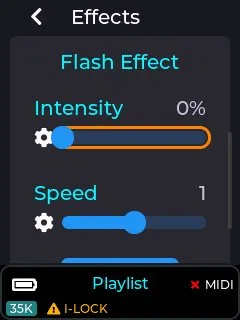
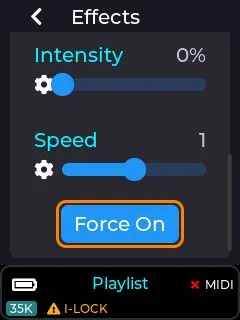
The intensity parameter determines how much of the projection will have the flash fade applied, and is between 0% and 100%.
The speed parameter changes the rate at which the projection is faded in/out, and is linked to the current tempo, and synced to the beat.
The “Force On” button is intended to be MIDI mapped to an APC button for live activation of the effect. When this button is activated, the intensity slider is briefly changed to 100% while the button is held down (fully activating the flash effect), and then returns to its previous value once released.
Default APC40 MK2 Flash Effect MIDI Mapping
The image below shows how the flash effect is mapped to an APC40 MK2 when using our default MIDI mapping provided on the SD card shipped with the LaserCube.
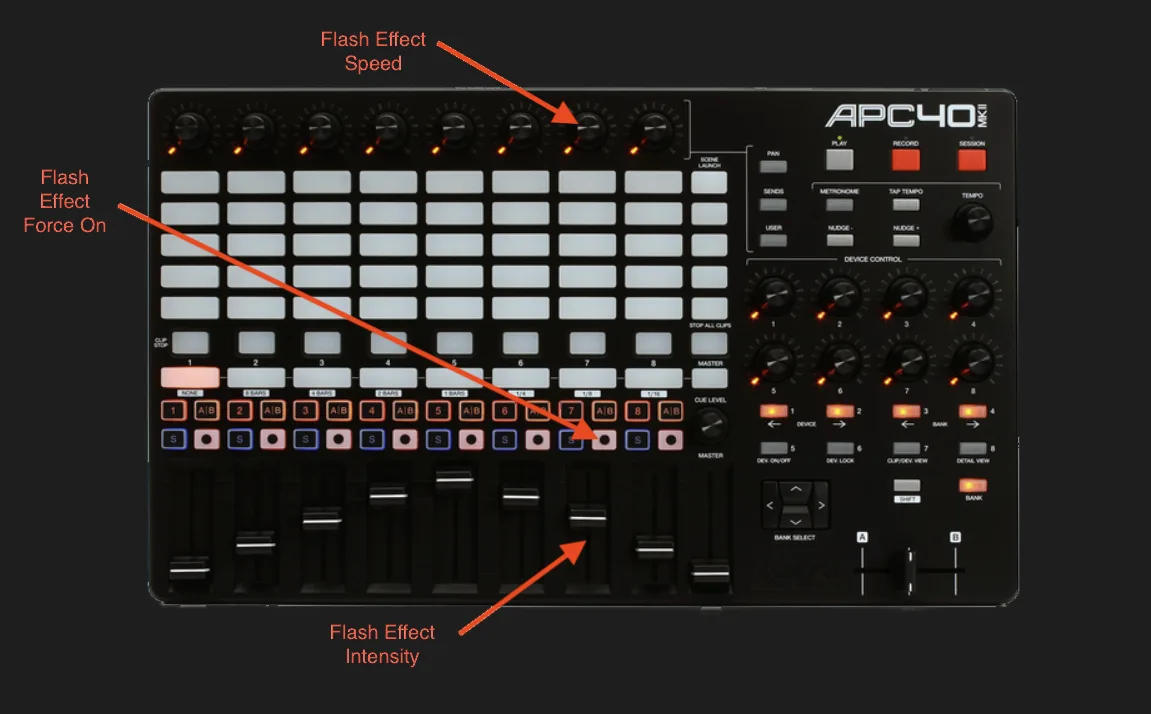
Strobe Effect
The strobe effect will strobe the current projection on/off to the beat, fraction of the beat, or multiple of the current beat, based on the current tempo (see wiki for tempo menu).
Strobe Effect Parameters
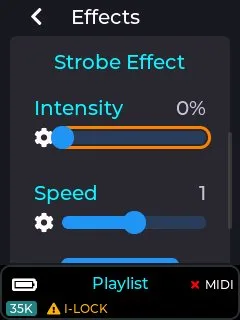
The intensity parameter determines the amount the projection will have the strobe applied, and is between 0% and 100%.
The speed parameter changes the rate at which the projection is strobed, and is linked to the current tempo, and synced to the beat.
The “Force On” button is intended to be MIDI mapped to an APC button for live activation of the effect. When this button is activated, the intensity slider is briefly changed to 100% while the button is held down (fully activating the strobe effect), and then returns to its previous value once released.
Default APC40 MK2 Strobe Effect MIDI Mapping
The image below shows how the strobe effect is mapped to an APC40 MK2 when using our default MIDI mapping provided on the SD card shipped with the LaserCube.
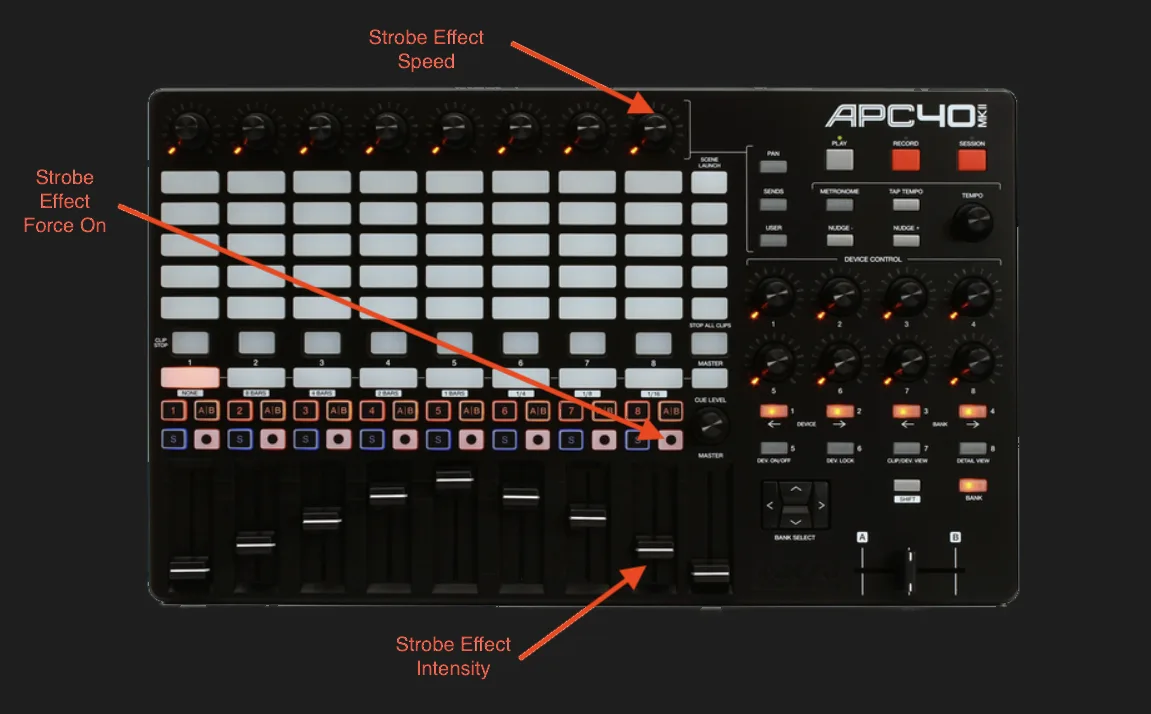
Status Info Page
The Status Information menu provides info about the current hardware/network status. It is useful when info like SD card free status or buffering status need to be checked by the user.
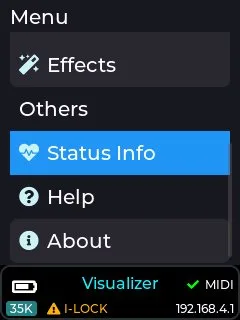
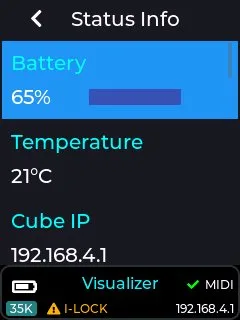
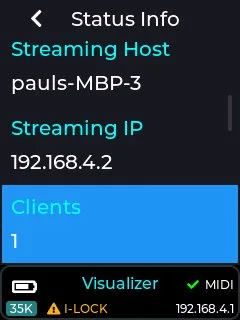
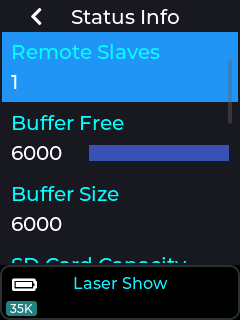
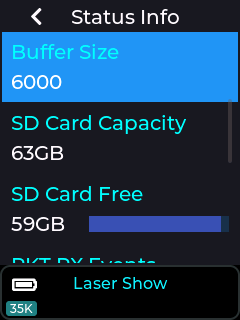
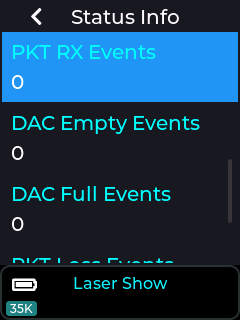
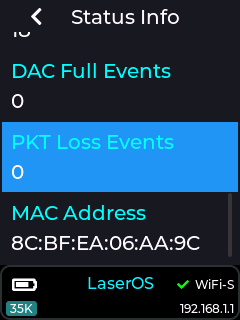
Battery: The Battery gauge shows an estimation of battery state of charge, based on measuring its voltage. If projecting, the reading will move around under load, showing a slightly lower reading as the scan complexity / output power varies.
Whilst charging, the battery state of charge cannot be measured.
Remote Slaves: If using Cube Link, gives the number of connected slave devices.
Buffer Free: displays the current buffer space available.
Buffer Size: displays the maximum buffer level.
SD Card Capacity: shows the reported capacity of the SD Card in Gigabytes
SD Card Free: shows the remaining capacity of the SD Card in Gigabytes
UI Mem Free: shows the free memory of the LCD menu, as a percentage.
PKT RX Events: shows the number of received packets. When in LaserOS Control Mode, this will increase rapidly as each packet of projection data is received.
Clicking on this entry will reset the count to zero.
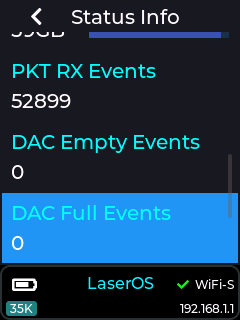
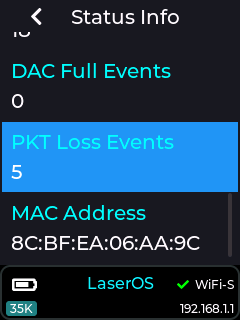
DAC Empty Events: displays the number of buffer under-run events.
This can happen due to lost packets, disabling the interlock or selecting the test patterns. Clicking on this entry will reset the count to zero.
DAC Full Events: displays the number of buffer overflow events.
Clicking on this entry will reset the count to zero.
PKT Loss Events: displays the number of lost packets. Lost UDP packets are common when using WiFi, especially in “congested” areas with many competing devices. Lost packets will be give the symptom of brief and intermittent drop-outs of the projection.
Moving away from the WiFi congested area, or preferably using a wired Ethernet connection will minimize this. Clicking on this entry will reset the count to zero.
MAC Address: MAC Address, unique to each Ultra MK2 / Pro LaserCube.
The Pro 3W and 6W have a clock (firmware 2.1 and later): set the date and time on the cube in Settings → Date & Time, from the web app (Device Clock in Player Settings) or on the web admin page’s General Tab. Status Info then also shows the date and time, and how many hours the laser diode has been used.
MIDI Mapping using an APC40 MK2 or APC mini MK2
The Ultra MK2 / Pro is capable of being controlled directly using an APC40 MK2 or an APC mini MK2 (support for others will be added later) connected to the USB port on the rear of the unit.
In order for any MIDI mapping to be saved, an SD card must be inserted with the correct path to the settings folder present on the card. The MIDI mapping files saved to the card are located here: /Lasercube/settings
Separate mapping files are saved for each MIDI device type, and also for each control mode.
The MIDI mapping files are also saved in JSON file format which is human readable text, so the user can also edit these files manually using a text editor if required.
Enabling USB MIDI
In order to use any of these MIDI devices, the USB must be enabled by going to the Settings ->USB MIDI menu.
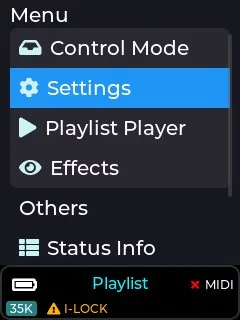
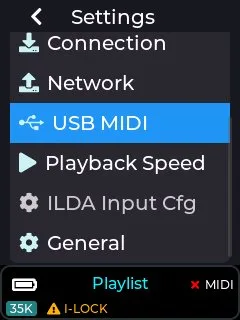
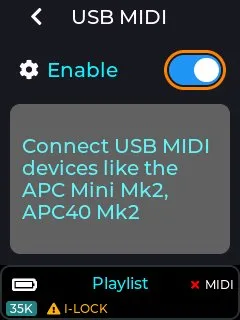
Note: USB MIDI does NOT operate when the unit is in LaserOS / ArtNet / DMX control modes, as these modes are controlled using alternate communication protocols.
If a compatible device is detected on the USB port then the status bar will briefly show an updated connected status, and unplugging a device will show the disconnected status as shown above. The status bar will also show a green tick or a cross next to the MIDI label on the RHS of the status bar.
MIDI Mapping a Slider Control
To map a slider in the menu to an APC dial or fader control, single press on a slider to enter edit mode, then long press to bring up the context menu, and then select “Link MIDI Knob” as shown below.
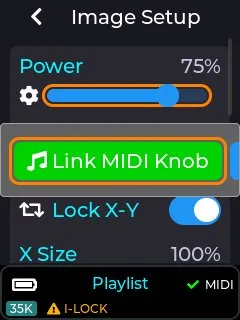
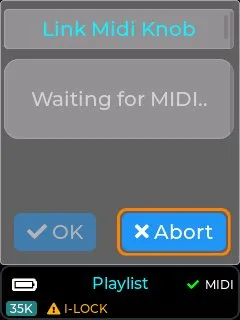
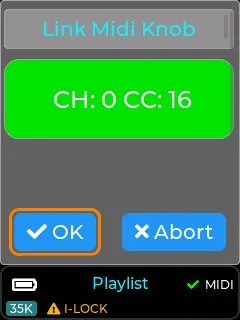
Once “Link MIDI knob” is selected, the device will wait for the user to turn or move a control on the APC. Once a control is moved then the associated MIDI channel and CC number will be captured.
If the MIDI channel and CC chosen by the user is already assigned to another control then the MIDI info will be shown in orange instead of green.
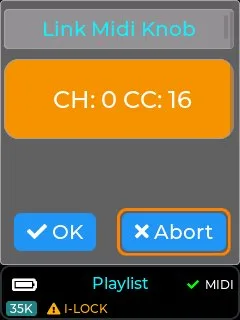
If the user accepts this APC control while the MIDI status is orange, the previous function will be un-mapped and re-assigned to the current UI slider.
Almost all sliders in the LaserCube’s menu UI can be assigned to an external APC Dial or Fader. Since firmware 2.2, the Colour Balance and Safety Zone sliders can’t be assigned, and links made to them on older firmware stop working.
Note: Faders on an APC40 are absolute controls and will always override the slider value when moved, unlike APC dials which are relative adjustment control with no physical end stops.
Once a slider from the LaserCube’s menu UI has been assigned to an APC control, the menu UI will update its slider to a yellow colour instead of blue as shown in the image below. Any movement of the assigned APC control will now also move the slider on the LCD menu UI.
If the slider was assigned to a dial on the APC40 MK2 then the LED ring on the APC dial will also reflect the slider’s current value, and editing the slider on the LCD menu UI will also update the APC’s led ring as they are always kept in sync with each other.
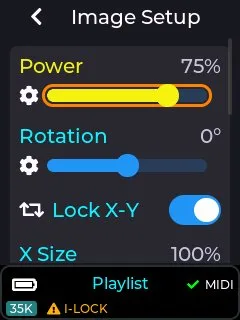
The image below shows how an APC dial will look once mapped to a UI slider element.
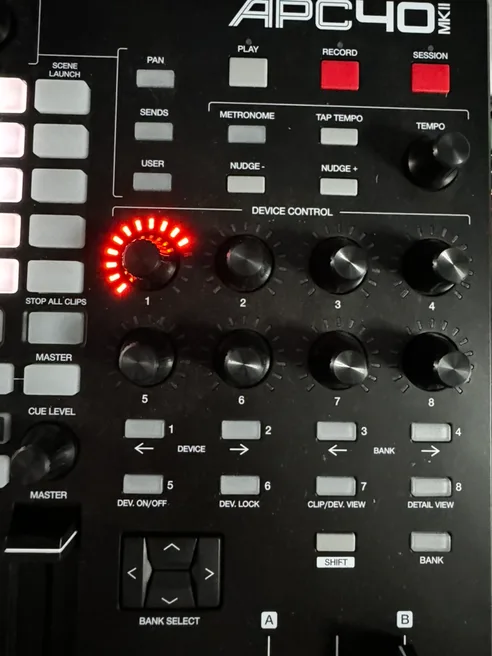
Note: When an APC dial is un-linked from a UI element, the LED ring will go off.
Un-mapping a Slider Control
To remove a previous MIDI mapping from a slider in the menu UI, edit the control by short press on the slider to enter edit mode, then long press to bring up the context menu, then select “unlink MIDI Knob” option.
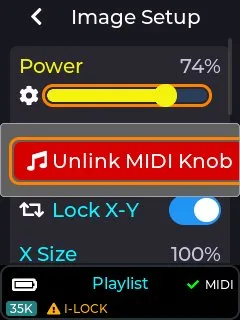
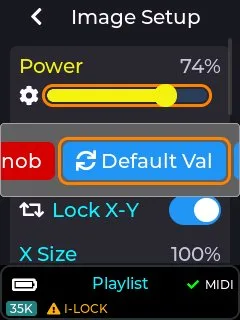
The images above show all the options available on the slider pop-up context menu, including the un-link option. The “Default Val” button will return the currently edited slider to its factory power-on default value, and the “Exit” button closes the context menu without performing any other actions.
Once the unlink option has been selected on the context menu, the control will return back to a blue colour indicating that it is no longer associated with any external MIDI control.
MIDI Mapping a Button Control or Switch
Buttons and Switch elements in the menu UI can also be mapped to an APC button by highlighting the element in the LCD menu UI, and then long pressing to activate the context menu. Once the context menu is activated you can select the “Link MIDI note” option, then press a control on the connected APC, and then assign a LED colour using the colour drop down. Un-Linking is done by long pressing on a UI element and selecting “Unlink” from the context menu.
MIDI mapped buttons / switches will also show in yellow on the LCD instead of a blue colour.
Since firmware 2.2, the Safety Zone switches can’t be linked either. After updating from older firmware, link the Enable switch of the Test Patterns again, to the same APC button: its old link no longer finds it, and linking the same button again replaces the old link.
The images below show the device in playlist control mode with it’s play button MIDI mapped to an APC button. If the APC button selected has an RGB LED associated with it then the button will light up on the APC with the colour selected from the colour dropdown.
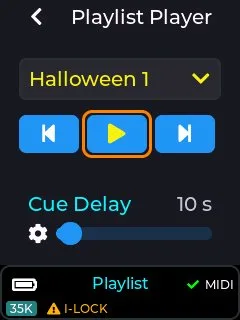
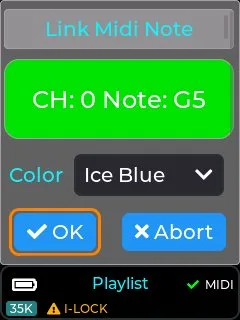
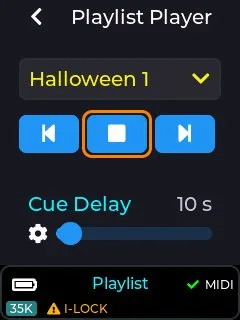
MIDI Mapping a Drop-Down Control
Most of the drop down UI controls within the LCD menu UI can be linked to a button on a connected APC MIDI controller. These include the currently selected playlist drop down, and also the laser show drop down when in laser show control mode.
To MIDI map a drop down you will firstly need to select an item from the drop down that you wish to assign to an APC button, then long press on the drop down in order to bring up the context menu.
Once the context menu is visible you will be able to assign the currently selected item from the drop down to a button on the APC using the “Link MIDI Note” button. Previously linked items can also be un-linked using the same procedure of selecting the drop down item and then long pressing to bring up the context menu, followed by selecting the “Unlink MIDI Note” option.
With an APC40 or APC mini connected, there are a total of 15 different colours selectable during the MIDI mapping process.
Note: Some APC buttons do not contain an RGB LED, so consult the relevant documentation for your APC device to determine which APC buttons can have an RGB colour assigned. If an APC button only has a single LED colour, then only select the first colour from the colour drop down.
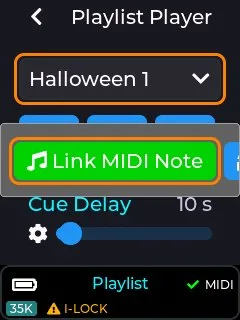
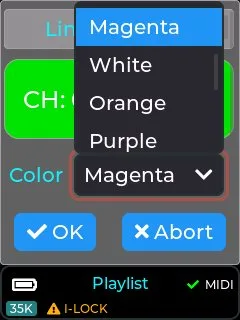
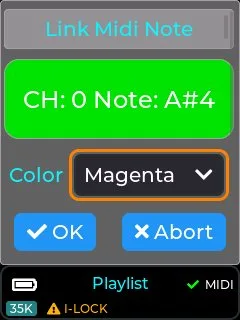
The drop down UI element will now be shown in yellow, indicating a mapping to an APC button, and the APC button (top right) will change to the selected colour (Magenta in this example).
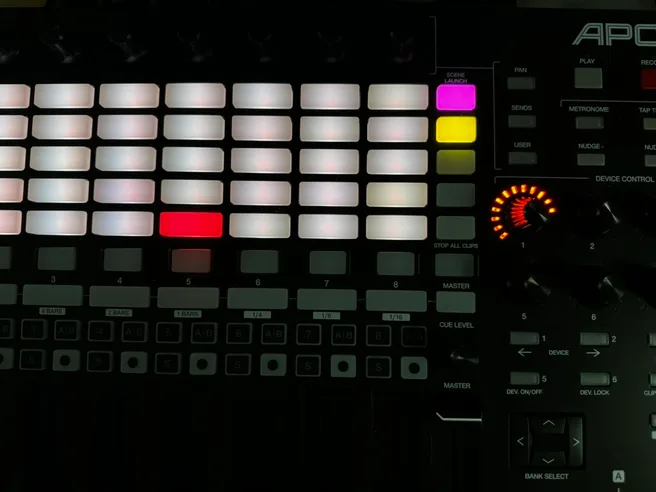
Default APC40 MK2 MIDI Mapping
The default MIDI mapping for an APC40 MK2 is shown below, and is provided with the factory SD card image.
This mapping can be changed by the user if required using this guide.
Items in blue are relevant when in playlist control mode, and items in red are part of the effects provided when in playlist or visualizer control mode, and items in yellow are global device adjustments linked to items within Settings→Projection→Image Setup.
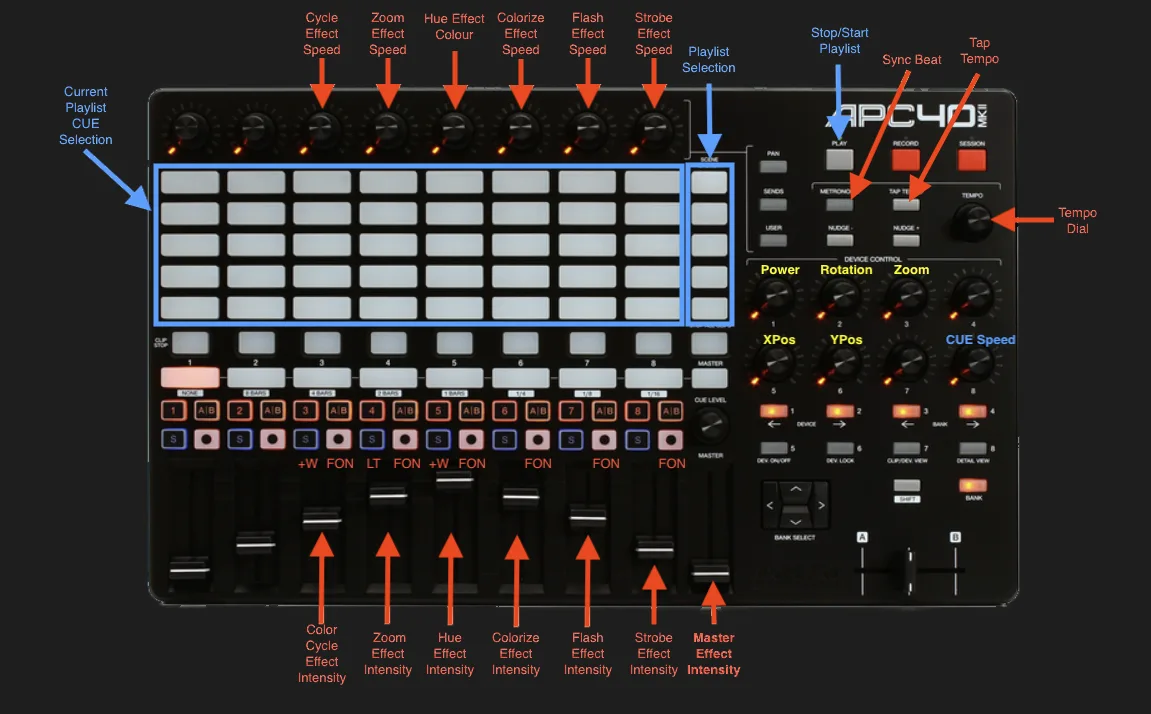
LaserCube Web Admin Page
In LaserOS control mode, the LaserCube has a legacy Web Admin Page for adjusting some of the devices network based configuration settings, and also performing remote firmware updates.
1. Note the IP address from the bottom right corner of the LCD.
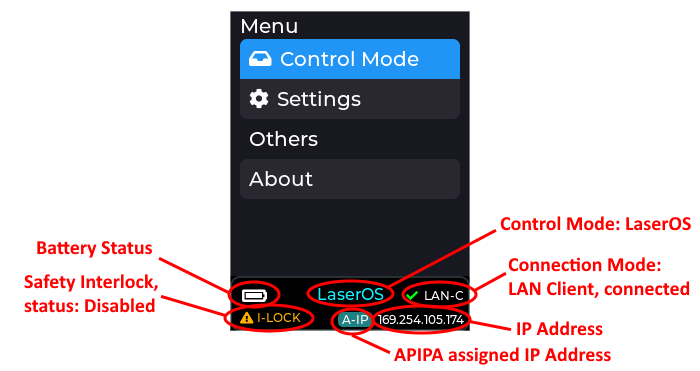
2. Open a web browser and type in that same IP address.
Log in using the following credentials:
User Name: LaserCubeUser
Password: Laser2020
The Web Admin Page has 3 Menu sections:
- Home Menu, showing general info.
- Config Menu, for network and mode settings.
- Update Menu, for remote firmware updates.
Home Menu
The Home Menu shows the Model Name and Number, the Interlock Mode, the MAC ID, the Firmware Version and the Active Partition. There are 2 partitions to allow fall back to a good working state should an update fail or be interrupted. The bar below the menu, shown on every page, gives the firmware version, network mode, active partition, battery level, interlock state and temperature.
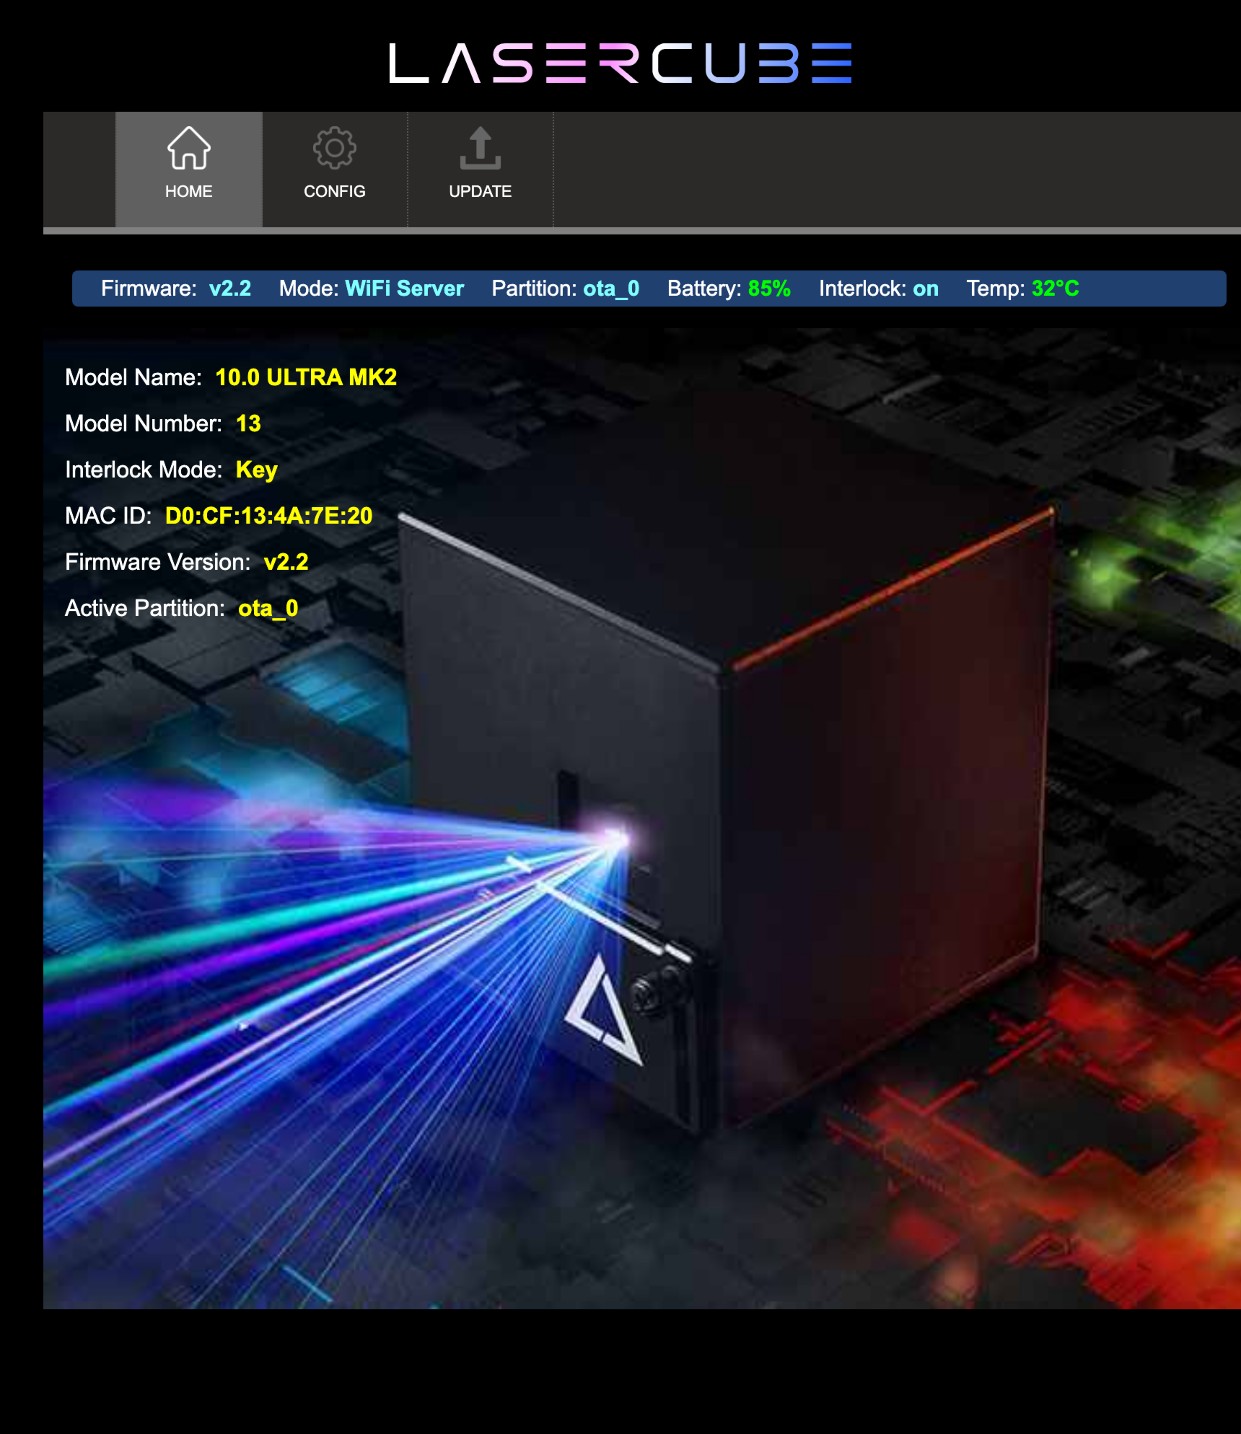
Config Menu
The Config Menu has 3 tabs, for network set-up and mode selection:
- WiFi Tab, for Wireless Connection Settings
- LAN Tab, for Wired Connection Settings
- General Tab, for Network Mode Selection and the Date & Time
WiFi Tab
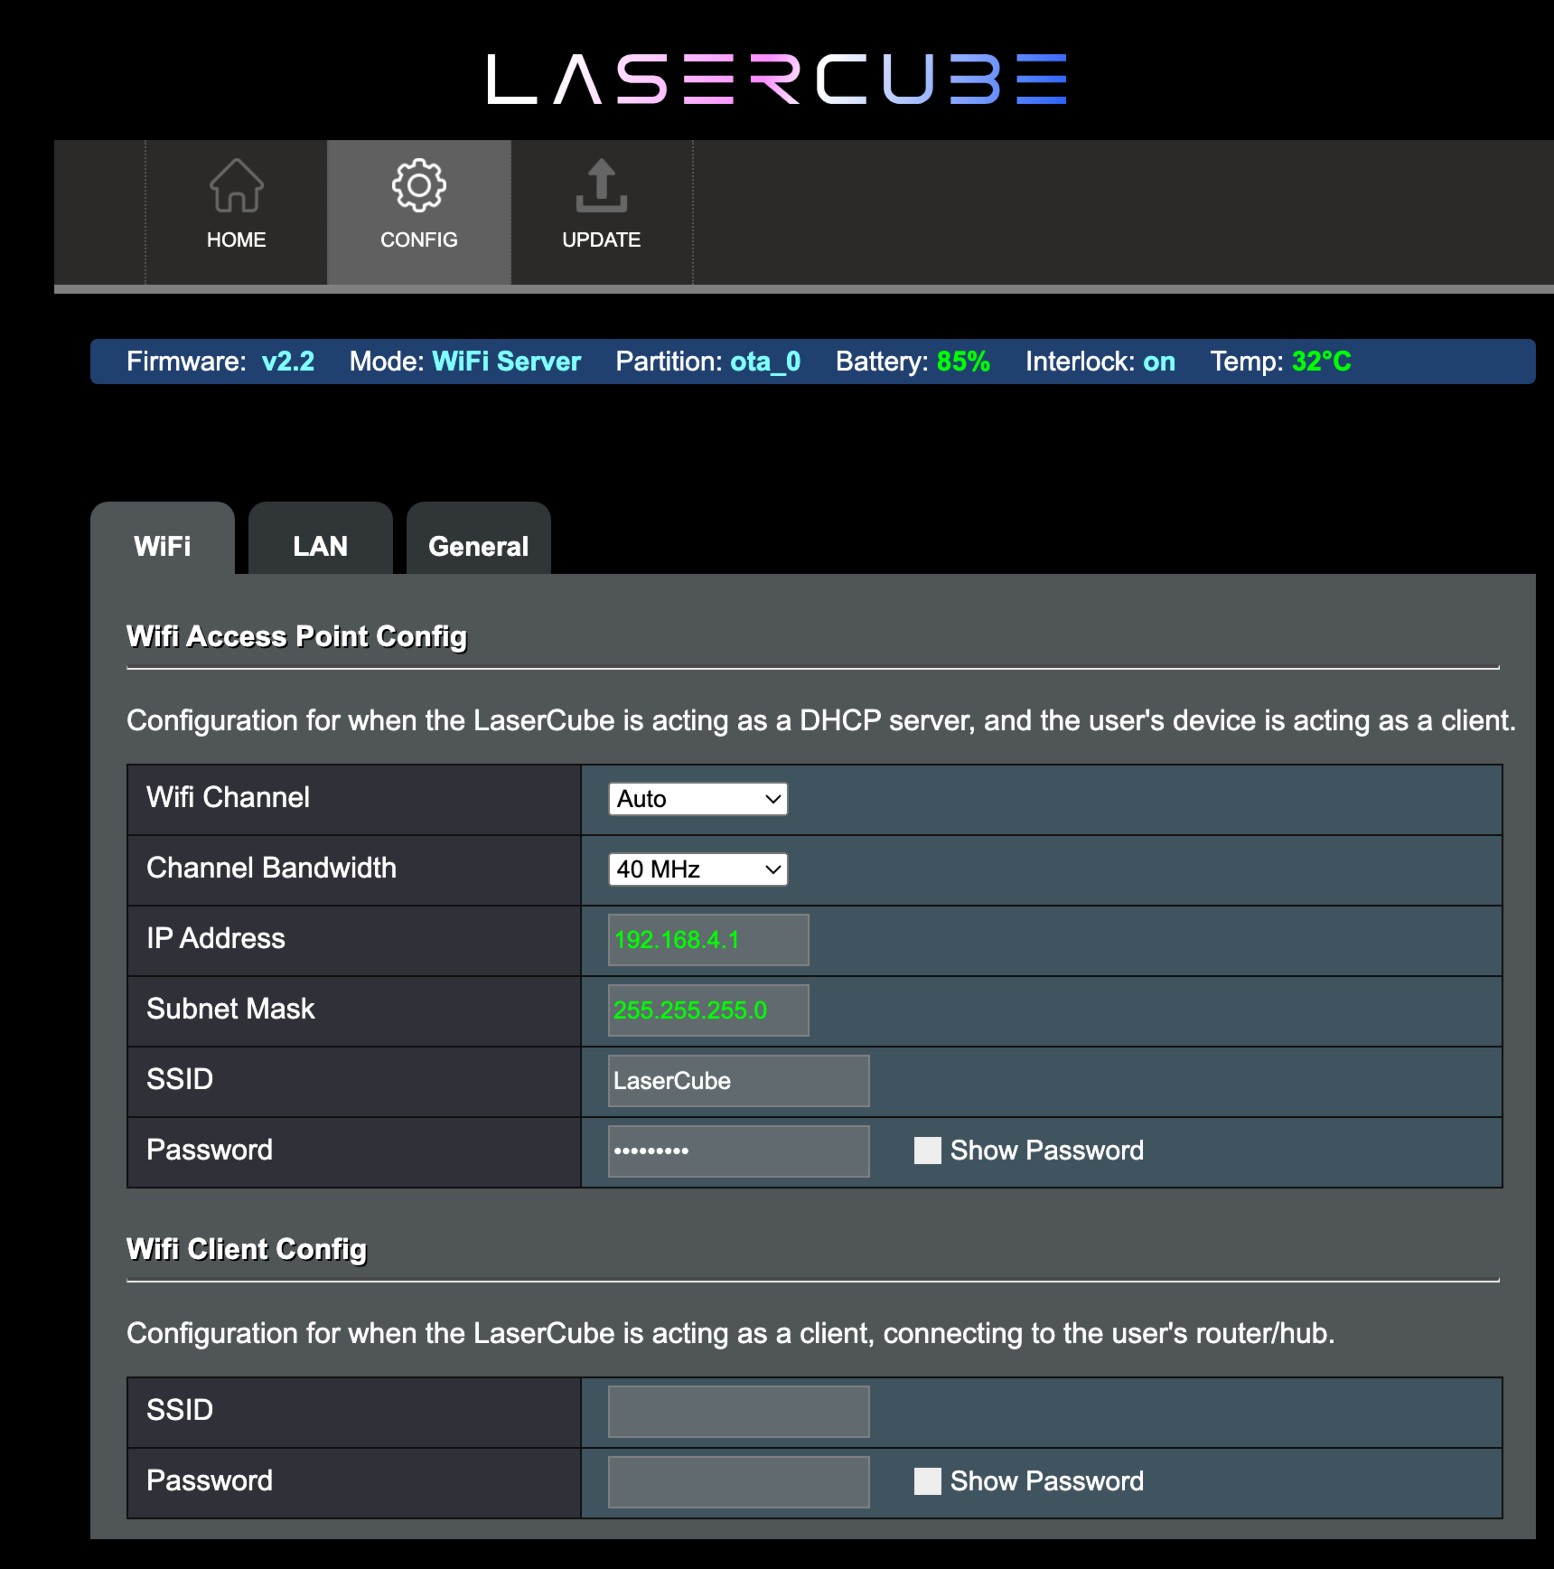
Where WiFi interference is present, the LaserCube WiFi channel can be changed, and the Channel Bandwidth set to 20 MHz instead of the default 40 MHz. Either change briefly disconnects your device from the cube’s WiFi.
The IP address and Subnet can be set for when the LaserCube is operating in WiFi Server mode, where it provides a DHCP service.
The WiFi Server mode default SSID and Password can also be changed.
If connecting to a router in WiFi Client mode, the SSID and WiFi password can be entered directly. This is useful if the router does not support WPS.
After changing a setting, press the Update button that appears next to it to save it to the cube.
LAN Tab
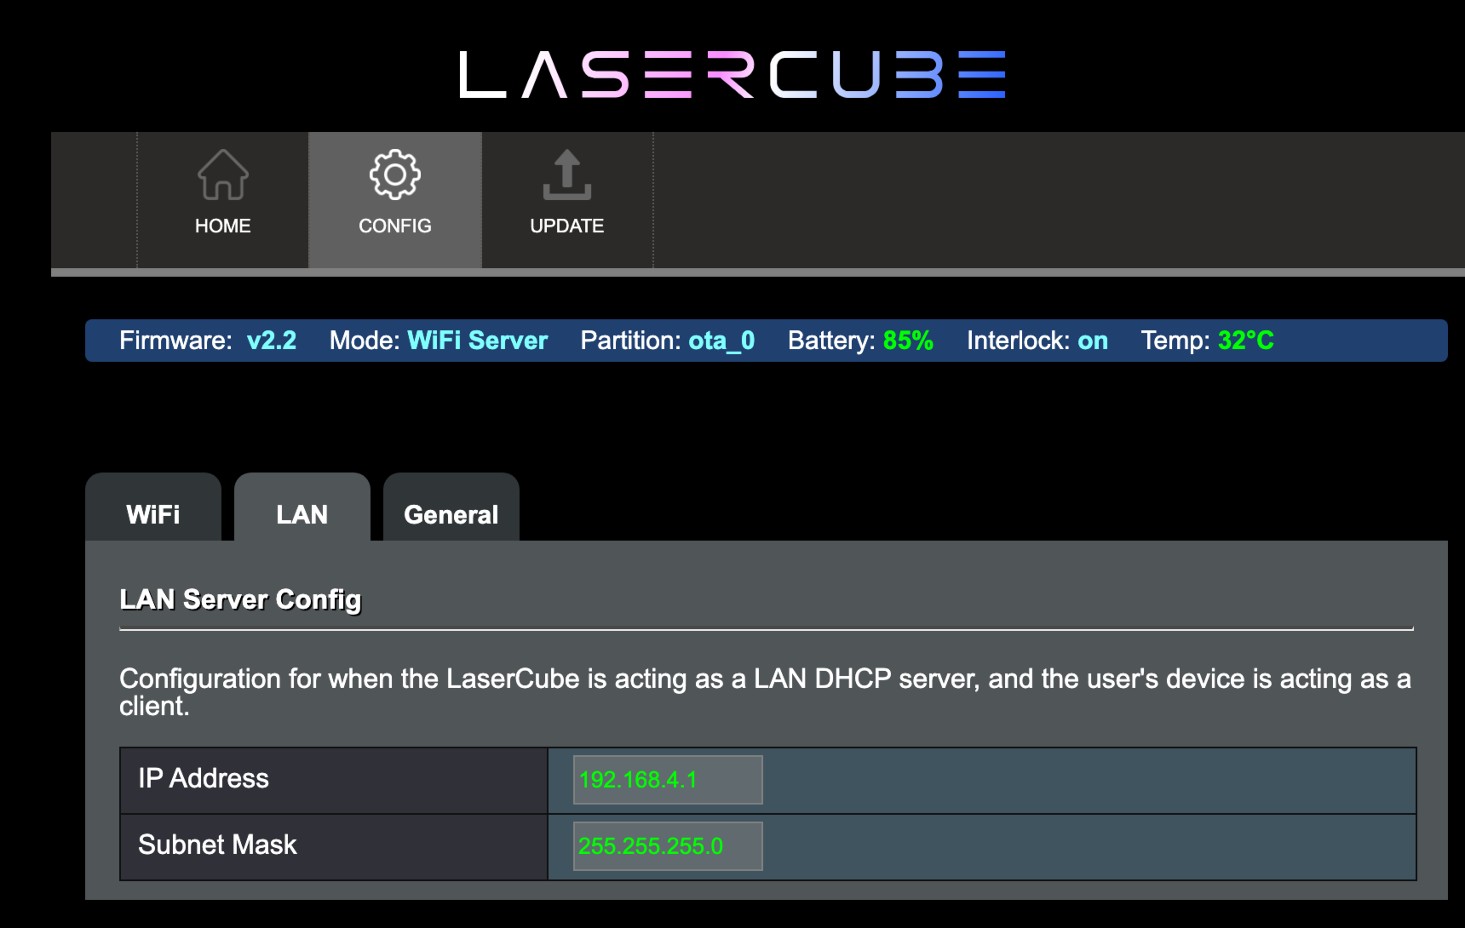
The IP address and subnet can be set for when the LaserCube is operating in LAN Server mode, where it provides a DHCP service.
General Tab
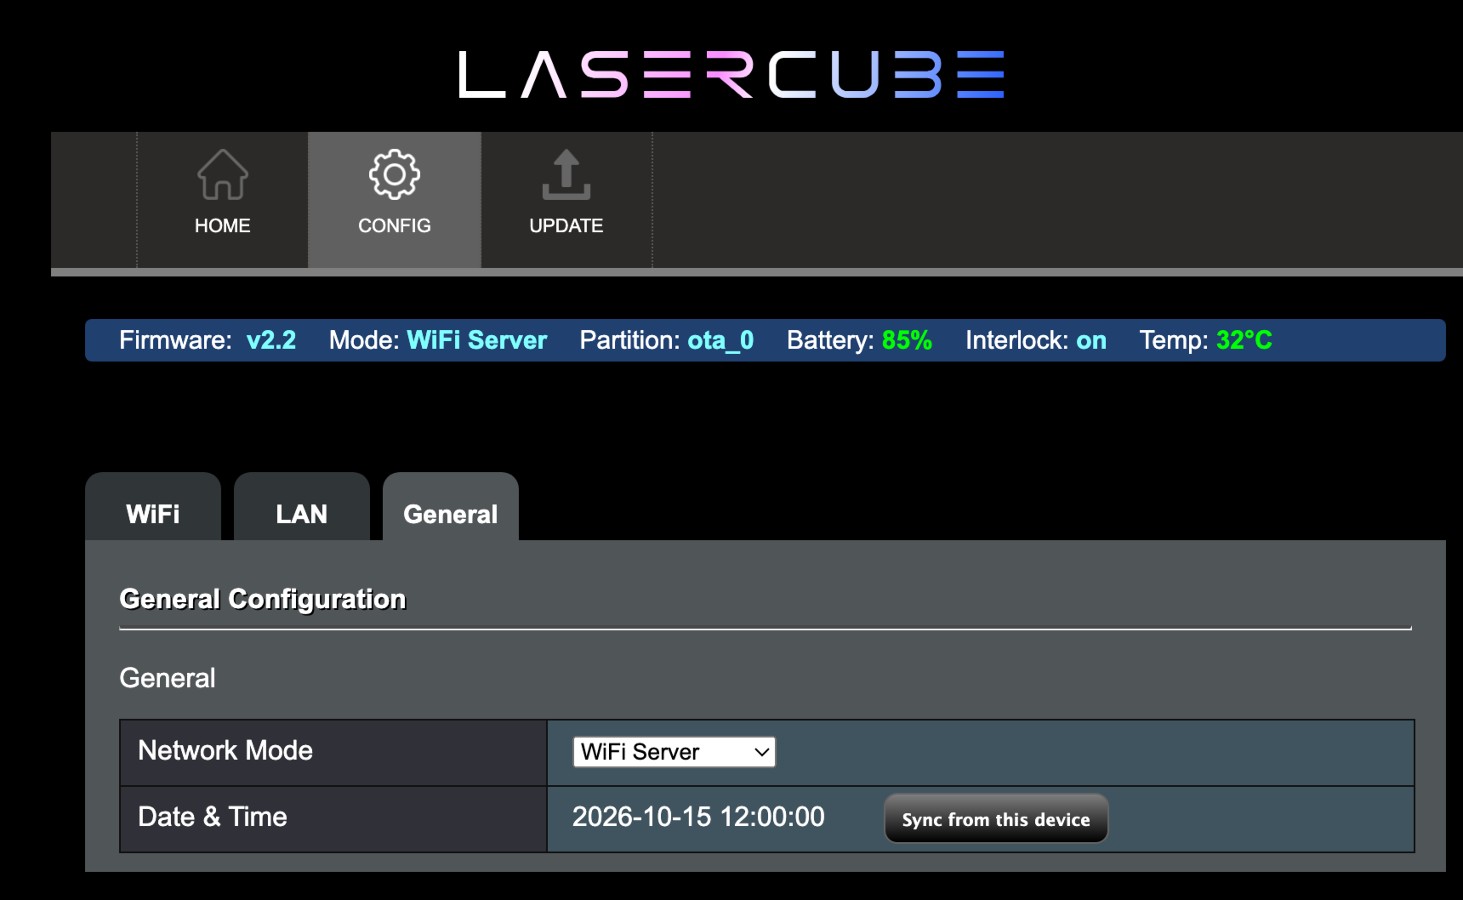
The network operating mode can be set from the Network Mode drop down, then Update. On firmware 2.1 and later the LaserCube switches to the new mode about a second later: reconnect to it at its new address and reload the page. On older firmware the page only saves the new mode: it takes effect the next time the cube restarts.
When the cube has a clock (the Pro), Date & Time shows it, and Sync from this device sets it from your phone or computer. The page also sets it by itself when the cube’s clock has been lost or is more than a minute out.
Firmware Update
The boot screen shows the firmware version when the LaserCube starts (firmware 2.0 and later). This manual is written for firmware 2.2 (October 2026); the SD card contents for each release include its release notes (Lasercube/Firmware/Firmware Release Info.txt).
There are two ways to update. The LaserOS app doesn’t update the Ultra MK2 or Pro: its own firmware update is for the LaserCube WiFi and the first-generation Ultra.
1. Via SD Card. This is the preferred update method. If the SD Card has a more recent firmware on it, you will be prompted to allow a firmware update. The latest SD card contents on our GitHub (https://github.com/Wickedlasers/mk2SDContent) include the latest firmware: see SD Card Information for how to copy them to the card.
Copying the new contents can delete your own playlists and MIDI mappings, so rename the old Lasercube folder first (see SD Card Information) and copy your own files from it into the new one. Switch the cube off before you take the card out or put it in. When the update starts, don’t switch the cube off: it takes one to two minutes and shows its progress in percent. When the screen says F/W Updated, press OK.
2. Manually, through the Web Admin Page:
Visit https://github.com/Wickedlasers/mk2SDContent to obtain the most recent OTA update binary from the Lasercube/Firmware folder.
Connect to the LaserCube in WiFi Server mode, as described in WiFi Server Mode, with the LaserCube in LaserOS control mode.
Browse to 192.168.4.1 and log in using the following credentials:
User Name: LaserCubeUser
Password: Laser2020
Go to the Update Tab. Click Choose File and select the update binary.
Click Upload.
Wait for the update to complete and the LaserCube to reboot.
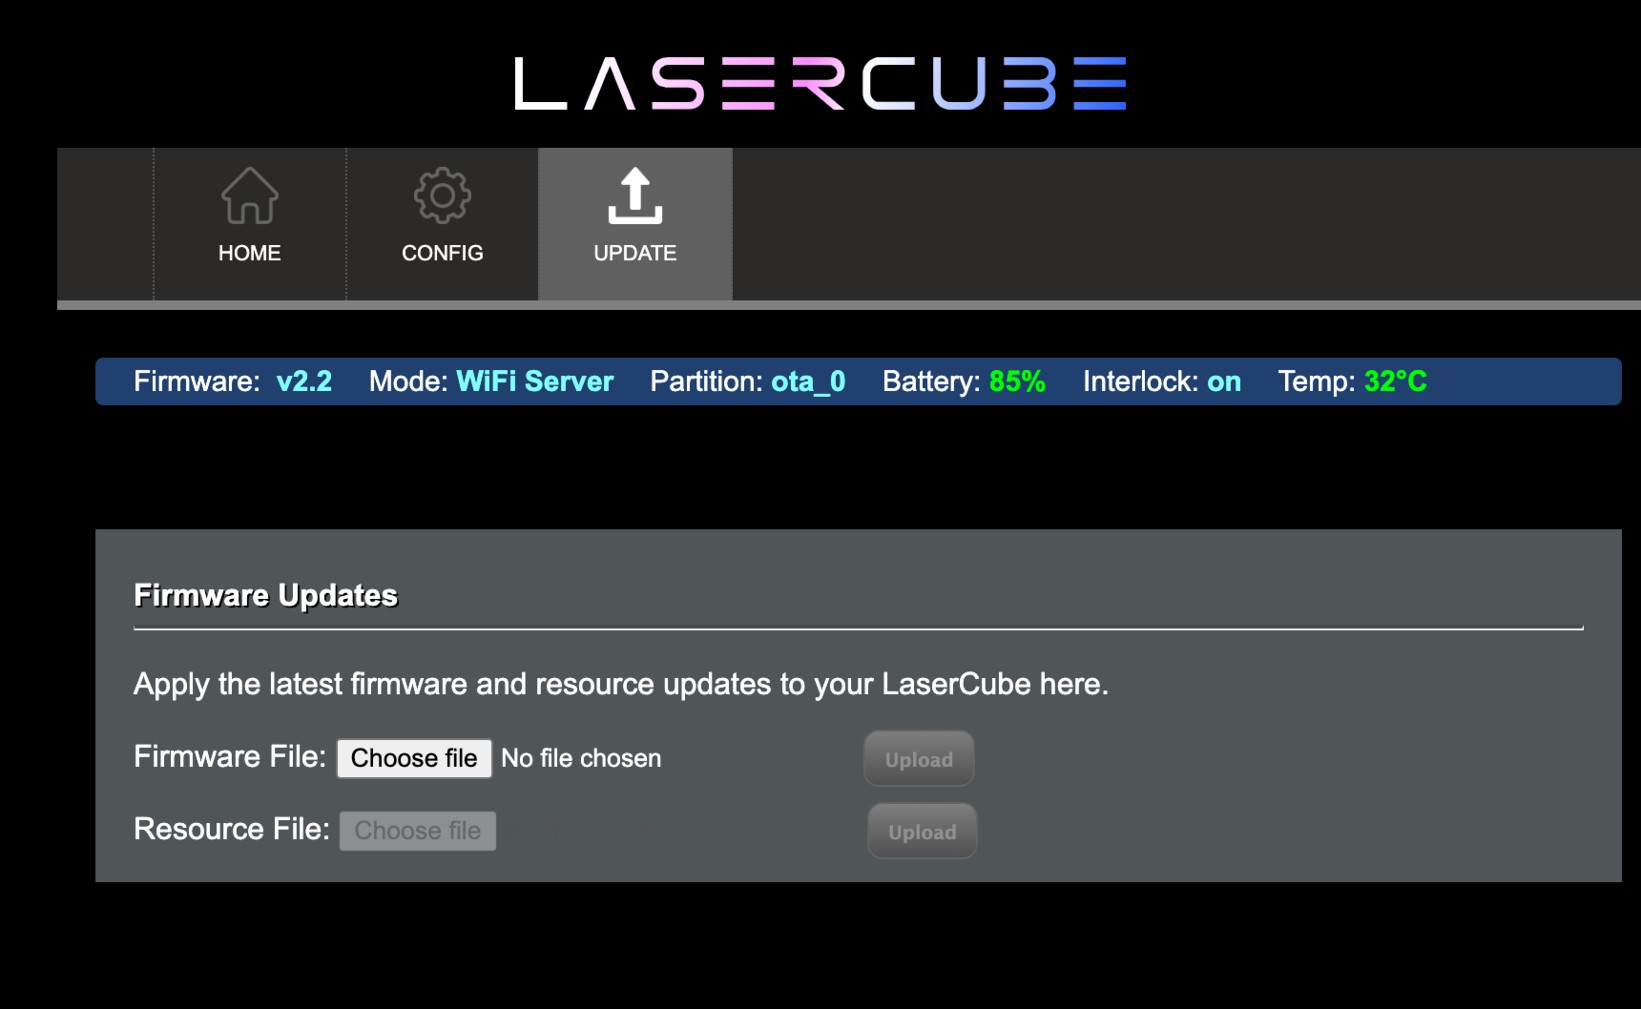
On firmware 2.2 and later, if an upload from the web page fails part way, for example when the connection drops, the cube shows Update Failed!, restarts into the firmware it already had and says that the previous firmware was kept.
Factory Reset Procedure
If you need to reset the LaserCube back to its factory firmware defaults, you can perform the factory reset as shown below. This should only be done if absolutely necessary.
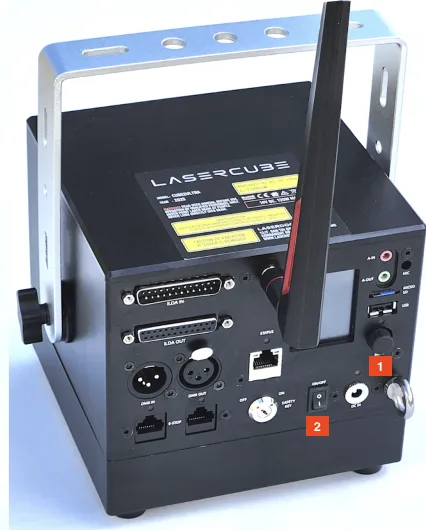
To Factory reset the device, firstly ensure the unit is powered OFF.
Hold the rotary encoder button down (1) and then while continuing to hold the rotary encoder down, power on the unit using the power switch (2). Keep holding the encoder down for at least 8 seconds and then release the encoder button.
The unit will return to its factory firmware version and all settings will also return to their defaults.
If an SD card is inserted and contains firmware that is newer than the factory version, the unit will offer to immediately update to the latest version. This should be done to ensure the latest firmware is running in your device.
Power, Battery and Temperature
Charger
Every LaserCube comes with its 19V DC charger (power adapter), with a plug or cable for your country. The charger plug is 2.5 × 5.5 mm. The Ultra MK2 and the Pro 6W use a 120W charger, the Pro 3W a 65W charger. A 19V charger with a higher wattage is fine.
If you need a new charger, we recommend buying a generic one locally (for example on Amazon): 19V DC, with a 2.5 × 5.5 mm plug and at least the wattage above. Shipping one from us usually costs more than the charger.
Battery
The battery charges while the LaserCube plays on its charger. Runtime and charging times are in the Technical Specifications.
If the battery needs replacing, we recommend a battery replacement under RMA at our service centre: email support@laseros.com with your order number. Do not open the LaserCube to replace the battery yourself.
Temperature Cut-off
The LaserCube has a temperature cut-off. If it gets too hot, for example in strong sun, the cut-off stops it. It does not restart by itself: you have to restart it.
Operate it only between 10°C (50°F) and 40°C (104°F), with open space around all sides for airflow (guidelines 8 and 9 in Safety Guidelines and Proper Usage).
Smoke or a Smell
A LaserCube should never give off a smell. If there is any smell or smoke, unplug it right away, keep it away from anything flammable, do not charge or use it again, and email support@laseros.com.
Accessories
These extras for the Ultra MK2 and Pro are sold on laseros.com, on their own or in the bundles. None of the lenses is needed for a regular laser show: they add effects.
Fitting a Lens
Switch the laser off before you fit or remove a lens (the Expander, a lens from the Optics Kit or the Diffract Lens): turn the safety key to OFF; it can stay in. The beam block can’t be used with a lens fitted. So after fitting a lens, check again where every beam ends, including the copies a diffraction lens spreads over the wall: all beams must stay at least 3 m above the floor where people may be (see Hardware Installation).
Expander
The Expander is a wide-angle lens unit, three lenses in one, that makes the picture about 3 times wider and higher: 9 times the area (sizes by distance: Picture Size). It makes the picture bigger without moving the cube further away: useful in a small venue, or to cover a wider area with one cube. It sits on a mounting plate in front of the laser aperture, held by a thumb screw. In a bundle, the plate is packed in the cube’s case with the other accessories.
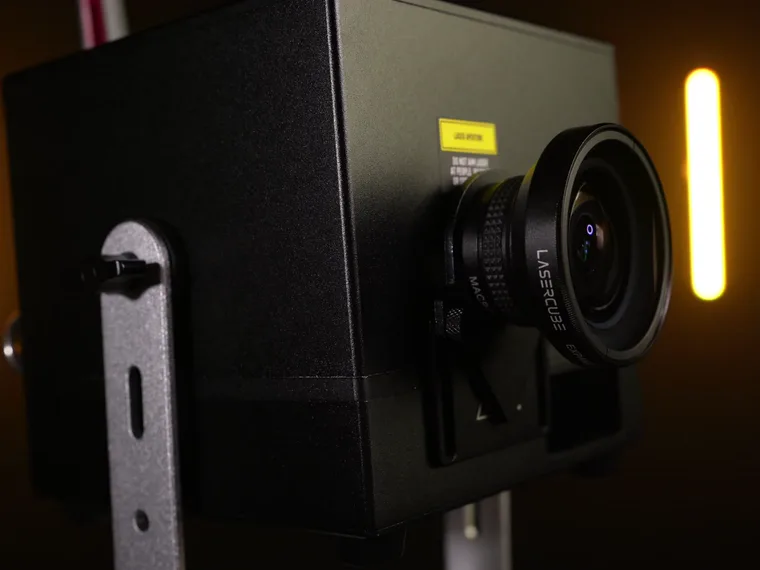
- It also makes every line thicker (about three times as wide) and a little dimmer, so it suits beams and large, simple shapes better than detailed graphics.
- Like a fisheye lens, it bends the edges of the picture inwards when the content fills the whole projection area. If the edges bend, make the picture smaller.
- Fitting it moves the whole picture as well as enlarging it, and removing it moves the picture again. So set the picture’s size and position, and any safety zone, after fitting or removing the lens, then check again where all the beams end.
Optics Kit
The Optics Kit sold outside the USA has ten lenses, each in its own holder: three Lumia lenses, three diffraction lenses, a focal lens, and Burst, Line and Radial, the three lenses of the Diffract Lens set. The US Optics Kit and older kits have the first seven.
- Lumia lenses are textured glass. As the beam moves across the glass, it is bent into soft, flowing shapes of colour, and each of the three gives a different look. With haze or fog in the air, they give an aurora-like effect.
- Diffraction lenses look like flat, clear glass. They split the beam into many copies of the picture: Diffraction 1 makes a row of copies, Diffraction 2 a wide grid and Diffraction 3 a dense grid.
- The focal lens, or blur lens, defocuses the beams: sharp lines become wide, soft bars.
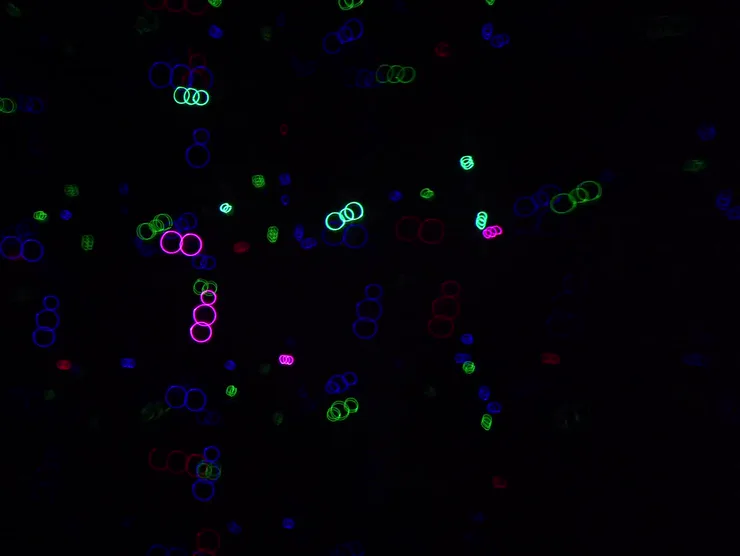
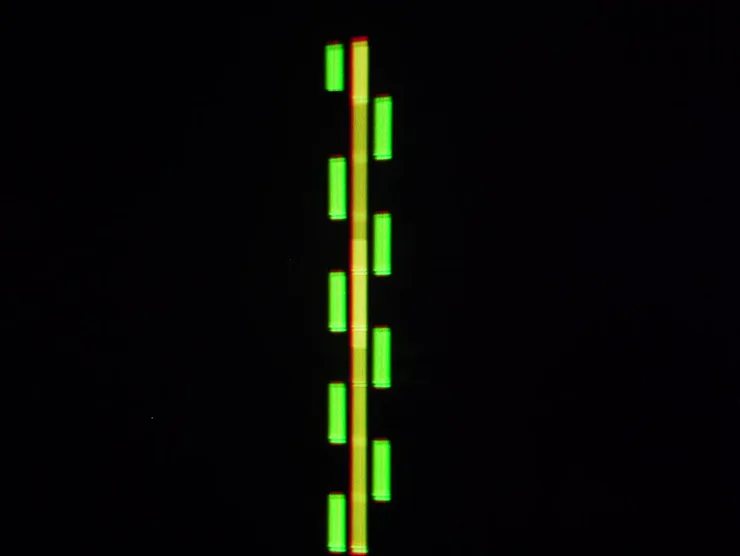
Diffract Lens
The Diffract Lens set has three more diffraction lenses. Burst scatters copies of the picture over the whole wall, Line spreads them out in long rows, and Radial arranges them in rings. It is part of the ten-lens Optics Kit sold outside the USA, and is sold on its own for a seven-lens kit (the US kit, or an older one).
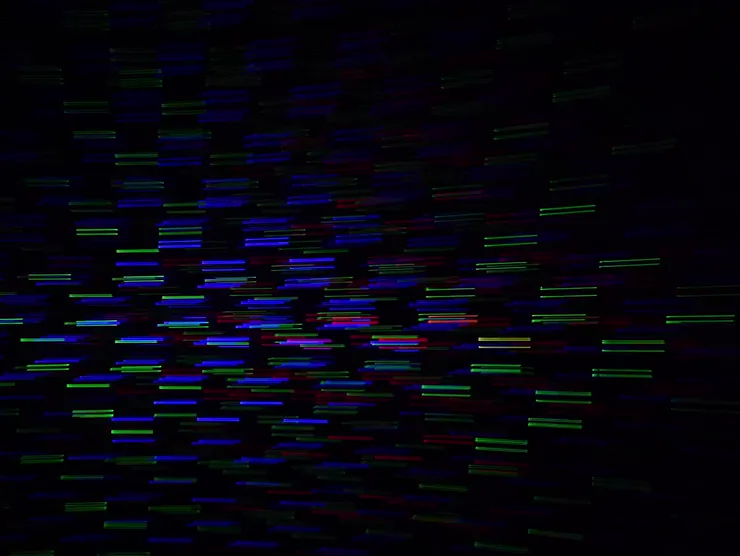
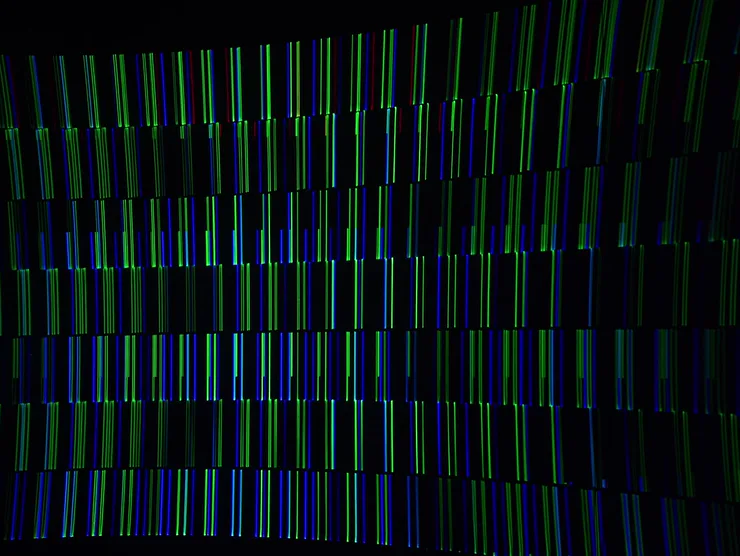
Hologram Net
The Hologram Net is a light, semi-transparent net, 3 m × 6 m. On a dark stage the net is almost invisible, so outline drawings projected onto it seem to float in the air. It is a hologram-like effect: a LaserCube can’t make real holograms in mid-air.
- Part of the light passes through the net. Place it so those beams end on a solid surface behind it, and keep to the 3 m rule in Hardware Installation.
- Hang it from a truss, tripods or lighting stands. If the net has no eyelets, add some along its edge and fix each one to the stand with a zip tie, which keeps the net straight and tight.
- The net is delicate. Remove creases with steam only, and if it gets dusty, wash it by hand with a mild soap.
Carbon Tripod
A carbon tripod for the Ultra MK2 and Pro, sold outside the USA. It comes in their DJX and STAGE bundles, or on its own; the product page has its details. The Mini Tripod on the gear page is for the WiFi LaserCube only.
Rain Cover
With its rain cover fitted, the Ultra MK2 is rated IP63 (IP51 without it): fine in light rain, not in heavy rain. The cover does not dim the beam. The Ultra MK2 rain cover is sold on its own, and comes in the Ultra MK2 DJX and STAGE bundles outside the USA (in the USA, in the STAGE and STADIUM bundles).
The Pro is rated IP51, and IP63 with its own rain cover, which is not available yet, so for now the Pro bundles come without one. Until then, don’t use a Pro in the rain, not even with another model’s cover.
Nano Fogger, Haze and Fog
Beams in the air show best with haze or fog. Thin haze gives the clearest beams, with sharp edges and every colour. Too much turns the beams into a bright glow and washes out the colours and edges.
Any fog or haze machine can be used to make the beams visible. The Nano Fogger is our small 10-watt fogger, for small spaces such as a studio (liquid not included). Big venues use a full-size fog or haze machine.
Never connect a fog machine to the LaserCube’s DMX ports unless you are sure it is true DMX: see item 22 in the LaserCube Parts Diagram.
Troubleshooting
Something not working? Find what you see in the list below. Each problem has its usual cause and the fix, with a link to the section that explains more. For connection problems step by step, see lesson 6 of the Academy’s Connect course.
- No beams: the laser doesn’t emit, NO LASER or an interlock message, cube or app?, lost the key
- Connection problems: LaserOS doesn’t find the cube, only some of the cubes, drop-outs or a yellow or red WiFi symbol, Cube Link, DMX or ArtNet
- Picture problems: one colour, colours jump, flicker or a wobbly logo, wrong place, moved after fitting the Expander, beams hard to see
- Sound, MIDI and effects: no sound, visualizer and music, MIDI controller, effects
- Power and heat: switched itself off, battery gauge, smell or smoke
- SD card and firmware: shows or playlists missing, can’t export, firmware, web app images missing
- Nothing else helps
If you’re still stuck, email support@laseros.com with your order number, the model and a short video of the problem.
No Beams
The cube is switched on, but no laser light comes out.
The Laser Doesn’t Emit
Cause: the cube isn’t armed. It emits only when the interlock is closed and the key is on, and with an E-Stop connected, after the E-Stop start. Until then, the status bar shows I-LOCK, and the EMISSION LEDs are off (with an E-Stop, they may flash).
Fix: switch on in this order:
- Close the interlock. Outside the US, plug the safety jumper into one of the E-STOP ports. US units (and any cube with the optional E-Stop) use the E-Stop there instead.
- Put the key in and switch the cube on.
- Once the cube has started, turn the key from OFF to ON. With the jumper, the EMISSION LEDs light up and I-LOCK goes from the status bar.
- With an E-Stop, then do the E-Stop start: red STOP button up and the pendant’s key to ON if it has one. On a US unit the EMISSION LEDs flash slowly, once every 3 seconds; after the second flash, briefly press the green START: the LEDs flash faster, and after 10 seconds they stay on. Outside the US, press the green START and let go: the LEDs light up straight away. See the E-Stop Setup Guide.
After the cube has lost power (switched off, or a flat battery), or after the interlock has been opened, it won’t emit by itself: turn the key to OFF and back to ON, and with an E-Stop do the E-Stop start again. See Enabling the Laser E-Stop / Interlock.
If the cube still says the interlock is not enabled although everything is fitted, turn the key off and on again with the cube switched on. If that doesn’t help, email support@laseros.com with a short video.
LaserOS Shows NO LASER or an Interlock Message
The Laser button at the top left of LaserOS on a computer shows where the problem is (see The Laser Button):
- NO LASER: LaserOS hasn’t found a cube. See LaserOS Doesn’t Find the Cube.
- LASER OFF, with a red power symbol: LaserOS has found the cube and its output is off. Click the button to start.
- LASER ON, but no beams, and the message “Interlock is not enabled on cube” with the cube’s serial number: the cube isn’t armed. See The Laser Doesn’t Emit.
- LASER ON, the cube armed, and still no beams: check that no power slider is at 0, such as Global Power and Power on LaserOS’s left panel (see Left Panel and Quick Controls).
In the phone app, the power button is in the middle of the bottom bar: red when the projection is off, blue when it is on. It turns blue even when the cube isn’t armed, and then shows the same interlock message.
Is It the Cube or the App?
Project one of the cube’s own test patterns. On the cube, open Settings → Projection → Test Patterns, turn Enable on and pick a pattern such as Square. This works in LaserOS control mode too, and the cube must be armed. If the pattern shows, the lasers and scanners work, and the problem is in the app, the content or the connection. Turn Enable off again to go back to your content. See Test Patterns.
If the pattern doesn’t show although the cube is armed and the beam block doesn’t cover the aperture, email support@laseros.com with a short video.
Lost the Key
Spare safety keys come in the box. If they’re all gone: the Ultra MK2 and the Pro, like the LaserCube WiFi and the original USB LaserCube, use a standard 12 mm keyswitch key numbered 135 (the number is stamped on the key). Look online or in an electronics shop for a 12 mm key switch sold with “135” keys: you only need the keys.
For another model, or if you’re not sure, email support@laseros.com with a photo of the back of your LaserCube.
Connection Problems
LaserOS, a lighting desk or the other cubes can’t reach the cube, or the projection drops out.
LaserOS Doesn’t Find the Cube
The Laser button reads NO LASER: LaserOS hasn’t found a cube, so it can’t connect to one.
Cause: LaserOS finds a cube only when the cube is in LaserOS control mode, on the same network as your phone or computer, and connected before LaserOS starts.
Fix: check these:
- On the cube, choose Control Mode → LaserOS (see LaserOS Control Mode).
- The status bar shows the connection mode you chose and an IP address. On firmware before 2.1, the cube asks to restart after a connection change: confirm with YES (see Connection Settings).
- In WiFi Server mode, your phone or computer has joined the cube’s own WiFi network (LaserCube, with the password Laser2020, unless you changed them). In WiFi Client or LAN Client mode with a router, both are on that router’s network.
- For any WiFi mode, the WiFi antenna is connected.
- Connect first, then start LaserOS. If LaserOS was already open, or the cube was switched off and on or changed its mode, quit LaserOS completely and start it again.
- A cable straight from the cube to one computer: use LAN Server Mode, with the computer’s network adapter left on automatic, or LAN Client with the steps in APIPA mode explained (the computer’s WiFi off while you connect).
- On a Mac, use the desktop version of LaserOS and allow it access to the local network.
- Older WiFi cubes on the same network: turn on backward compatibility in General Settings (LaserOS 0.17.7 or later).
- Use LaserOS 0.18.1 or later (see Installing LaserOS).
Original USB LaserCube on Windows: this older cube connects by USB. The LaserOS installer adds its USB driver (libusbK), and Device Manager then lists the cube under libusbK USB Devices as LaserdockInterface0, 1 and 2. If they are missing, try another USB cable and port, then install LaserOS again.
LaserOS Finds Only Some of the Cubes
Cause: usually the missing cube’s network settings.
Fix:
- For several cubes, use Ethernet cables in LAN Client mode, through a switch or a router. Set every cube to Control Mode → LaserOS and Settings → Connection → LAN Client (see A Show for Several Cubes).
- Leave IP Mode on Auto IP (Settings → Network → LAN Client). With a router, each cube gets its address from the router. With no router, the cubes and the computer give themselves 169.254 addresses: follow APIPA mode explained.
- If you use Static IP, give every cube its own address, on the same network as the computer. No two cubes may have the same address.
- Then quit LaserOS and start it again.
Drop-outs, or a Yellow or Red WiFi Symbol
Cause: in LaserOS control mode, the laser data streams over the network at a high rate. On busy 2.4 GHz WiFi, data gets lost, and the projection breaks up in brief drop-outs. In WiFi modes, the WiFi symbol at the bottom left of the status bar turns yellow or red when there is interference.
Fix:
- In Status Info, PKT Loss Events counts the lost data. Select it to reset it to zero, then see whether it climbs while you stream.
- In WiFi Server mode, run WiFi Scan (Settings → Network → WiFi Server). It shows how busy the channels are and picks the quietest one. Leave Channel on Auto (see WiFi Server Mode).
- Move away from the busy area, or better, use a cable: the USB-C to Ethernet adapter from the box for one phone or computer, or LAN Client through a switch or router for several cubes.
- In Playlist, Visualizer and Laser Show mode, the cube plays its own content, so WiFi shouldn’t affect the projection. If a laser show stutters there, check the SD card: cheaper cards can fail to stream the shows (see SD Card Information for the card we tested).
A Cube Doesn’t Follow Cube Link
Cause: the cube isn’t on the master’s Cube Link network, or is out of range.
Fix:
- Cube Link makes its own wireless network, but only while the cube’s connection mode is LAN Client or LAN Server, not a WiFi mode.
- Enable it on every cube. Set one cube to Master and the others to Slave, all with the same Link Channel and PIN. A slave in range of its master shows a purple status bar.
- Connect the WiFi antenna on every cube: Cube Link needs it. The range is about 20–40 m in line of sight; keep metal objects out of the way between the antennas.
- For a show made for several projectors, set each cube’s Group, and choose the same show category on every cube before you press play.
- The details are in Cube Link Mode.
No Response to DMX or ArtNet
Cause: no data reaches the cube, or the desk sends values that black it out. A red cross next to the DMX label in the status bar means no DMX or ArtNet data is being received; a green tick means it is.
Fix:
- Set Control Mode to DMX-512 or ArtNet. The cube restarts into that mode.
- DMX: check the cables and that the DMX line is correctly terminated. On the Pro, use adapter cables wired for DMX: standard 3.5 mm-to-XLR audio cables are wired the other way round and won’t work (see Connecting DMX cables to the LaserCube Pro).
- ArtNet: check that the status bar shows an IP address (if not, look for a network problem first) and that the cube is set to the universe your controller sends (see ArtNet Status).
- On your desk, patch the cube at its start address (default 1). Channel 1 (access mode) and channel 3 (cue select) black the cube out at 0–31, and in Standard access mode or above, channel 5 (fader) at 0 is black (see DMX/ArtNet Channel Layout).
Picture Problems
The cube projects, but what you see isn’t what you expect.
Everything Is in One Colour
Cause: in LaserOS, Single Color or Mono Color turns all content into one colour.
Fix: in LaserOS on a computer, open Settings → Color. Set Single Color to Off, move Mono Color and Shift Color all the way to the left and turn Fader R, G and B up, or click Reset settings at the bottom of the page (see Mono Color). In the phone app, tap the gear at the top right, then tap the page title and pick Color.
In the cube’s own modes, a built-in effect can re-colour the picture: see Effects Don’t Work, or Change the Picture.
Colours Jump Instead of Fading
Cause: TTL Mode is on in LaserOS. It makes the cube switch each colour fully on or off, like a TTL projector.
Fix: in LaserOS on a computer, open Settings → Projector Setup → Color Balance, pick the cube in the device list and turn TTL Mode off (see Color Balance and TTL Mode).
Flicker, Rounded Corners or a Wobbly Logo
Cause: the content has more detail than the scanners can draw smoothly. They draw only so many points per second.
Fix: simplify the content, change its render quality, make the picture smaller or split it over more cubes. In Draw, keep Points used under 100%. The steps are in Flicker and Render Quality.
The Picture Is in the Wrong Place
Cause: the size and position are set in another place than the one you changed: in LaserOS control mode, the settings of the software that streams to the cube (LaserOS’s, or another program’s) apply, and the cube’s other modes use the cube’s own.
Fix:
- LaserOS control mode: in LaserOS, open Settings → Projector Setup → Image. The Square test pattern there shows the whole projection area (see Image Settings in LaserOS). The cube’s own Image Setup, Colour Balance and Safety Zone are greyed out in this mode: that is normal.
- The cube’s other modes: on the cube, open Settings → Projection → Image Setup. At 100% X and Y size, the position sliders have no effect: make the picture smaller first (see Image Setup).
- Not square on a wall at an angle (a trapezoid): in the cube’s other modes, use Keystone H and Keystone V in Image Setup (firmware 2.2 and later; see Keystone Correction); in LaserOS control mode, LaserOS’s keystone corners.
- DMX or ArtNet mode: depending on the access mode, the desk’s channels 6 to 11 also set the size, mirroring, rotation and position (see DMX/ArtNet Channel Layout).
- Upside down or mirrored: use Flip X and Flip Y.
The beam block and the 3 m rule in Hardware Installation apply whatever the picture’s size and position.
The Picture Moved After Fitting the Expander
Cause: the Expander moves the whole picture as well as enlarging it, and removing it moves the picture again.
Fix: switch the laser off before you fit or remove the lens. Afterwards, set the picture’s size and position, and any safety zone, again, then check where all the beams end. If the edges of the picture bend, make it smaller. See Expander and Fitting a Lens.
Beams Are Hard to See, or Washed Out
Cause: beams in the air show best with haze or fog, and light in the room makes them harder to see. Too much haze turns the beams into a bright glow and washes out the colours and edges.
Fix: darkness and a little haze or fog make the beams much more visible; thin haze gives the clearest beams. If the beams turn into a glow, use less haze. See Nano Fogger, Haze and Fog.
Sound, MIDI and Effects
Sound, a MIDI controller and the cube’s built-in effects.
No Sound, or Sound Out of Step
Cause: the cube has no speaker. In Laser Show mode, the show’s sound comes out of the green A-OUT jack, for powered speakers.
Fix:
- Connect powered speakers to A-OUT and turn up Audio Output Volume under Settings → Audio (see Audio Settings).
- Sound out of step with the show: some speakers delay the sound. Set Audio Output Delay, then stop and start the show again: the new delay applies from the next start.
- In LaserOS control mode, LaserOS handles all the audio, so the cube’s audio settings have no effect.
The Visualizer Doesn’t React to Music
Cause: the cube listens to the wrong input, or the input gain is too low.
Fix: under Settings → Audio, check Audio Input Selection: the built-in microphone, or the line input (the pink A-IN jack) with music from a computer or other audio device. Then set Max Line Gain / Max Mic Gain: too low and the visualizers hardly change, too high and they are overdriven. In LaserOS control mode, the cube’s audio settings have no effect: check LaserOS’s own (see Sound in LaserOS).
The MIDI Controller Does Nothing
Cause: USB MIDI is off, or the cube is in a mode that doesn’t use it.
Fix:
- Turn on USB MIDI under Settings → USB MIDI. The status bar then shows a green tick next to the MIDI label when a controller is connected, and a cross when none is (see Enabling USB MIDI).
- The cube’s USB MIDI doesn’t operate in LaserOS, ArtNet, DMX, IDN or Ether Dream control mode (see USB MIDI Settings). In LaserOS control mode, plug the controller into the computer that runs LaserOS instead (see MIDI Controllers in LaserOS).
- The cube works with the APC40 MK2 and the APC mini MK2. MIDI mappings are saved only when an SD card with the Lasercube/settings folder is in the cube.
Effects Don’t Work, or Change the Picture
Cause: the built-in effects work only when they are enabled and the Master effect slider is above 0%. Effect settings are kept when the cube is switched off and on.
Fix: open the Effects menu (in Playlist and Visualizer mode), turn Enable on and check that Master is above 0%. With the factory APC40 MK2 mapping, the controller’s Master fader sets it, so move that fader up. When you don’t need effects, keep them disabled, so they can’t change the picture by accident. See Built-in Effects and Master Effect Slider.
Power and Heat
The cube switches itself off, or the battery reading looks odd.
The Cube Switched Itself Off
Cause: the cube shuts down when it gets too hot (the temperature cut-off) or when the battery is flat.
Fix:
- Too hot (overheating), for example in strong sun: the temperature cut-off turns the cube off, and it doesn’t restart by itself. Let it cool down, then switch it on again. Use it only between 10°C (50°F) and 40°C (104°F), with open space around all sides for airflow. LaserOS shows the cube’s temperature under Settings → Projector Setup → Info.
- Flat battery: plug in the charger. The battery charges while the cube plays on its charger (see Battery).
- Either way, reset the key before the laser can emit again (see The Laser Doesn’t Emit).
The Battery Gauge Looks Wrong
Cause: the gauge estimates the charge from the battery’s voltage. While the cube charges, it can’t measure the charge, and while it projects, the reading moves around and shows a little lower (see Status Info).
Fix: while charging, look at the charging LED instead: red while the battery charges, green when it is full (item 13 in the LaserCube Parts Diagram). For the charger the cube needs, see Charger.
The Cube Smells or Smokes
A LaserCube should never give off a smell. Unplug it right away, keep it away from anything flammable, do not charge or use it again, and email support@laseros.com (see Smoke or a Smell).
SD Card and Firmware
Always switch the cube off before you take the micro SD card out or put it in.
Shows or Playlists Are Missing
Cause: the SD card is missing, or doesn’t have the files.
Fix:
- Laser Show mode lists no shows: the SD card isn’t in, or it doesn’t have the factory contents. Download the latest contents from https://github.com/Wickedlasers/mk2SDContent and copy them as SD Card Information describes. Rename the old Lasercube folder first, so you keep your own playlists and MIDI mappings.
- Your own playlist is missing from the playlist drop-down: both its .ldpl file and its folder must be on the card (see Exporting a Playlist to the micro SD card).
- A Timeline show isn’t on the card: SD card export takes playlists only, so build the show as a playlist to play it without LaserOS running.
LaserOS Can’t Export to the SD Card
Cause: the phone app can’t export, or LaserOS doesn’t recognise the card.
Fix: export with LaserOS on a computer. If it says “SD card not Found”, check that the card is in the card reader, that its volume name is WL and that it has a Lasercube folder. If your computer asks for permission to access the card, allow it. See Exporting a Playlist to the micro SD card.
Checking and Updating the Firmware
Some steps in this manual depend on the firmware version. The cube shows it on its boot screen (firmware 2.0 and later), and LaserOS on a computer shows it under Settings → Projector Setup → Info.
To update from the SD card (the preferred way):
- Rename the card’s old Lasercube folder. Download the latest SD card contents from https://github.com/Wickedlasers/mk2SDContent, unzip them and copy the new Lasercube folder into the root of the card (see SD Card Information). Copy your own playlists and MIDI mappings from the old folder into the new one.
- With the cube off, put the card in, then switch the cube on. When it asks to update the firmware, accept.
- Don’t switch the cube off during the update. It takes one to two minutes and shows its progress in percent. When the screen says F/W Updated, press OK.
The other way, by hand through the web admin page, is in Firmware Update. On firmware 2.2 and later, an upload there that fails part way leaves the cube on the firmware it already had.
Web App Images Missing After an Update
Cause: the SD card doesn’t have all of the latest SD card contents, for example when only the firmware file was copied to it.
Fix: copy all the folders of the latest SD card contents, not just the firmware file (see SD Card Information). Without them, the web app shows the visualizer and effect previews as blank items (see Visualizer Web App).
Nothing Else Helps
A factory reset puts the cube back to its factory firmware and every setting back to its default, including the cube’s own image setup and safety zone, so set them again before the next show. If the SD card has newer firmware, accept the update the cube then offers. See Factory Reset Procedure.
If the problem stays, email support@laseros.com with your order number, the model and a short video.
A problem in LaserOS: Settings > General > Report a bug opens an email to support@laseros.com. On a computer, also attach laseros.log and config.ini from Settings > General > Open Config Folder; the phone apps can’t attach their log.
SD Card Information
The LaserCube Ultra MK2 / Pro is supplied with a pre-loaded micro SD card containing all demo laser shows, Playlists, and MIDI mappings for APC40 MK2 and APC mini MK2.
Always switch the LaserCube off before you take the micro SD card out or put it in. Never remove or insert the card while the cube is on.
If you need additional SD cards then these can be obtained from places like Amazon.
The card which we have tested and guarantee to work with the device is the Lexar A2 Silver Plus 64Gb micro SD card ( https://americas.lexar.com/product/lexar-professional-silver-plus-microsdxc-uhs-i-card/).
The LaserCube supports this range of cards up to 2Tb.
Note: Please make sure you do not purchase inferior / cheaper micro SD cards, as these could fail to correctly stream the laser shows which require low latency and high throughput in order to stream simultaneous audio and projection data.
The micro SD cards usually come pre-formatted in the Ex-FAT filesystem format, and this is the preferred format in order to take advantage of >32Gb space compared to FAT32.
If you need to format a card manually then please use Ex-FAT with default settings offered by your operating system.
If you need to obtain the most up to date files that are provided on the factory micro SD card then these are available from here: https://github.com/Wickedlasers/mk2SDContent
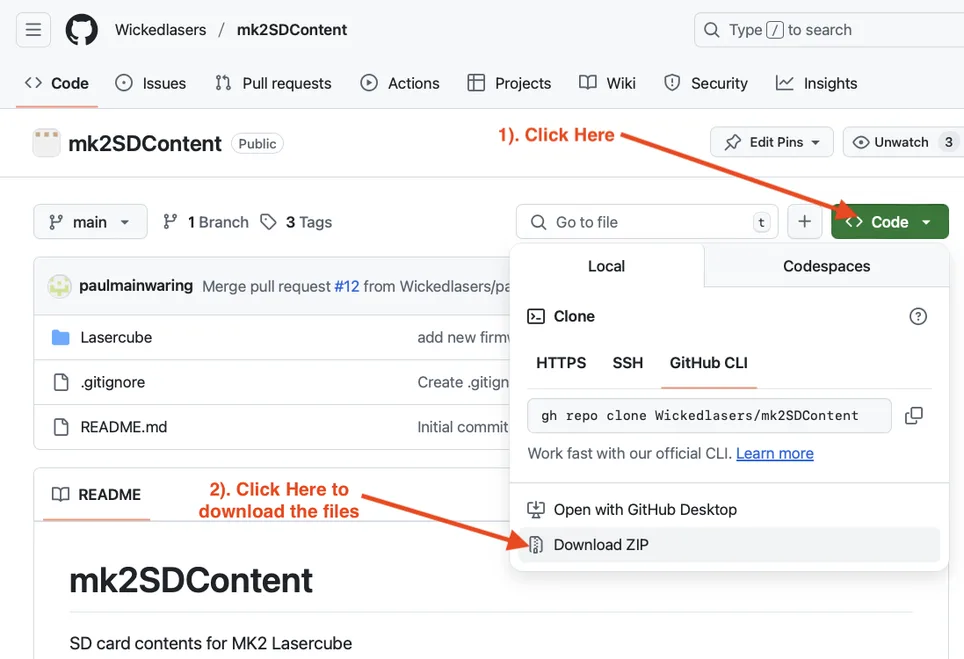
You will need to unzip the downloaded file before copying the “Lasercube” folder into the root of your new micro SD card. If you are using a card with the “Lasercube” folder already present then you can either rename the old folder, or delete the folder before copying the new folder you just downloaded. If you delete the folder then you will lose any custom playlists or MIDI mappings.
Note: Please also rename the SD card volume name to “WL” without the quotes in order for LaserOS to see it when exporting custom playlists to the SD card.