
ULTRA MK2 LaserOS Playlist Export Guide
Ultra MK2 LaserOS Playlist Export Guide
This guide shows how to add custom user content to your Ultra MK2 Laser cube, by showing how you can use LaserOS software to create an example playlist, add custom content, then export to the MK2 SD card for projecting on the device.
1. Prerequisites
* A PC/Mac Laptop or Desktop machine to install the desktop version of LaserOS on.
Note: You cannot use the iOS or Android version of LaserOS to export to the MK2 SD card.
* A micro SD card reader, preferably a USB 3.x one for faster file transfers.
2. Install LaserOS 0.17.7 or later
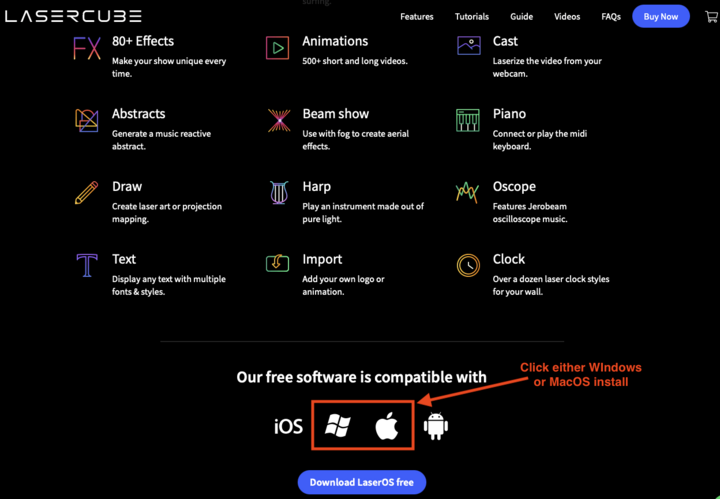
Before you can add content to your MK2, our LaserOS desktop software must firstly be installed onto your PC/Mac. Go to [1](http://www.laseros.com/) and scroll down until you see the download links as shown in the image below:
Follow the instructions for installing LaserOS on your chosen platform, then run the software by opening Launchpad on MacOS, or click the icon for LaserOS on your desktop if using a Windows platform.
3. Create a new Playlist
The method of adding new content to the MK2 is via a LaserOS playlist, by either selecting an existing one you already created, or by creating a new one from scratch.
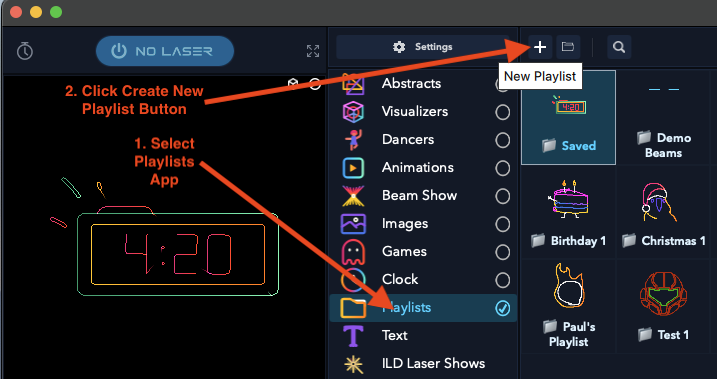
You can create a new playlist by selecting the playlists app from the centre pane, then click the small ‘+’ icon as shown in the image below:
Once you create a playlist, you will now be able to drag content from the various categories into the playlist pane on the right hand side. You can also add content to a playlist by right clicking on any CUE within laserOS, and then use the “add to playlist” button.
This is the method we will show in this document, so for now you can simply save the empty playlist with the name of your choice as shown below:
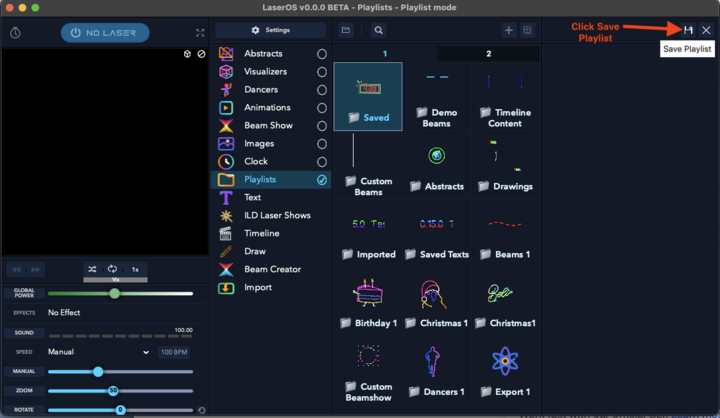
When you click the “save playlist” button you will need to give the playlist a name. Keep this name as short as possible, as the MK2 can only display a limited number of characters on the LCD when selecting a playlist from the drop down menu on the MK2 LCD.
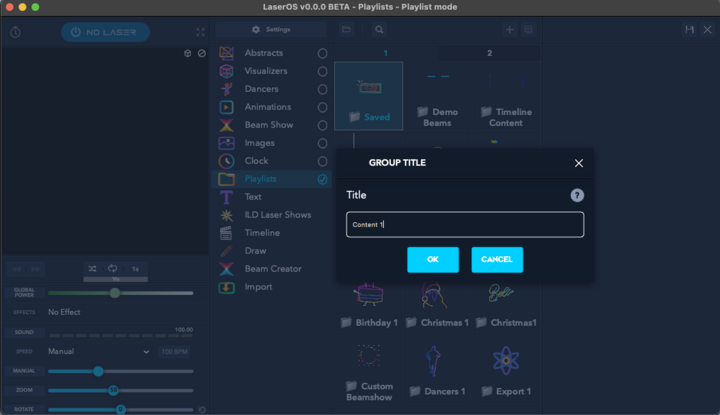
In this example guide we name the new playlist “Content 1”.
Now you have a custom playlist added, it is now possible to add content to the playlist by selecting items from the various LaserOS categories and right clicking on the CUE you wish to add to the playlist.
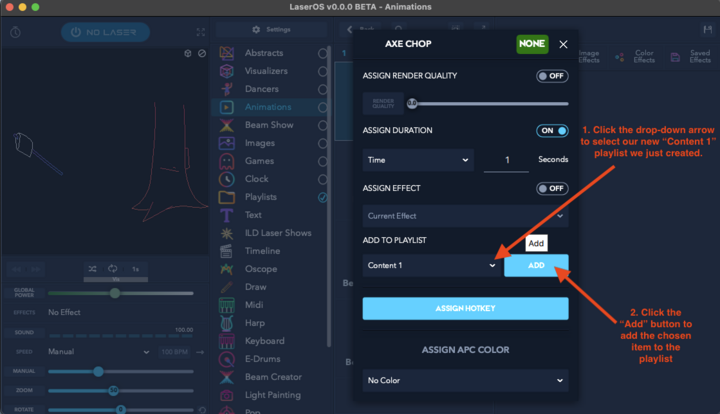
When you right click on a CUE (Animations→Vectors→Axe Chop in our example), a pop-up menu will appear which will then allow you to select the newly created playlist from the “Add To Playlist” drop-down, then click the “Add” button to add the item to the chosen playlist as shown below:
4. Adding a custom SVG to the Playlist
If you have any custom content you wish to display with the MK2 such as a company logo in SVG file format, you can add this to the playlist by using the import app within LaserOS.
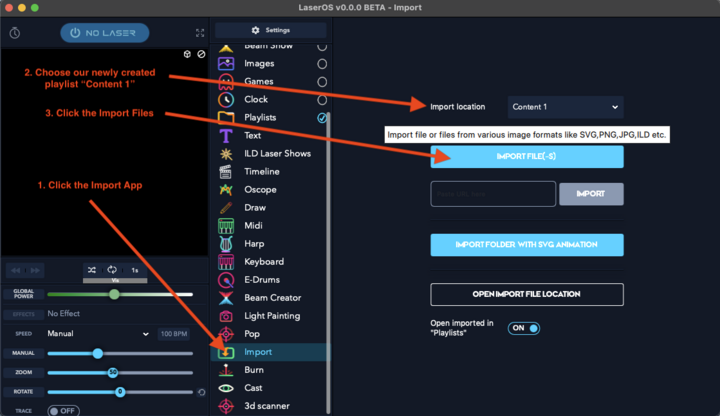
Select the import app, then select the playlist you wish to import content into, then click the import files button.
Select the SVG file you wish to add using the file browser window which appears after clicking the “import File button”

In our example we are importing the Wicked Lasers Logo as an SVG file.
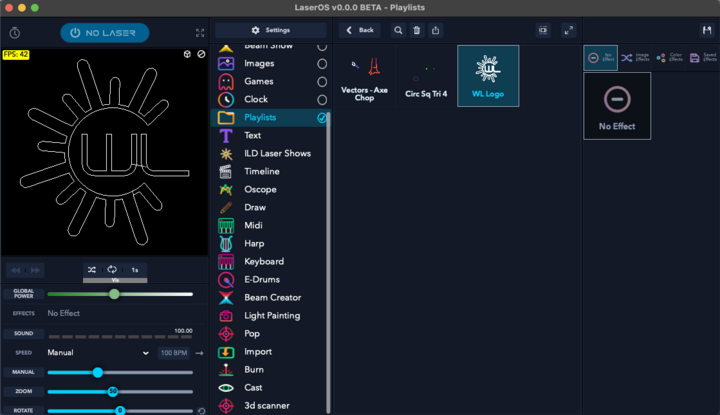
You can return to the playlists app and select the “Content 1” playlist by double clicking which will then show all the items added to this playlist.
The playlist should contain all the items you have selected and added via the right click popup menu. The image below shows the newly added custom SVG called “WL Logo”
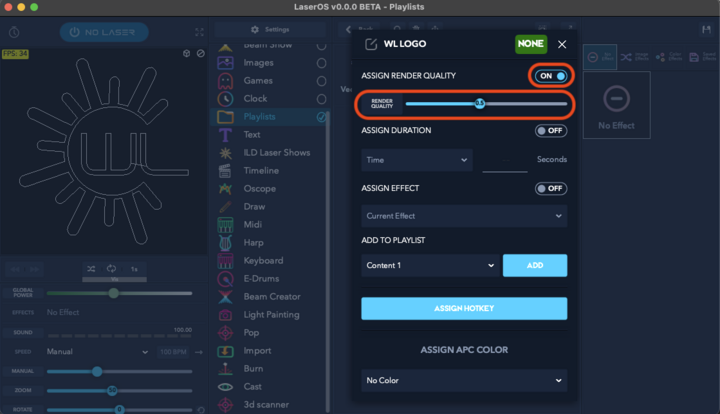
Some content imported from SVG may need its render quality changing depending on how complex the image is. Since the Galvo Scanners can only render a certain number of points per second you may see the projection start to flicker if the imported SVG is too complex, or the quality slider is adjusted to maximum quality, as the laser will need to render more points in order to display the image with sharper corners and more detail. You can turn on “Show FPS” in Settings→General in order to get an idea of the frame rate the item will render at. (>=45 FPS will not appear to flicker).
You can adjust the render quality by right clicking on an item in the playlist and turning on the “assign render quality” toggle followed by adjusting the render quality slider as shown below.
5. Exporting a Playlist to the MK2 micro SD card
Once you have finished adding CUE’s to your new playlist, you can then export the entire playlist to the MK2.
You will need to insert the micro SD card provided with the MK2 into a USB reader and then connect the reader to your PC/Mac.
The SD card should appear in File Explorer / Finder as a removable device with the volume name “WL”. The card should also contain a folder in the root called “Lasercube”.
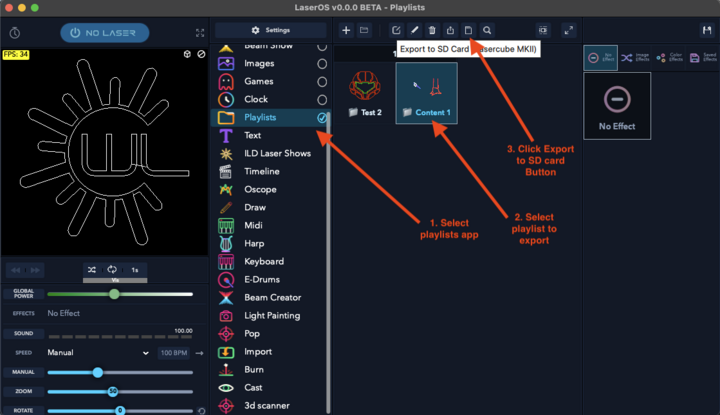
In LaserOS, select the playlists app, then select the playlist you wish to export, then finally click the SD card export button as shown in the image below:
Your OS may ask for permission to access files on a removable volume, if so then click “Allow”.
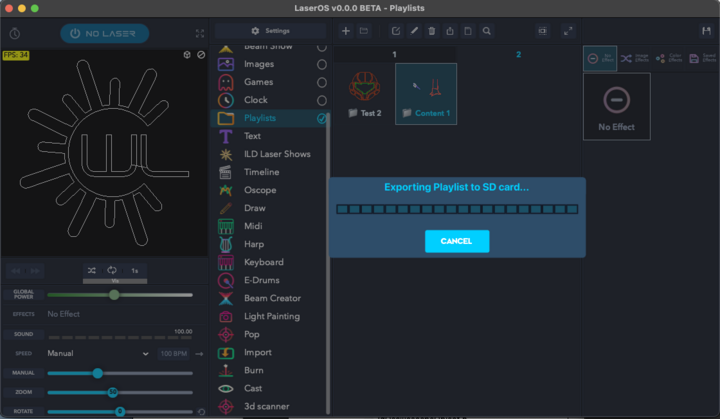
If the SD card is detected on your machine then LaserOS will show an export progress bar depending on how many items need exporting to the SD card.
If the playlist already exists on the SD card (as you may have already added it once before) you may be prompted as to whether you wish to overwrite the playlist on the SD card or not, as shown below.
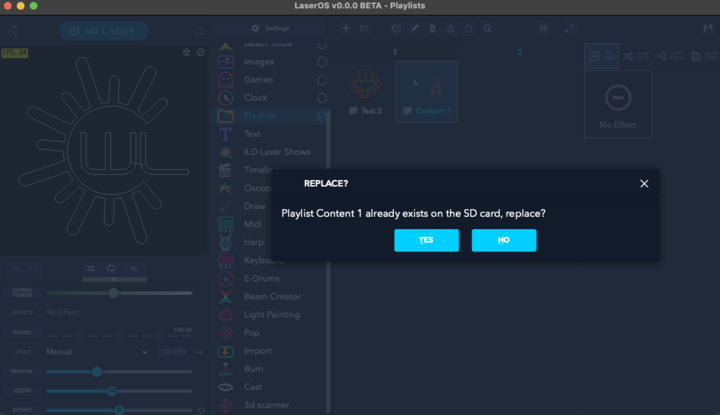
If you accept to replace the playlist then the previous playlist on the SD card will be deleted and replaced by the current one.
If when you click the export to SD card you see an “SD card not Found” message box, then please ensure you have inserted the MK2 card into your reader and into your PC properly, and also check that the volume name of the SD card is shown as “WL”. If the SD card volume name is not “WL” without the quotes then you can right click on the removable device and rename the card to “WL” using Windows file manager. This should only be necessary if you have used your own SD card and forgot to rename the volume.
The SD card should also contain a folder called “Lasercube”. If it does not then you need to download the factory SD card image again from our GitHub here: [2](https://github.com/Wickedlasers/mk2SDContent)
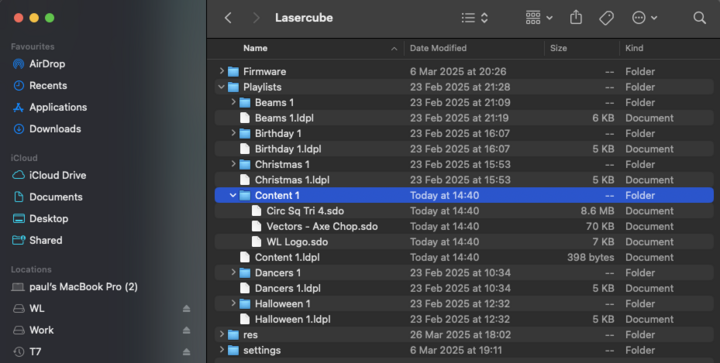
The image below shows the contents of the SD card with the new “Content 1” playlist folder and files added.
6. Using the new playlist on the MK2.
To project the CUE’s from the “Content 1” playlist we just exported from LaserOS, you need to firstly safely eject the SD card from your PC/Mac. This can be done by right clicking the SD card in file manager and selecting “Eject”.
Place the SD card back into the MK2 and power on the cube. Select playlist control mode, then select the “Content 1” playlist which should now be available in the playlist drop-down within the playlist player menu.
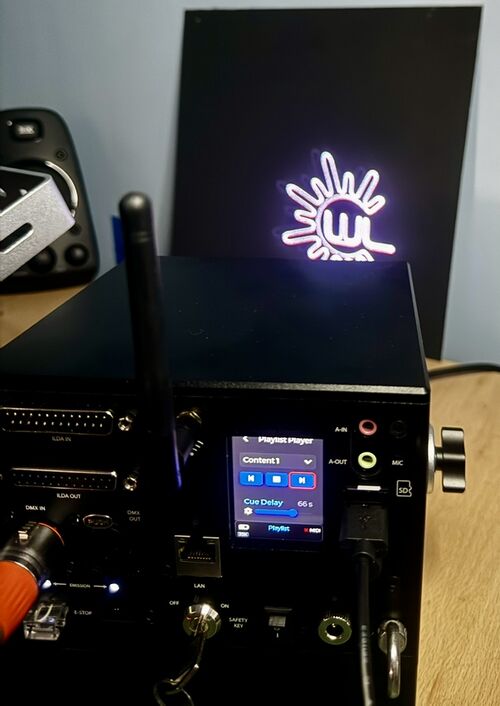
The photo above shows the custom SVG that was imported to LaserOS, then exported to the MK2 as “Content 1” playlist.