ULTRA MK2 Effects
MK2 Built in Effects
The effects menu will be available on the top level menu of the MK2 when it is in either playlist or visualizer control mode.
The effects can be used to modify the currently projected image, and consist of both colour modifying effects and image movement / scale effects.
These effects are also dependant on the current setting of the tempo which can be accessed from settings→tempo or set using tap tempo an an APC40 MK2 device (see wiki section on tempo).
Any of the effect parameters can be MIDI mapped to an APC40 MK2 or APC mini MK2 in order to allow live modification of the effects (see our DEMO APC40 MK2 MIDI mapping on the SD card provided with the MK2).
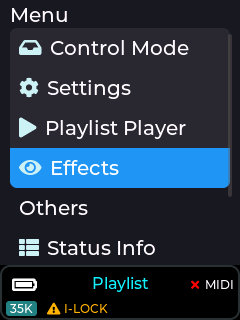
The Effects menu can be accessed from the top level menu when the MK2 is in playlist or visualizer control mode as shown in the image below:
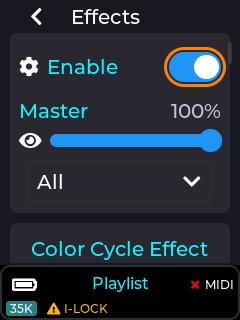
In order to be able to use the effects they must be enabled. If no effects are required then it is recommended to have the effects disabled to prevent unintentional changes to the projection.
Any of the effect parameters changed via the LCD menu UI will be preserved through a power cycle. This is to allow the unit to start up with any effect chosen by the user without any additional actions which is perfect for when the device just needs to be powered on and interlock activated.
Available Effects
There are currently 6 effects that can be applied to the currently projected image, and each effect has its own set of user adjustable parameters depending on the chosen effect.
- Colour Cycle
- Zoom
- Hue
- Colourize
- Flash
- Strobe
More effects will be added in future firmware releases for the MK2, allowing for more varied live projection modifications.
Master Effect slider
The intensity applied to the projection from any of the available effects are controlled by a master intensity slider. This is set to 100% by default, and can be changed via the menu UI or MIDI mapped to a dial/fader. With this slider at 0% then none of the effects will be applied to the projection.
Effects Filter drop down
In order to access the required effect filter more quickly via the menu UI, the user can use the effect filter drop down. By default the effect filter is set to “ALL” so all filters can be accessed by scrolling through the effect menu. If a specific effect filter is selected then only the parameters for that effect will be visible.
tmp_de9dd66e.png) ote: The effect filter is only for filtering effects in the UI to allow faster config of the chosen effect, but does not have any bearing on which effects are activated._
Colour Cycle effect
This effect will cycle through a series of primary colours to the current beat or multiple of the beat based on the current tempo and effect speed setting (tempo can be set via settings→tempo menu).
The colour sequence is currently fixed to the following:
Blue → Green → Cyan → Red → Magenta → Yellow
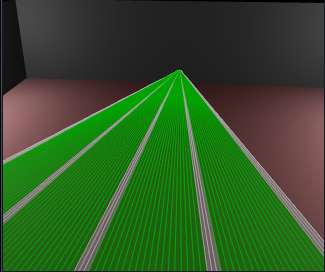
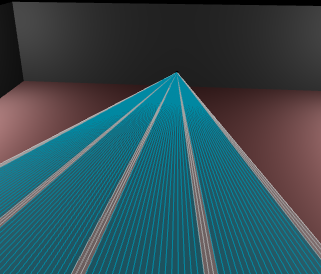
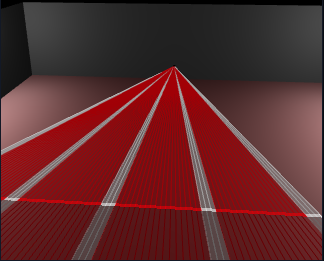
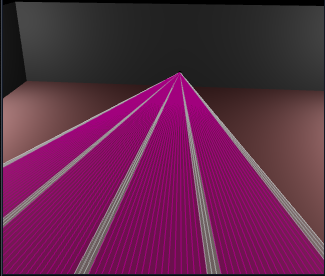
The above images show the colour cycle effect colours when +White parameter is OFF.
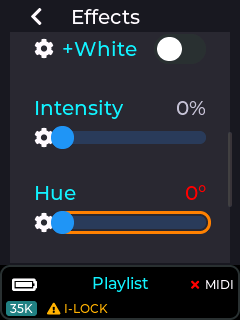
Colour cycle effect parameters
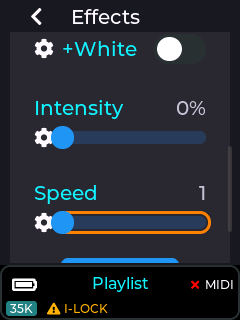
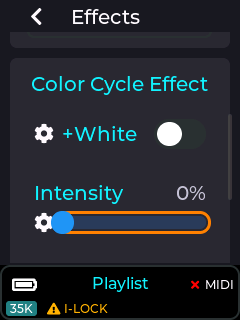
The adjustable parameters for the colour cycle effect are Intensity, Speed, and Include White (+white).
Intensity parameter is used to select how much of the original CUE colour is modified by this effect. e.g. 50% intensity will equally mix the original CUE colour with the cycle effect colour, and 100% will completely replace the original CUE colours with the colour from this effect.
These parameters can be MIDI mapped to a dial/fader when using an APC MIDI device.
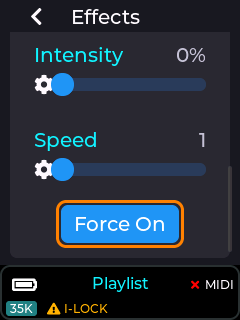
Speed parameter is used to control how often the colour cycle occurs. With a speed of 1, the colour will change on every beat, and a speed of 2 will change on every other beat etc.
The “Force On” button is only present so it can be assigned to an APC MIDI button in order to live trigger the effect, overriding the intensity slider. Pressing an APC button mapped to this button will cause the intensity to be briefly set to 100% while the button is held down.
The +White parameter is used to control whether any parts of the currently projected CUE which contains full white will be overridden by the cycle colour.
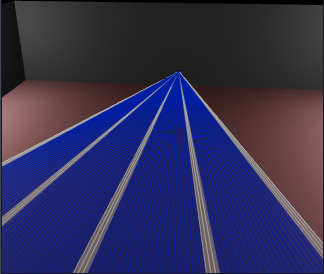
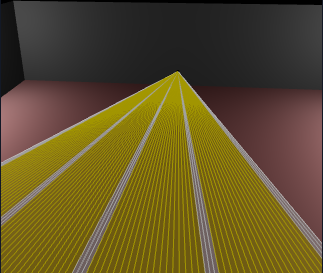
The +White parameter is useful when using fan beam patterns as shown below.
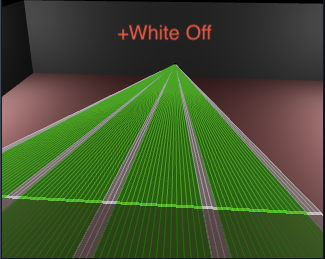
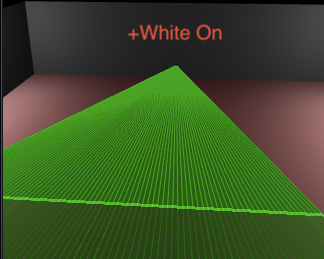
With +White off, only non white parts of the beam pattern will be replaced by the cycle effect colour. With +White On, the whole beam pattern will be re-coloured.
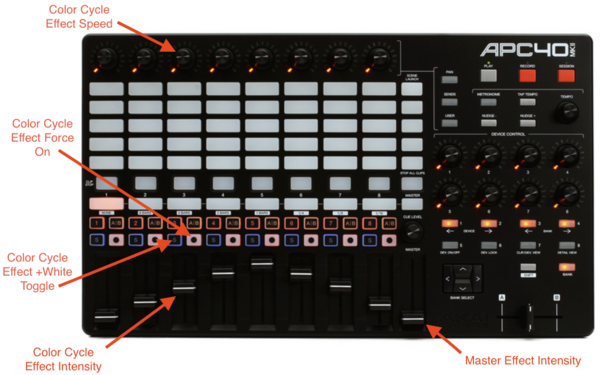
Default APC40 MK2 Colour Cycle Effect MIDI mapping
The image below shows how this effect is mapped to an APC40 MK2 when using our default MIDI mapping provided on the SD card shipped with the MK2.
Zoom Effect
This effect will zoom the projection in/out in sync with the beat based on the current tempo (see tempo in the wiki).
Zoom effect parameters
The zoom effect has several parameters that can be adjusted by the user, including intensity, speed, and zoom type.
The intensity slider adjusts how much of the zoom in/out effect is applied to the current projection between 0% and 100%.
The Speed slider allows the rate of zoom in/out to be adjusted. This parameter is based on the current tempo, and can be adjusted between fractions of the current beat to multiples of the beat.
The Linear parameter changes whether the zoom in/out is done in a linear fashion or a logarithmic one.
The “Force On” button is intended to be MIDI mapped to an APC button for live activation of the effect. When this button is activated, the intensity slider is briefly changed to 100% while the button is held down, and then returns to its previous value once released.
Default APC40 MK2 Zoom Effect MIDI mapping
The image below shows how this effect is mapped to an APC40 MK2 when using our default MIDI mapping provided on the SD card shipped with the MK2.

Hue Effect
This effect will re-colour the current projection to a user selected colour based on the hue, saturation, and intensity parameter adjustments.
Hue effect parameters
The images below show the available user parameters for the hue effect.

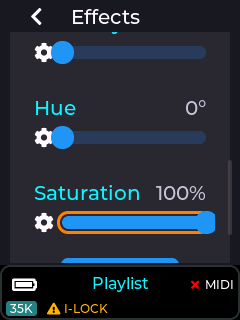
The “+White” works the same as described in the Colour cycle effect documented previously, and determines whether white portions of the projection will include the colour override or not.
The intensity slider determines how much of the selected hue colour will be applied to the projection.
The saturation slider will set how vivid the colour will be, so a low saturation level will result in pastel colours, and a high saturation will give the most vivid colours.
The hue slider allows a colour to be selected within the hue range of 0 to 360 degrees as shown in the image below.
![]()
The “Force On” button is intended to be MIDI mapped to an APC button for live activation of the effect. When this button is activated, the intensity slider is briefly changed to 100% while the button is held down (fully activating the hue effect), and then returns to its previous value once released.
Default APC40 MK2 Hue Effect MIDI mapping
The image below shows how the hue effect is mapped to an APC40 MK2 when using our default MIDI mapping provided on the SD card shipped with the MK2.

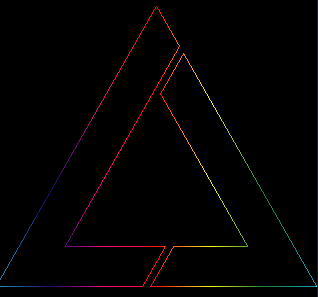
Colourize Effect
This effect will apply a rotating colour hue on the projection. The left image is without the effect applied, and the right with the effect applied.

Colourize effect parameters
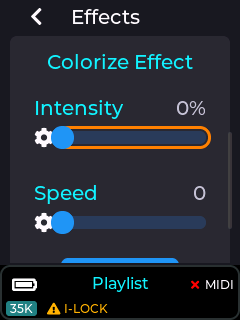
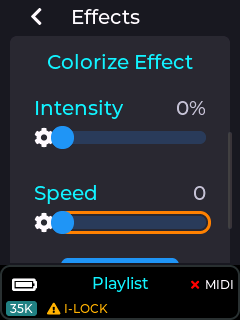

The intensity parameter determines how much of the colour effect will be applied to the projection between 0% and 100%.
The speed parameter changes the rate at which the colour moves, and is not related to the current tempo setting.
The “Force On” button is intended to be MIDI mapped to an APC button for live activation of the effect. When this button is activated, the intensity slider is briefly changed to 100% while the button is held down (fully activating the colourize effect), and then returns to its previous value once released.
Default APC40 MK2 Colourize Effect MIDI mapping
The image below shows how the colourize effect is mapped to an APC40 MK2 when using our default MIDI mapping provided on the SD card shipped with the MK2.

Flash Effect
The flash effect will fade the current projection in/out to the beat or multiple of the current beat, based on the current tempo.
Flash effect parameters
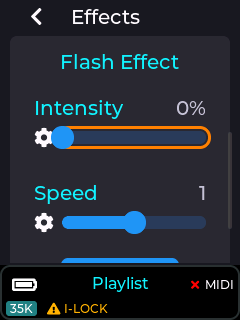
The intensity parameter determines how much of the projection will have the flash fade applied, and is between 0% and 100%.
The speed parameter changes the rate at which the projection is faded in/out, and is linked to the current tempo, and synced to the beat.
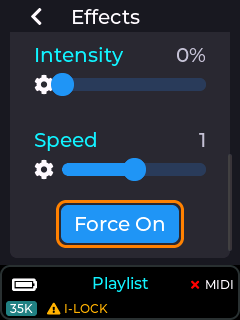
The “Force On” button is intended to be MIDI mapped to an APC button for live activation of the effect. When this button is activated, the intensity slider is briefly changed to 100% while the button is held down (fully activating the flash effect), and then returns to its previous value once released.
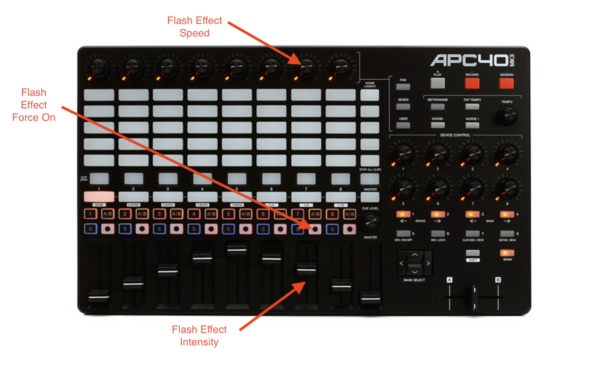
Default APC40 MK2 Flash Effect MIDI mapping
The image below shows how the flash effect is mapped to an APC40 MK2 when using our default MIDI mapping provided on the SD card shipped with the MK2.
Strobe Effect
The strobe effect will strobe the current projection on/off to the beat, fraction of the beat, or multiple of the current beat, based on the current tempo (see wiki for tempo menu).
Strobe effect parameters
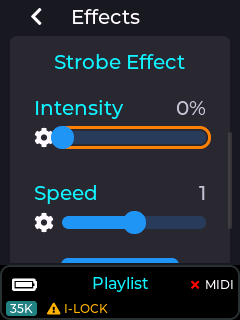
The intensity parameter determines the amount the projection will have the strobe applied, and is between 0% and 100%.
The speed parameter changes the rate at which the projection is strobed, and is linked to the current tempo, and synced to the beat.
The “Force On” button is intended to be MIDI mapped to an APC button for live activation of the effect. When this button is activated, the intensity slider is briefly changed to 100% while the button is held down (fully activating the strobe effect), and then returns to its previous value once released.
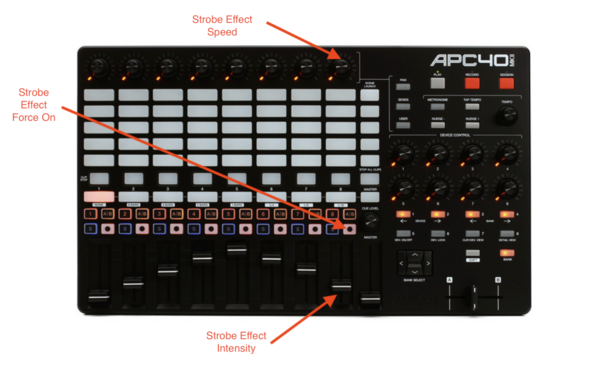
Default APC40 MK2 Strobe Effect MIDI mapping
The image below shows how the strobe effect is mapped to an APC40 MK2 when using our default MIDI mapping provided on the SD card shipped with the MK2.